Input


Input
Now you know how to call functions, use variables, create functions, and use if statements. You also know how to modify variables over time to create animations, and you’ve seen that p5.js gives you predefined variables like width and height.
You also know that p5.js automatically calls the setup function once at the very beginning of the program, and then calls the draw function 60 times per second.
So far your programs have mostly done stuff on their own, without responding to anything that the user does. This tutorial shows you how to get user input (things like mouse position, mouse clicks, and keyboard typing) to make your programs more interactive.
Mouse Input
The mouseX and mouseY Variables
p5.js provides mouseX and mouseY variables that hold the current location of the mouse cursor in the window. p5.js automatically updates these variables, so you can use them in the draw function to get the position of the mouse.
This program draws a circle wherever the mouse cursor is.

The mouseIsPressed Variable
The mouseX and mouseY variables point to number values that hold the current position of the mouse.
Similarly, the mouseIsPressed variable points to a boolean value that’s true when the mouse is pressed, and false when it’s not. You can use the mouseIsPressed variable in an if statement to do stuff when the mouse is held down:
This program uses an if statement to check whether mouseIsPressed is true. If it is, then it draws a green background. If not, then it draws a gray background.
In other words, the program displays gray unless the mouse is pressed, then it displays green.
You can combine the mouseIsPressed variable with the mouseX and mouseY variables to create a drawing program:
This program uses an if statement to check whether mouseIsPressed is true. If it is, then it draws a circle at mouseX,mouseY.
In other words, the program lets you draw with circles whenever the mouse is pressed.
This works because the code does not call the background function from the draw function, so new circles are drawn on top of old circles.
Mouse Input Functions
The mouseIsPressed variable is useful when you want to do something continuously, as long as the user has the mouse pressed. But what if you want to detect one-time input like a mouse click?
These one-time inputs are called events, and p5.js provides a bunch of functions that it automatically calls whenever an event happens. By writing code inside these functions, you can run code when these events happen.
There are a bunch of mouse input functions that allow you to react to more specific events. Here are some examples:
mousePressed()is called once when the user presses the mouse button. This is the first half of a click.mouseReleased()is called once when the user releases the mouse button. This is the second half of a click.mouseClicked()is called when the mouse is clicked. This is a press and a release!mouseMoved()is called whenever the mouse moves.mouseDragged()is called, you guessed it, whenever the mouse is moved while its button is pressed.mouseWheel()is called when you scroll with the mouse wheel.- If you need to know which mouse button is pressed, check out the
mouseButtonvariable. - See the p5.js reference for many more!
Here’s an example that defines mousePressed, mouseReleased, and mouseDragged functions to change the background color:
The program starts out gray. When the user presses their mouse, it turns green, and then turns yellow when the user releases their mouse. The program turns blue when the user drags their mouse.

Combining Input Variables and Event Functions
Inside an event function, you can use the same variables and functions as you can in the draw function. Here’s an example that uses the mouseX and mouseY variables inside the mouseClicked function:
Inside the draw function (which is called 60 times per second), this code checks the mouseIsPressed variable and draws a small cyan circle under the mouse if it is. Inside the mouseClicked function (which is called once when the user clicks their mouse), the code draws a large green circle under the mouse. In other words, the user can hold down their mouse to draw a small cyan circle, or they can click their mouse to draw a large green circle

Keyboard Input
The keyIsPressed Variable
Similar to how the mouseIsPressed variable is true whenever the user is pressing a mouse button, the keyIsPressed variable is true whenever the user is pressing a key on the keyboard.
You can use the keyIsPressed variable in an if statement to execute code whenever the user is pressing a key:
This program uses an if statement to check whether the keyIsPressed variable is true. If so, then it draws a green background, otherwise, it draws a gray background.

In other words, the program shows green whenever the user presses a key.
The key Variable
The keyIsPressed variable by itself is useful if you want to know whether any key is pressed. Many programs will also want to know which key is being pressed. For that, you can use the key variable.
The key variable points to a single character that holds the last key that was pressed.
You can use it directly:
This program passes the key variable into the text() function to draw the last key typed by the user.

Or you can use the key variable in an if statement to detect particular key presses:
This program uses an if statement to check whether keyIsPressed is true. If so, then it uses another if / else-if block to check whether they key is r, g, or b. Depending on which key is pressed, it draws a different color background. If keyIsPressed is false, then it doesn’t bother checking the key variables and draws a gray background.

Notice that the code only checks the key variable if it knows that keyIsPressed is true. This is because key always holds the most recent key pressed by the user, even if the user stopped pressing it.
Challenge: Modify this code so the color change remains, even when the user releases the key.
The keyCode Variable
They key variable is useful if you want to check for letter or number keys. But what if you want to check for the shift or ctrl key, or the arrow keys? They don’t have character representations, so the key variable won’t work with them.
Instead, you can use the keyCode variable. You can check the keyCode variable against predefined variables like UP_ARROW, DOWN_ARROW, LEFT_ARROW, RIGHT_ARROW, SHIFT, CONTROL, and ALT (There are more, check the reference!) to do stuff when the user presses a specific key.
This program checks whether one of the arrow keys is being pressed, and moves a circle based on that. This allows the user to move the circle around the screen.

Challenge: Modify this code to make the circle go faster!
Keyboard Input Functions
The keyIsPressed, key, and keyCode variables are useful if you want to do something continuously, as long as the user presses a key. But what if you want to respond to one-time keyboard events?
Similar to how p5.js automatically calls the mousePressed(), mouseReleased(), and mouseClicked() functions based on mouse events, Processing also automatically calls the keyPressed(), keyReleased(), and keyTyped() functions based on keyboard events.
You can define these functions to run code based on these keyboard events.
This program maintains a message variable. In the keyTyped function, it appends the typed key to the message variable. The draw function draws the message to the screen.

Handling Multiple Keys
The key and keyCode variables only hold the most recent key pressed. This limits you to only knowing about one key at a time. But what if the user is holding down multiple keys at the same time?
The keyIsDown function takes a keyCode parameter and returns a boolean: true if the corresponding key is currently down, and false if it’s not. Here’s an example:

Cheat Sheet
This program shows a bunch of the variables and event functions you can use to get user input:
There are other input variables and functions. See the p5.js reference for more info!
Homework
- Create a drawing program. Be creative! Maybe clicking creates a circle, dragging creates a rectangle, and the keyboard changes the color. These are just suggestions, do whatever you want!
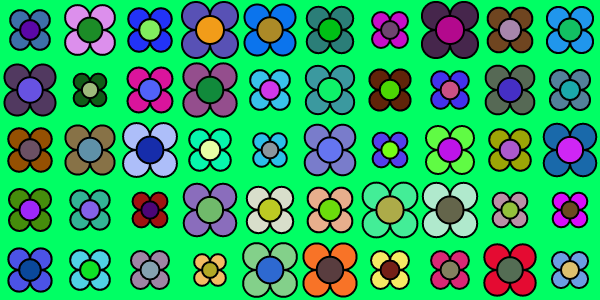
- Create a drawing program for a specific scene. For example, you could create a garden drawing program where clicking creates flowers (randomly sized and colored?), dragging creates grass, the mouse wheel adds butterflies, keyboard changes the background or sky…
- Create a program where the user controls a ball that bounces around the screen. Add acceleration, gravity, and braking. Instead of a circle, make it a spaceship (like from the game Asteroids) where you control the direction and acceleration.
- Remember that scene you drew from a previous homework? Add user interaction. Let users click to add object, or press keys to change colors.
- Create a typing game: show a random character on the screen. If the user types it correctly, increase the score and show another character. If the user types the wrong character, the game is over. Bonus: make the game automatically end after 60 seconds!
