Animation


Animation
- What is animation?
- State
- Reassigning Variables
- Modifying Variables
- The Draw Loop
- Scope
- Resetting
- Bouncing
- Clearing Old Frames
- Shortcuts
- Learn More
- Homework
Now you know how to call and create functions, how to use and create variables, and how to use if statements.
You’ve seen that the draw function is called 60 times per second, and you know how to use operators like + and - to get new values.
This tutorial combines all of those ideas to create animations.
What is animation?
In a way, animations are an illusion. When you watch a video (whether that’s a cartoon, a tv show, or a movie), what you’re really seeing is a series of still images, or frames.
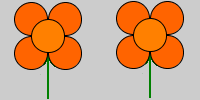
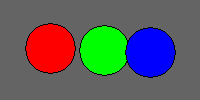
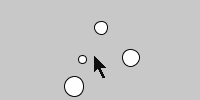
Here’s an example series of frames:

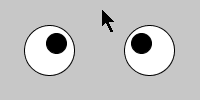
By showing a series of frames sequentially, animations trick your brain into seeing a moving object:

The above animation is slow, so you can still see the individual frames. Typically, animations look much more smooth if they have more frames and the difference between each frame is smaller (in other words, if the ball doesn’t move so far each frame).

This tutorial introduces techniques you can use to create animations in Processing.
State
When you think about animation, it’s helpful to think about what displays each frame. Try to break the scene down into a series of variables. Those variables represent the state of the scene.
For example, the state of a ball might be represented by circleX and circleY variables. You might pass those variables into the ellipse function to draw a circle at a specific position.
To change the state of the circle, you would modify those variables. Increasing the circleX variable would move the circle right, and increasing the circleY variable would move the circle down.
You can think of an animation as three steps:
- Create variables that represent the state of your scene.
- Use those variables to draw your scene.
- Change those variables over time!
You’ve already seen the first two steps; next you’ll learn more about the third step.
Reassigning Variables
One thing you might not have seen yet is that after you create a variable, you can reassign it by giving it a new value.
To reassign a variable, you type its name, then the equals operator =, and then the new value it should have.
float circleY = 50;
circleY = 100;
At the end of this code, circleY now holds the value 100.
Notice that you don’t give the variable a type when you reassign it, because it already has a type.
Creating a variable (giving it a type and a name) is called declaring a variable. The first time you point it to a value using the = operator (which is often in the same line as declaring it) is called initializing a variable. If you then change the value of the variable, that’s called reassigning the variable.
// declaration
float circleY;

// initialization
circleY = 50;

// reassignment
circleY = 100;
In other words, you only have to give a variable a type when you’re declaring it, not when you’re initializing or reassigning it.
Modifying Variables
Now you know how to declare, initialize, and reassign a variable.
And you know that you can use variables anywhere you can use a value, and that you can use operators to get new values.
float circleY = height / 2;
This code uses the height variable and divides it by 2 to get a new value, and then points circleY to that value.
You can combine those ideas to change a variable over time, by basing its new value on its old value.
// delcaration and initialization
float circleY = 50;

// reassignment
circleY = circleY + 1;
At the end of this code, circleY will point to the value 51.
If this is confusing, try reading the right side of the reassignment line first: the code takes circleY, which is 50, and then adds 1 to get 51. The code then reassigns circleY so it points to that value instead of its old value.
The Draw Loop
This might not seem very interesting yet, but it becomes much more useful when you combine it with the draw function.
Remember that Processing automatically calls the draw function 60 times per second. So if your draw function draws a scene based on a set of variables, and then changes those variables, then the next frame will show something different.
Here’s an example:
// state
float circleY = 0;

void setup() {
  size(200, 200);
}

void draw() {
  // clear out old frames
  background(32);

  // draw current frame based on state
  ellipse(100, circleY, 50, 50);

  // modify state
  circleY = circleY + 1;
}
First, this code declares a variable named circleY and initializes it to point to the value 0. Every time the draw function is called, the code draws a gray background, and then draws a circle with a vertical position of circleY. Then, the code adds 1 to the circleY variable!
The next time draw is called, circleY will be 1, which causes the circle to be drawn just a little bit lower in the window. Then circleY will be 2, then 3, then 4, etc. The code repeats that 60 times per second, which makes it look like the circle is falling.
See the Pen by Happy Coding (@KevinWorkman) on CodePen.
Scope
Notice that the above code declares the circleY variable at the top of the sketch, outside the draw function. Code that’s outside of any functions is run once at the very beginning of the program.
What if you declared the circleY variable inside the draw() function?
void setup() {
  size(200, 200);
}

void draw() {
  // state
  float circleY = 0;

  // clear out old frames
  background(32);

  // draw current frame based on state
  ellipse(100, circleY, 50, 50);

  // modify state
  circleY = circleY + 1;
}
Every frame, this program declares a variable named circleY and initializes it to point to 0. It then clears out old frames, draws a circle, and reassigns the value. But then at the beginning of the next frame, the code declares a new variable named circleY and initializes it to 0. Every frame will show the same thing, and the circle won’t move at all.
In other words, the variable “forgets” its old value, since it’s recreated every frame. If you want a variable to remember its value between frames, then you have to declare it at the top of your sketch, outside of any functions!
Similarly, what if you declared the circleY variable inside the setup function?
void setup() {
  size(200, 200);

  // state
  float circleY = 0;
}

void draw() {
  // clear out old frames
  background(32);

  // draw current frame based on state
  ellipse(100, circleY, 50, 50);

  // modify state
  circleY = circleY + 1;
}
You might think this makes sense because the setup function is only called once at the beginning of the program, but this code has a big problem: if you declare a variable inside a function, you can only access it inside that function! Since you declare the circleY variable inside the setup function, you can only access it inside the setup function. So when you try to use it in the draw function, you’ll get an error.
The places you can access a variable is called the variable’s scope. To make sure you can access a variable between multiple calls to the draw function, you have to declare it at the top of the sketch. I call this a sketch-level variable.
A common thing to do is declare a variable at the top of the sketch, then initialize it in the setup function, and then reassign it in the draw function:
// state
float circleY;

void setup() {
  size(200, 200);

  circleY = height / 2;
}

void draw() {
  // clear out old frames
  background(32);

  // draw current frame based on state
  ellipse(100, circleY, 50, 50);

  // modify state
  circleY = circleY + 1;
}
This program declares the circleY variable at the sketch level. Then in the setup function, it sets the size and initializes the circleY variable to the value calculated from height / 2. If you tried to do this calculation at the top of the sketch, it wouldn’t work because the size hasn’t been set yet!
Finally, the draw function uses the circleY variable to draw the scene, and then reassigns it to create an animation.
Resetting
Now you have an animation, but the circle falls off the bottom window and never comes back. Chances are that’s not what you want.
To fix this, you can use an if statement to check whether the circle has fallen off the bottom of the window. You know the circle is below the bottom of the window when circleY is greater than height. When this happens, you can reassign circleY to move the circle back to the top of the window.
// state
float circleY = 0;

void setup() {
  size(200, 200);
}

void draw() {
  // clear out old frames
  background(32);

  // draw current frame based on state
  ellipse(100, circleY, 50, 50);

  // modify state
  circleY = circleY + 1;

  // reset state
  if(circleY > height) {
    circleY = 0;
  }
}
This code is mostly the same: it declares a variable named circleY, initialize it to 0, and uses that variable to draw a circle. It then reassigns circleY every frame, which creates an animation.
The new part is the if statement. After reassigning the circleY variable, the code checks whether the new value is greater than height. If it is, then the circleY variable is reassigned to the value 0. The next time the draw function is called, circleY will be 0, the circle will be drawn at the top of the window, and the animation starts over again.
See the Pen by Happy Coding (@KevinWorkman) on CodePen.
Bouncing
When the circle reaches the bottom of the window, you could make it bounce instead of teleporting it back to the top of the window.
One way to do this is to use a ySpeed variable to hold the direction the circle should travel. Then when you detect the circle has fallen off the bottom of the window (when circleY > height), you can reassign the ySpeed variable:
// state
float circleY = 0;
float ySpeed = 1;

void setup() {
  size(200, 200);
}

void draw() {
  // clear out old frames
  background(32);

  // draw current frame based on state
  ellipse(100, circleY, 50, 50);

  // modify state
  circleY = circleY + ySpeed;

  // bounce off bottom
  if(circleY > height) {
    ySpeed = ySpeed * -1;
  }
}
Now when circleY > height, the code multiplies the ySpeed variable by -1, which makes it negative. Adding that to circleY causes circleY to decrease, which moves the circle up.

You can expand that to make the ball bounce off all of the sides of the screen:
// state
float circleX = 100;
float circleY = 0;
float xSpeed = 1;
float ySpeed = 1;

void setup() {
  size(200, 200);
}

void draw() {
  // clear out old frames
  background(32);

  // draw current frame based on state
  ellipse(circleX, circleY, 50, 50);

  // modify state
  circleX = circleX + xSpeed;
  circleY = circleY + ySpeed;

  //bounce off left and right
  if(circleX < 0 || circleX > width) {
    xSpeed = xSpeed * -1;
  }

  // bounce off top and bottom
  if(circleY < 0 || circleY > height) {
    ySpeed = ySpeed * -1;
  }
}
This program creates variables to hold the position of the ball (circleX and circleY), and two variables to hold the speed of the ball (xSpeed and ySpeed). Every frame, the code draws a ball at that position, and then modifies the position by that speed. It then uses an if statement to check whether the ball has gone off the left or right side of the window, and reverses the xSpeed variable if it has. Similarly, it uses another if statement to check whether the ball has gone off the top or bottom of the window, and reverses the ySpeed variable if it has. This causes the ball to bounce off every side of the window.
See the Pen by Happy Coding (@KevinWorkman) on CodePen.
You can read more about this in the collision detection tutorial.
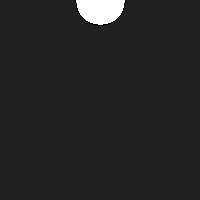
Clearing Old Frames
All of the above programs call background(32) to draw a gray background at the start of every frame. This “paints over” anything drawn by previous frames, clearing out anything that was already in the window.
This approach of clearing out old frames is useful for most animations, but it depends on what kind of effect you’re going for. See what happens if you remove the background(32) call from the above program:

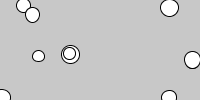
If you don’t clear out old frames, then the frames “stack” as you draw the new frame directly on top of the old frames.
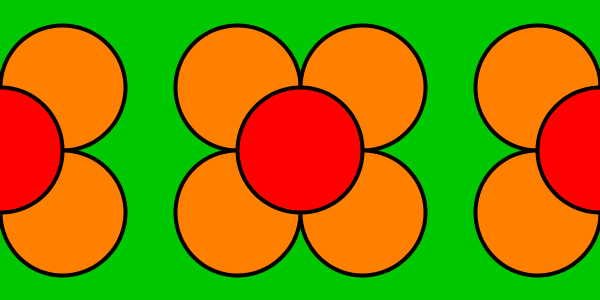
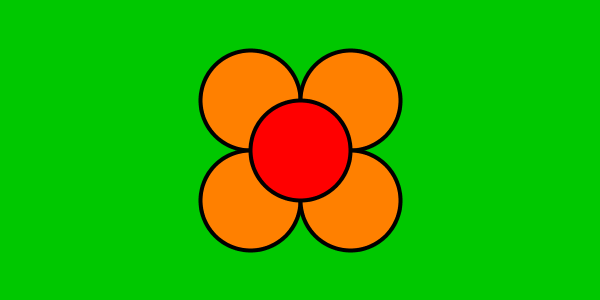
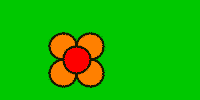
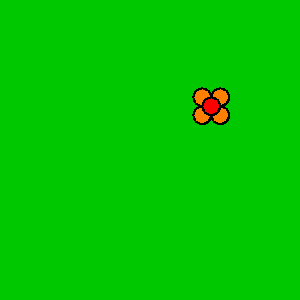
The random flower program from the creating functions tutorial is an example that intentionally draws new frames on top of old frames without clearing them out:
See the Pen by Happy Coding (@KevinWorkman) on CodePen.
Whether or not you clear out old frames depends on what you’re trying to create!
Shortcuts
The above examples uses syntax like this to reassign a variable:
circleY = circleY + 10;
This line of code adds 10 to the circleY variable.
You can also use the add assign operator, which looks like +=, to do the same thing without needing to type circleY twice:
circleY += 10;
This code does the exact same thing, except it’s less typing. It adds 10 to circleY and then reassigns circleY to that new value, all in one step.
Similarly, if you’re adding 1 to a variable, you can use the increment operator, which looks like ++ after the variable name:
circleY++;
This code adds 1 to circleY and then reassigns circleY to that value, all in one step.
There are similar shortcuts for subtraction, multiplication, and division. You don’t have to use the shortcuts, but you’ll probably see them in other people’s code, so it’s good to be familiar with them.
Learn More
- Animation - Wikipedia
- += add assign - Processing reference
- Dave Whyte posts Processing animations on Instagram and Twitter
Homework
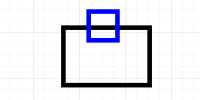
- Add gravity to the bouncing ball program. Hint:
ySpeedchangescircleYevery frame. Gravity changesySpeedevery frame! - Add a rectangle to the bouncing ball program. The ball should bounce off the rectangle as well as the edges of the window.
- Create an animation that shows a full day- start out with a sunrise, show the sun moving across the sky, then sunset, and finally the moon and stars.
- Remember your drawing program from previous homeworks? Animate it by either bouncing it around the screen or by changing it over time.
- Create a random walk animation.
