Interactive HTML
Interactive HTML
- Referencing HTML Elements
- The Document Object Model
- document.getElementById()
- Modifying Elements
- Input
- Homework
Now you know how to write JavaScript code, and you know how to set up events in your HTML to call functions that you write. So far you’ve used functions like alert() and console.log() to interact with the user. But “real” JavaScript usually modifies something on the page.
Referencing HTML Elements
Remember from the CSS tutorials that there are several ways to reference an HTML element: by tag, by class, and by id. Take this example webpage:
<!DOCTYPE html>
<html>
  <head>
    <title>Referencing HTML Elements</title>
  </head>
  <body>
    <p>This is the first paragraph.</p>
    <p class="myClass">This is the second paragraph.</p>
    <p class="myClass" id="myId">This is the third paragraph.</p>
  </body>
</html>
This HTML contains three <p> elements, and there are three ways to reference them:
- By tag: you can refer to all
<p>elements, which will reference all three<p>tags. - By class: you can refer to the
myClassclass, which will reference the second and third<p>tag. - By ID: you can refer to the
myIdid, which will only reference the third<p>tag.
You can use these selectors to create CSS that styles the <p> tags by referencing them:
<!DOCTYPE html>
<html>
  <head>
    <title>Referencing HTML Elements</title>
    <style>
      p {
        font-size: 16pt;
      }

      .myClass {
        color: red;
      }

      #myId {
        background-color: black;
      }
    </style>
  </head>
  <body>
    <p>This is the first paragraph.</p>
    <p class="myClass">This is the second paragraph.</p>
    <p class="myClass" id="myId">This is the third paragraph.</p>
  </body>
</html>
This CSS makes every <p> tag have a font size of 16pt, gives the myClass class a color of red, and gives the myId id a background color of black.

See the Pen by Happy Coding (@KevinWorkman) on CodePen.
The Document Object Model
The Document Object Model, or DOM for short, is how your browser organizes a webpage so you can access it using JavaScript code.
In other words, the DOM provides functions that you can call in your JavaScript code to modify a webpage to make it interactive.
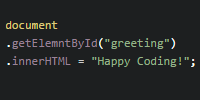
document.getElementById()
One of the most common DOM functions you’ll use is the document.getElementById() function, which returns the element with the ID you pass in as a parameter. Here’s an example:
let labelElement = document.getElementById('label');
labelElement.innerText = 'You clicked the button!';
This code calls the document.getElementById() function to get the element with an ID of label. Then it changes the innerText property of the labelElement to update its text.
See the Pen by Happy Coding (@KevinWorkman) on CodePen.
Modifying Elements
You’ve seen one way to modify an element, using the innerText field to change the content of an element. There are a ton more!
For a more complete list, check out W3Schools or MDN. But here are a few examples:
innerHTML
This is similar to innerText, except the content can include HTML.
See the Pen by Happy Coding (@KevinWorkman) on CodePen.
style
The style property lets you customize the styling of an element.
See the Pen by Happy Coding (@KevinWorkman) on CodePen.
The style property has nested properties, for example:
style.colorsets the color of an elementstyle.bordersets the border of an elementstyle.backgroundsets the background of an element
These are the same properties that you learned about in CSS!
Creating and Appending Elements
You can use innerHTML to add HTML elements to an elements, but for more complicated code, you can use these functions:
createElement()creates an element of a certain tag.createTextNode()creates the innermost content of an element. You could also use theinnerTextproperty.- The
appendChild()function adds oneElementto another.
See the Pen by Happy Coding (@KevinWorkman) on CodePen.
This code uses the document.createElement() function to create a new <p> element, then it uses the document.createTextNode() to create content for that <p> element. Then it uses the appendChild() function to add the content to the <p> element, and again to add the <p> element to the <div> with the container id.
element.className
The className field lets you to get or set the CSS class of an element.
const element = document.getElementById("yourIdHere");
element.className = "yourClassHere";
This lets you set the style in CSS, and then change which styles apply in JavaScript. The element.id variable works in the same way, but with CSS ids instead of classes.
element.remove()
The element.remove() function removes an element from the webpage.
See the Pen by Happy Coding (@KevinWorkman) on CodePen.
addEventListener()
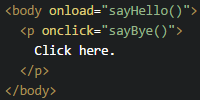
You’ve seen HTML attributes like onload and onclick that let you add an event listener using HTML. The element.addEventListener() function lets you add an event listener to an element using JavaScript.
See the Pen by Happy Coding (@KevinWorkman) on CodePen.
This code uses the onload attribute to call the setupClickListener() function. The setupClickListener() function uses the addEventListener() function to add the clicked() function as a click listener to the element with the clickMe id.
Input
Now you’ve seen how to reference HTML elements in your JavaScript, and you’ve seen examples of properties you can set to modify those elements.
HTML contains various input tags that you can use in your page, and you can use JavaScript to get the values from those input elements. Here’s an example:
See the Pen by Happy Coding (@KevinWorkman) on CodePen.
First, take a look at the HTML:
<input id="name-input" />
<button onclick="sayHello();">
  Click me!
</button>
<p id="output"></p>
The HTML contains three elements:
- An
<input>element with an ID ofname-input, which renders as a text box. Notice that the<input>tag is self-closing, so it ends in/>without a separate closing tag. - A
<button>ellement with anonclickattribute that calls thesayHello()function. - A
<p>element with an ID ofoutput. Notice that the<p>element contains no content.
Now, look at the sayHello() function:
function sayHello(){
  let inputElement = document.getElementById('name-input');
  let name = inputElement.value;

  let outputElement = document.getElementById('output');
  outputElement.innerText = 'Hello ' + name + '!';
}
This code uses the document.getElementById() function to get a reference to the input element, and then uses the value property to get the text typed by the user. Then it uses the document.getElementById() function again to get a reference to the output <p> tag, and updates its text to show the user a greeting.
This pattern of getting input from the user, doing something with it, and then modifying the page as a result is very common.
HTML has a few other input elements, like text areas that show multiple lines, checkboxes, and radio buttons. The <input> tag can also have a type attribute, which lets the user enter different kinds of data. Learn more about that on W3Schools and MDN.
These are just a few examples- like I said, there are a TON of variables and functions you can use to make your webpage interactive. Check out W3Schools or MDN for more info, and use your favorite search engine to find what you’re looking for. As always, feel free to ask a question in the forum if you get stuck!
Like with all programming, the idea is that you should combine all of the above (and whatever you find from reading the documentation and doing searches) to accomplish your goal.
Homework
- What happens if you call the
getElementById()function with an id that’s not on the webpage? What about the other functions? Hint: check your JavaScript console for any errors. - Create an interactive webpage that plays rock-paper-scissors against the user.
- You could also create a page that plays a game like Mastermind or Nim.

