AJAX and JSON


AJAX and JSON
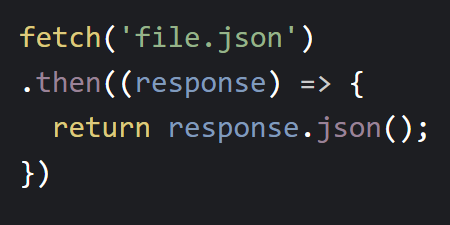
Note: I wrote this tutorial back in 2017. Since then, the fetch() function has replaced most of what’s in this tutorial. I’m leaving it up for now, but unless you need to support IE, I recommend using the fetch function instead!
- AJAX
- No Local Files
- The
XMLHttpRequestObject - The
onreadystatechangeFunction - JSON
- JSON Arrays
- Nested JSON
- Why are we talking about JSON?
- Thinking in AJAX
- JQuery
- Homework
Now you know how to create webpages using HTML, and you know how to make them interactive using JavaScript. You also know how to use links between pages.
Let’s say we have a few pages: maybe a homepage, an about page, and a page that shows pictures of cats. Now we want to show a welcome message on every page. In other words, we want to add this at the top of each .html file:
<p>Welcome to my website!</p>
We could do this manually by editing each .html file and copying this into it. That might be okay for three files, but what if we have a dozen pages? Or a hundred? What happens when we want to change the message to something else?
It would be nice if we could have our message in a single place that every .html file reads from. Then when we want to change the message, we’d just change it in one place instead of changing it in each individual file.
We could do this by putting our message in JavaScript code in a separate .js file like this:
function addMessage(){
	document.getElementById("welcome").innerHTML = "Welcome to my website!";
}
Then in each .html file we would load that .js file and include a blank <p id="welcome"></p> tag in our HTML, and we’d call addMessage() when the page was loaded.
That would work, but it would get annoying if the message we wanted to post got more complicated, since we’d have to have HTML inside our JavaScript.
This is where something called AJAX becomes useful.
AJAX
AJAX stands for Asynchronous JavaScript and XML, which sounds complicated. But using AJAX is really just using one object that comes with plain old vanilla JavaScript. This object allows you to load an external file and add its content to your webpage.
(You can do a lot more than that, but let’s work our way up from our basic example.)
No Local Files
AJAX is a way to access external files from your webpage, but it doesn’t work with files on your file system. The files you access has to be on the internet: in other words, it can’t be a file:// you access from your own computer.
This might be annoying if all of your files have just been on your computer so far, but this is a safety feature. Imagine how scary the internet would be if any website could read files from your computer!
So if you want to try AJAX out, make sure you upload the files to a server. If you don’t have access to a server, then you can just use these files for now:
- https://HappyCoding.io/tutorials/javascript/example-ajax-files/text-welcome.txt
- https://HappyCoding.io/tutorials/javascript/example-ajax-files/html-welcome.html
- https://HappyCoding.io/tutorials/javascript/example-ajax-files/random-welcomes.json
Anyway, back to the tutorial!
The XMLHttpRequest Object
The XMLHttpRequest is a part of standard JavaScript. You don’t have to load a library to use it, and it doesn’t require any special syntax to use.
You start out by calling the XMLHttpRequest constructor using the new keyword and storing the resulting object in a variable:
var ajaxRequest = new XMLHttpRequest();
Then you set the onreadystatechange property of the object you just created. The onreadystatechange points to a function that will be called as the external file is loaded:
ajaxRequest.onreadystatechange = function(){
	console.log("Ready state changed!");
	//more on this in a second
}
Then you call the open() function and pass it 3 parameters:
- The first parameter is what type of request this should be. We want to get some content, so we’ll use
"GET"for now. Later you might use"POST"if you want to post content to a server. - The second parameter is the URL that contains the stuff you want to load.
- The third parameter is a boolean:
trueif you want your code to keep going while the content is loaded,falseif you want the code to stop and wait for the loading to finish. At this point you should always usetrue, otherwise your page can become unresponsive while the URL is loaded.
All of that to explain this line of code:
ajaxRequest.open("GET", "https://happycoding.io/tutorials/javascript/example-ajax-files/text-welcome.txt", true);
Finally, you call the send() function to send the request to the URL you specified. The browser will fetch the contents and then call the onreadystatechange function you set.
ajaxRequest.send();
Putting it all together, it looks like this:
var ajaxRequest = new XMLHttpRequest();
ajaxRequest.onreadystatechange = function(){
	console.log("Ready state changed!");
	//more on this in a second
}
ajaxRequest.open("GET", "https://happycoding.io/tutorials/javascript/example-ajax-files/text-welcome.txt", true);
ajaxRequest.send();
The onreadystatechange Function
Remember that the first A in AJAX stands for asynchronous. That means that your code keeps doing other stuff while the request is sent off. After all, you might be requesting a huge file that will take an hour to download! If your code had to stop everything it’s doing and wait for the file to be loaded, then during that time a visitor to your site couldn’t scroll around and click stuff. Your site would look like it was frozen.
So instead of waiting for the file to be loaded, the request is sent off and your code keeps going. Then your onreadystatechange function is called with updates to let you know what’s going on with the download.
Think about it this way: your website is busy at work responding to input, scrolling around and interacting with the user. But your website needs a file that’s located across town. So your website gets its friend AJAX to go get that file for it. Your website keeps doing its thing, and AJAX drives across town to get the file. On its way, AJAX sends your website messages to let it know what’s up. Eventually AJAX comes back with the file, and your website can do whatever it wants with it.
The readyState Variable
The onreadystatechanged message is how AJAX lets your website know what’s going on with the download. Normally, the function is called 4 times:
- When AJAX establishes a connection with the server. Hey I got directions to the file.
- When the server receives the request. Hey I’m at the server.
- When the request is processed. Hey I’m picking up the file now.
- When the file is loaded. Here’s your file!
You can check which of these states AJAX is in using the readyState variable. The readyState variable will be an integer from 1 to 4 for each of the above states, or 0 if something went wrong. Sorry I got lost on my way to the file!
Inside the onreadystatechanged function, you can check the readyState variable:
ajaxRequest.onreadystatechange = function(){
	if(ajaxRequest.readyState == 1){
		console.log("Established server connection.");
	}
	else if(ajaxRequest.readyState == 2){
		console.log("Request received by server.");
	}
	else if(ajaxRequest.readyState == 3){
		console.log("Processing request.");
	}
	else if(ajaxRequest.readyState == 4){
		console.log("Done loading!");
	}
	else{
		console.log("Something went wrong. :(");
	}
}
For our purposes, we probably only care about readyState being 4, but you can use the other states for debugging or for showing progress.
The status Variable
The readyState variable only tells us half the story. AJAX could load the URL (so readyState is 4), but the file might be missing (Hey I followed the directions you gave me, but the file wasn’t there.), or it might require a username and a password (Hey I tried to get the file, but the door was locked.), etc. So we also have to check this status, which is stored in the status (surprise!) variable.
The status variable holds the HTTP status code of the request. For example, it’s 200 when the URL is loaded correctly, 404 if the file is missing (you’ve probably seen a 404 error while browsing the internet before), or 500 if the server had an error. Here is a full list of possible values, but for now we probably only care about a status of 200 (success).
Here’s an example that checks for success:
ajaxRequest.onreadystatechange = function(){
	if(ajaxRequest.readyState == 4){
		//the request is completed, now check its status
		if(ajaxRequest.status == 200){
			//our file has loaded!
		}
		else{
			console.log("Status error: " + ajaxRequest.status);
		}
	}
	else{
		console.log("Ignored readyState: " + ajaxRequest.readyState);
	}
}
This code builds on what we’ve seen. It checks for the readyState to be 4, meaning that the request has been completed. Then it checks for the status to be 200, meaning that the file was loaded successfully. In the case of errors we’re just printing to the console, but you might want to do something like let the user know something is wrong.
The responseText Variable
We had to set up all of the above to make sure the file loads successfully, but we haven’t actually done anything with the content of the file yet. Finally, we can do that using the responseText variable.
The responseText variable holds the content of the file. It’s just a string value, and we can do whatever we want with it. For example, we could just set the content of one of the elements in our webpage to whatever is in the file:
document.getElementById("welcome").innerHTML = ajaxRequest.responseText;
This line of code finds the element with an id of welcome and sets its content to responseText, which contains the content of the file.
Putting it all together, here’s a complete example that loads the contents of https://happycoding.io/tutorials/javascript/example-ajax-files/text-welcome.txt into a <p> element on a page.
<!DOCTYPE html>
<html>
<head>
	<title>AJAX Example</title>

	<script>
		function getWelcome(){
			var ajaxRequest = new XMLHttpRequest();
			ajaxRequest.onreadystatechange = function(){

				if(ajaxRequest.readyState == 4){
					//the request is completed, now check its status
					if(ajaxRequest.status == 200){
						document.getElementById("welcome").innerHTML = ajaxRequest.responseText;
					}
					else{
						console.log("Status error: " + ajaxRequest.status);
					}
				}
				else{
					console.log("Ignored readyState: " + ajaxRequest.readyState);
				}


			}
			ajaxRequest.open('GET', 'https://happycoding.io/tutorials/javascript/example-ajax-files/text-welcome.txt');
			ajaxRequest.send();
		}

	</script>
</head>
<body onload="getWelcome()">
	<p id="welcome"></p>
	<p>This is an example website.</p>
</body>
</html>
See the Pen by Happy Coding (@KevinWorkman) on CodePen.
This example fetches the message as soon as the page loads, so you probably don’t even notice it not being there at first. But you can make an AJAX request whenever you want, not just when the page loads. Try changing the <body> of the page to this:
<body>
	<p onclick="getWelcome()">Click here to see the welcome message.</p>
	<p id="welcome"></p>
</body>
Now instead of fetching the message as soon as the page loads, the code waits until the user clicks to fetch it.
See the Pen by Happy Coding (@KevinWorkman) on CodePen.
So far we’ve just fetched some text content, but the file you fetch can contain anything you want. Let’s try fetching some HTML content!
First, let’s change our <p> tag to a <div> tag. Technically putting HTML inside a <p> tag will work, but it’s a good habit to put it inside a <div> instead:
<body onload="getWelcome()">
	<div id="welcome"></div>
	<p>This is an example website.</p>
</body>
Then, change the URL we’re loading to this one, which contains HTML content: https://happycoding.io/tutorials/javascript/example-ajax-files/html-welcome.html
ajaxRequest.open('GET', 'https://happycoding.io/tutorials/javascript/example-ajax-files/html-welcome.html');
Now when the page loads, the HTML content from that url is loaded into our <div> tag.
See the Pen by Happy Coding (@KevinWorkman) on CodePen.
We can also load this content whenever we want. The point is that the content can be anything, not just basic text.
JSON
Let’s pause talking about AJAX for a second and talk about something else: JSON.
Remember that you can use object literals to represent objects in JavaScript:
var point = {x: 7, y: 42};

console.log("The point is at " + point.x + ", " + point.y);
JSON stands for JavaScript Object Notation, and it’s a way to store data in a way that’s easy for JavaScript to understand. For example, here’s the same object stored as JSON in a string variable:
var jsonString = '{"x": 7, "y": 42}';
If this looks weird, remember that JavaScript uses both single quotes ' and double quotes " for strings. So this is just a string (characters inside single quotes '), and that string contains some double quote " characters.
But the string is in the JSON format, which looks a lot like an object literal, except the variable names are surrounded by double quote " characters. (Actually you can do that with object literals too!)
Now that we have a JSON string, we can use the JSON.parse() function to turn it into a JavaScript object that you can use in your code:
var jsonString = '{"x": 7, "y": 42}';
var point = JSON.parse(jsonString);

console.log("The point is at " + point.x + ", " + point.y);
JSON Arrays
You can also use JSON to store arrays. To store an array in JSON, use square brackets [ ] and a comma-separated list of JSON objects, like this:
var jsonArrayString = '[ {"x": 7, "y": 42}, {"x": 0, "y": 0}, {"x": 2.7, "y": 3.14} ]';
This JSON string represents an array that contains 3 objects with x and y properties. We can use the JSON.parse() function to turn this into an array that we can use in our code just like any other array:
var jsonArrayString = '[ {"x": 7, "y": 42}, {"x": 0, "y": 0}, {"x": 2.7, "y": 3.14} ]';
var pointArray = JSON.parse(jsonArrayString);
for(var i = 0; i < pointArray.length; i++){
	var point = pointArray[i];
	console.log("The point is at " + point.x + ", " + point.y);
}
Nested JSON
One more note about JSON: most of the JSON you’ll see in real life will be more complicated than these examples. Just like object literals can contain other object literals and arrays, JSON can contain nested data.
For example, here is a JSON array that contains objects, which themselves contain objects and arrays:
'[
	{
		"name": "Example One",
		"numbers": [1, 2, 3],
		"point": {"x":7, "y":42}
	},

	{
		"name": "Example Two",
		"numbers": [4, 5, 6],
		"point": {"x":2.7, "y":3.14}
	}
]'
This example JSON represents an array that contains two objects. Each object has three properties: a name property that points to a string value, a numbers property that points to an array, and a point property that points to an object.
We could use the JSON.parse() function to turn this JSON into an array, and then we could use JavaScript to get at the data in this JSON. For example, this line would print out the point of the first object:
var parsedArray = JSON.parse(jsonArray);
var firstPoint = parsedArray[0].point;
console.log("The first point is at " + firstPoint.x + ", " + firstPoint.y);
Why are we talking about JSON?
Because you can use AJAX to fetch it.
For example, take a look at the JSON here: https://happycoding.io/tutorials/javascript/example-ajax-files/random-welcomes.json
[
  {"message": "Welcome to my site!", "color": "red"},
  {"message": "Thanks for visiting!", "color": "blue"},
  {"message": "Hello visitor!", "color": "green"},
  {"message": "Meow!", "color": "orange"},
  {"message": "Bienvenido!", "color": "purple"}
]
This JSON contains one top-level object with a single randomMessages property. That property points to an array which contains 5 objects. Each of those objects contains a message property and a color property.
We can write code that uses AJAX to fetch this data, and then we can use the JSON.parse() function to turn it into an object that we can manipulate in our code.
//turn JSON into array
var messagesArray = JSON.parse(ajaxRequest.responseText);

//get random object from array
var randomIndex = Math.floor(Math.random()*messagesArray.length);
var messageObj = messagesArray[randomIndex];

//use that object to set content and color
var welcomeDiv = document.getElementById("welcome");
welcomeDiv.innerHTML = messageObj.text;
welcomeDiv.style.color = messageObj.color;
This code turns the JSON into an object that we can work with in our code. Then it takes that object and gets a random message object from it. Then it uses that object to set the content and color of our message.
In other words, this code displays a random welcome message (which we specified in a separate .json file) at the top of our webpage:
<!DOCTYPE html>
<html>
<head>
  <title>Random AJAX Welcome</title>

  <script>
    function getWelcome(){

      var ajaxRequest = new XMLHttpRequest();
      ajaxRequest.onreadystatechange = function(){

        if(ajaxRequest.readyState == 4){
          //the request is completed, now check its status
          if(ajaxRequest.status == 200){
            //turn JSON into array
            var messagesArray = JSON.parse(ajaxRequest.responseText);

            //get random object from array
            var randomIndex = Math.floor(Math.random()*messagesArray.length);
            var messageObj = messagesArray[randomIndex];

            //use that object to set content and color
            var welcomeDiv = document.getElementById("welcome");
            welcomeDiv.innerHTML = messageObj.text;
            welcomeDiv.style.color = messageObj.color;
          }
          else{
            console.log("Status error: " + ajaxRequest.status);
          }
        }
        else{
          console.log("Ignored readyState: " + ajaxRequest.readyState);
        }
      }
      ajaxRequest.open('GET', 'https://happycoding.io/tutorials/javascript/example-ajax-files/random-welcomes.json');
      ajaxRequest.send();
    }

  </script>
</head>
<body onload="getWelcome()">
  <div id="welcome"></div>
  <p>This is an example website.</p>
</body>
</html>
See the Pen by Happy Coding (@KevinWorkman) on CodePen.
(Try refreshing this example to see different welcome messages.)
Thinking in AJAX
Before AJAX, most websites worked like this:
- A visitor goes to a URL that points to a particular
.htmlfile. - That
.htmlfile contains all of the content on the page, and it’s downloaded in a single request. - To visit another page on the website, the visitor goes to a different URL that points to a different
.htmlfile. - That next
.htmlfile contains all of the content on the next page, and it’s also downloaded in a single request. - Repeat.
This is exactly how the pages you’ve created have worked so far, and it’s how many websites (including this one!) still work.
But as webpages became more complicated and contained more data, the size of each “one big request” became, well, big. This lead to pages taking a long time to load, which made it harder for webpages to be interactive.
AJAX was developed to deal with these issues. Using AJAX, a website can work like this:
- A visitor goes to a URL that points to a particular
.htmlfile. - That
.htmlfile contains the “core content” of a page: that might just be its layout and some JavaScript for fetching additional content. - Then the webpage makes a bunch of smaller AJAX requests to fetch the additional content.
- To visit another page on the website, the visitor clicks a button that triggers AJAX to load just that section, without reloading stuff like the navigation bar. (Note that JavaScript can change what’s in the URL bar, so it might even look like you’re visiting another page!)
This was a different way of thinking about how webpages work. It allowed sites like GMail (which was one of the first popular pages to use AJAX) to load only the layout of the page at first, then to fetch the messages, then to fetch their content. It allowed sites like Twitter or Tumblr or Facebook to implement an “infinite scroll” that loads more content as your scroll through your feed. It also allowed notifications without forcing you to refresh the page and autocomplete in search bars.
But AJAX is not an all-or-nothing thing. You don’t have to use AJAX, but it can be very useful for loading “extra content” on top of your webpage. For example, this website mostly uses the “traditional” approach of each page being its own .html file, and that file containing all of the content. But then I use AJAX to fetch little “extra” stuff like the tags for each tutorial and example.
This uses the idea of progressive enhancement, where you guarantee that your page will work without JavaScript. Then you use AJAX to add extras.
JQuery
AJAX is a part of plain old vanilla JavaScript, like we’ve seen above. You can keep on using it that way without any libraries. If you’re just starting out, that’s exactly what I recommend you do. (That means you can skip this section, hooray!)
But I should also note that JQuery does provide shortcuts for using AJAX. For example, our first example that displays a simple welcome message that it fetches using AJAX can be shortened to a single line of code using the JQuery library:
function getWelcome(){
	$("#welcome").load('https://happycoding.io/tutorials/javascript/example-ajax-files/text-welcome.txt');
}
This code does the exact same thing as the code we wrote above. Behind the scenes, the JQuery library is creating a XMLHttpRequest object and an onreadystatechange function for us, so we don’t have to worry about all of the boilerplate code.
There are other AJAX functions in JQuery. As always, the documentation is your best friend!
To be clear: you don’t have to use JQuery in order to use AJAX. AJAX is a part of plain old vanilla JavaScript. I think it’s really important to understand what’s going on behind the scenes, otherwise you’ll be very confused when something goes wrong. But once you understand what’s going on, JQuery can be a nice shortcut- but that’s all it is, so don’t feel like you have to use it.
Homework
- Create your own
.jsonfile that contains welcome messages, and use AJAX to show a random welcome message (or quote of the day, or cat facts) on every page on your site. - I provide a
.jsonfile located at https://happycoding.io/api/site.json that contains JSON that represents every post on this site. Do something cool with it! (For example, the tags page is built using AJAX and this file!) I’d love to see anything you come up with! - CodePen also provides files that can be fetched with AJAX. Read more about it here. Do something cool!