Fetch
Fetch
- AJAX
- No Local Files
- Promises
- Fetch with Callback Functions
- Fetch with Promise Chaining
- Fetch with Anonymous Functions
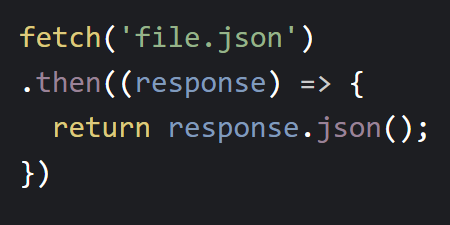
- Fetch with Arrow Functions
- Fetch with Async and Await
- JSON
- Fetch with JSON
- Thinking in AJAX
Now you know how to create webpages using HTML, and you know how to make them interactive using JavaScript.
Let’s say you have a few pages: a homepage, an about page, and a page that shows pictures of cats. Now you want to show a welcome message on every page. In other words, you want to add this at the top of each .html file:
<p>Welcome to my website!</p>
You could do this manually by editing each .html file and copying this into it. That might be okay for three files, but what if you have a dozen pages? Or a hundred? What happens when you want to change the message to something else?
It would be nice if you could put your message in a single place that every .html file reads from. Then when you want to change the message, you could change it in one place instead of changing it in each individual file.
There are a few ways to do that: you could write JavaScript that manipulates the page, or you could use something like Jekyll or a server to build the HTML.
This tutorial introduces another approach called AJAX, which you can implement using the fetch() function.
AJAX
AJAX stands for Asynchronous JavaScript and XML. That sounds complicated, but with modern JavaScript, using AJAX means calling the fetch() function. This function lets you load another URL and then add its content to your webpage, or do other processing with it.
No Local Files
The fetch() function lets you load other files on the internet, but it does not work with local files loaded using file:// URLs. This is a safety feature. Imagine how scary the internet would be if any website could read files from your computer!
But this might also make it more annoying to test out your code as you read through this tutorial. To make your life a little easier, you can use these files for now:
- https://HappyCoding.io/tutorials/javascript/example-ajax-files/text-welcome.txt
- https://HappyCoding.io/tutorials/javascript/example-ajax-files/html-welcome.html
- https://HappyCoding.io/tutorials/javascript/example-ajax-files/random-welcomes.json
You can also use your own files, but they’ll only work on your live site, not with local files (unless you run your own local server).
Promises
So far, the functions you’ve seen have been synchronous, which means they happen right away, as soon as you call them.
Functions can also be asynchronous, which means they happen “behind the scenes” while the rest of your code keeps running. This is handy for actions that might take a long time to complete, like fetching the content at a URL.
You can think of an asynchronous function as promising to do something when you call it. Behind the scenes, asynchronous functions return a Promise object, which is a special value that lets you specify what happens when the work is done.
To see what I mean, consider this code:
See the Pen by Happy Coding (@KevinWorkman) on CodePen.
This code defines a fetchWelcome() function, which is called on load. The code calls the fetch() function and then adds the result to the page. You might expect this to work, but if you try it out, you’ll see [object Promise] added to the page instead.
That’s because the fetch() function is asynchronous and returns a Promise, which you can’t use directly. Instead, you need to either use callback functions, or promise chaining, or the async and await keywords.
Fetch with Callback Functions
The fetch() function returns a Promise which you can’t use directly, so one way to work with the result is through a callback function:
function fetchWelcome() {
  // Fetch the response from the URL,
  // which returns a Promise
  const fetchPromise =
        fetch('https://happycoding.io/tutorials/javascript/example-ajax-files/text-welcome.txt');

  // When the response comes back,
  // call the convertToText() function
  fetchPromise.then(convertToText);
}
This code works by calling the fetch() function and passing it a URL to fetch. That request is sent asynchronously in the background. In the meantime the fetch() function returns a Promise, which is a special kind of value that lets us work with the result when it comes back.
The code then calls the then() function and passes it the name of a function. When the fetchResponse promise is done fetching the response, it automatically calls the convertToText() function with the response
That function would look like this:
function convertToText(response) {
  // Convert the response to text,
  // which returns a Promise
  let textPromise = response.text();
  // When the text comes back, call
  // the addTextToPage() function
  textPromise.then(addTextToPage);
}
This function takes the response, and then converts it to text using the text() function. That function also returns a Promise (because it can take a long time to read a really big response), so you have to use another callback function.
Finally, the addTextToPage() function can use the text:
function addTextToPage(text){
  document
    .getElementById('welcome-container')
    .innerText = text;
}
Putting it all together, it looks like this:
See the Pen by Happy Coding (@KevinWorkman) on CodePen.
Fetch with Promise Chaining
The above example works by using a few different callback functions. To understand the code, we have to read the fetchWelcome() function, which uses the convertToText() function as a callback, which then uses the addToText() function as a callback. Reading through nested callback functions like this can be confusing, so another way to work with Promise objects is through promise chaining. That looks like this:
See the Pen by Happy Coding (@KevinWorkman) on CodePen.
Now instead of nesting the callback functions, the convertToText() function itself returns a Promise object, which lets you “chain” the then() calls together. This means you no longer have to read through 3 levels of functions to follow the code.
Fetch with Anonymous Functions
Notice that the convertToText() and addTextToPage() functions are only called once, as callback functions. Since you don’t need them anywhere other than when you’re fetching the URL and processing the response, you can use anonymous functions instead.
See the Pen by Happy Coding (@KevinWorkman) on CodePen.
Instead of defining named functions, this code uses anonymous functions and passes them directly into the promise chain.
Fetch with Arrow Functions
In 2015, JavaScript introduced a new feature called arrow functions which let you more easily define anonymous functions.
Here’s an example:
See the Pen by Happy Coding (@KevinWorkman) on CodePen.
This is probably the “best” way to work with the then() function, but you’ll still see all of the above techniques in the wild.
Fetch with Async and Await
In 2017, JavaScript introduced another new feature called async and await, which lets you create your own asynchronous functions.
See the Pen by Happy Coding (@KevinWorkman) on CodePen.
Which approach you take is up to you. What feels the most readable to you? What makes the most sense at a glance?
No matter which approach you choose, the idea is the same: you call the fetch() function to fetch the contents of a URL, which gives you a promise, and then you convert that to a usable piece of data.
JSON
Let’s pause talking about the fetch() function for a second and talk about something else: JSON.
Remember that you can use object literals to represent objects in JavaScript:
const point = {x: 7, y: 42};

console.log("The point is at " + point.x + ", " + point.y);
JSON stands for JavaScript Object Notation, and it’s a format for storing data that’s easy for JavaScript to understand. For example, here’s the same object stored as JSON in a string variable:
const jsonString = '{"x": 7, "y": 42}';
If this looks weird, remember that JavaScript uses both single quotes ' and double quotes " for strings. So this is a string (characters inside single quotes '), and that string contains some double quote " characters.
But the string is in the JSON format, which looks a lot like an object literal, except the variable names are surrounded by double quote " characters. (Actually you can do that with object literals too!)
Now that you have a JSON string, you can use the JSON.parse() function to turn it into a JavaScript object that you can use in your code:
const jsonString = '{"x": 7, "y": 42}';
const point = JSON.parse(jsonString);

console.log("The point is at " + point.x + ", " + point.y);
JSON Arrays
You can also use JSON to store arrays. To store an array in JSON, use square brackets [ ] and a comma-separated list of JSON objects, like this:
const jsonArrayString = '[ {"x": 7, "y": 42}, {"x": 0, "y": 0}, {"x": 2.7, "y": 3.14} ]';
This JSON string represents an array that contains 3 objects with x and y properties. You can use the JSON.parse() function to turn this into an array that you can use in your code, just like any other array:
const jsonArrayString = '[ {"x": 7, "y": 42}, {"x": 0, "y": 0}, {"x": 2.7, "y": 3.14} ]';
const pointArray = JSON.parse(jsonArrayString);
for(const point of pointArray){
	console.log("The point is at " + point.x + ", " + point.y);
}
Nested JSON
One more note about JSON: most of the JSON you’ll see in real life will be more complicated than these examples. Just like object literals can contain other object literals and arrays, JSON can contain nested data.
For example, here is a JSON array that contains objects, which themselves contain objects and arrays:
'[
	{
		"name": "Example One",
		"numbers": [1, 2, 3],
		"point": {"x":7, "y":42}
	},

	{
		"name": "Example Two",
		"numbers": [4, 5, 6],
		"point": {"x":2.7, "y":3.14}
	}
]'
This example JSON represents an array that contains two objects. Each object has three properties: a name property that points to a string value, a numbers property that points to an array, and a point property that points to an object.
You could use the JSON.parse() function to turn this JSON into an array, and then you could use JavaScript to get at the data in this JSON. For example, this line would print out the point of the first object:
const parsedArray = JSON.parse(jsonArray);
const firstPoint = parsedArray[0].point;
console.log("The first point is at " + firstPoint.x + ", " + firstPoint.y);
Fetch with JSON
Why are we talking about JSON? Because you can use the fetch() function to load JSON data!
For example, take a look at the JSON file here: http://happycoding.io/tutorials/javascript/example-ajax-files/random-welcomes.json
[
  {"text": "Welcome to my site!", "color": "red"},
  {"text": "Thanks for visiting!", "color": "blue"},
  {"text": "Hello visitor!", "color": "green"},
  {"text": "Meow!", "color": "orange"},
  {"text": "Bienvenido!", "color": "purple"}
]
This JSON file contains an array which contains 5 objects. Each of those objects contains a text property and a color property.
You can write code that uses the fetch() function to request this URL, and then you can use the json() function to read the JSON from the response, which gives you an object that you can manipulate in your code.
<!DOCTYPE html>
<html>
<head>
	<script>
    async function fetchWelcome() {
      // Fetch the content from the URL
      const fetchResponse = await   fetch('https://happycoding.io/tutorials/javascript/example-ajax-files/random-welcomes.json');

      // Read the JSON content of the response and parse it to get an array
      const messagesArray = await fetchResponse.json();

      // Pick a random message from the array
      const randomIndex = Math.floor(Math.random()*messagesArray.length);
      const message = messagesArray[randomIndex];

      // Use that message to set content and color
      const welcomeContainer = document.getElementById("welcome-container");
      welcomeContainer.innerText = message.text;
      welcomeContainer.style.color = message.color;
    }
  </script>
</head>
<body onload="fetchWelcome()">
  <div id="welcome-container"></div>
</body>
</html>
This code fetches the JSON from the file and then parses that JSON into an array using the json() function. Then the code picks a random message, and uses it to set the content and color of the page.
In other words, this code displays a random welcome message (which are specified in a separate .json file) at the top of the webpage:
See the Pen by Happy Coding (@KevinWorkman) on CodePen.
(Try refreshing this example to see different welcome messages.)
Thinking in AJAX
Before AJAX, most websites worked like this:
- A visitor goes to a URL that points to a particular
.htmlfile. - That
.htmlfile contains all of the content on the page, and it’s loaded all at once. That page might also load other files like JavaScript and CSS, but it’s all referenced by the HTML file. - To visit another page on the website, the visitor goes to a different URL that points to a different
.htmlfile. - That next
.htmlfile contains all of the content on the next page, and it’s also loaded all at once. - Repeat.
This is exactly how the pages you’ve created have worked so far, and it’s how many static websites still work.
But as webpages became more complicated and contained more data, pages started taking longer to load, which made it harder for webpages to be interactive.
AJAX was developed to deal with these issues. Using AJAX, a website can work like this:
- A visitor goes to a URL that points to a particular
.htmlfile. - That
.htmlfile contains the “core content” of a page, like its overall layout and some JavaScript for fetching additional content. - Then the webpage makes a bunch of smaller AJAX requests to fetch the additional content.
- To visit another page section on the website, the visitor clicks a button that triggers AJAX to load just that section, without reloading stuff like the navigation bar. (JavaScript can change what’s in the URL bar, so it might even look like you’re visiting another page!)
This was a different way of thinking about how webpages work. It lets sites like Gmail (which was one of the first popular pages to use AJAX) load only the layout of the page at first, then to fetch the messages, then to fetch their content. It lets sites like Twitter or Facebook implement an “infinite scroll” that loads more content as you scroll through your feed. It also enabled features like notifications and autocomplete!
But AJAX is not an all-or-nothing thing. You don’t have to use AJAX, but it can be very useful for loading “extra content” on top of your webpage. This is called progressive enhancement, where you guarantee that your page will work without JavaScript, and then you use AJAX to add extras.
You can see AJAX in action yourself: look for websites that only reload parts of their UI when you click around. For example, when you click on a post in social media, the whole page probably doesn’t reload. The navigation stays in place, and only the central content of the page changes. That’s because most social media sites are using AJAX!
Homework
- Create your own
.jsonfile that contains welcome messages, and use AJAX to show a random welcome message (or quote of the day, or cat facts) on every page on your site. - I provide a
.jsonfile located at http://happycoding.io/api/site.json that contains JSON that represents every post on this site. Do something cool with it! (For example, the tags page is built using AJAX and this file!) I’d love to see anything you come up with! - CodePen also provides files that can be fetched with AJAX. Read more about it here. Do something cool!

