Creating a REST API


Creating a REST API
- REST
- Simple Example REST API
- Simple Java REST Client
- Simple JavaScript REST Client
- CORS
- Handling Logins in REST
- Token Authentication
- Summary
- Homework
Now we know how to create a web app using servlet classes. We know how to get user input, how to access a database, and how to handle user logins. But what if we want to support different kinds of programs instead of just a web app? What if we want to create a desktop application or an Android app? How do we provide access to our data for those programs without writing everything from scratch each time?
This tutorial introduces the idea of creating a REST API, which is a way of organizing our code so we can access our data from multiple applications. Your REST API is server code whose job it is to provide access to your data and to enforce rules like who can see what. Then other programs use your REST API to interact with your data.
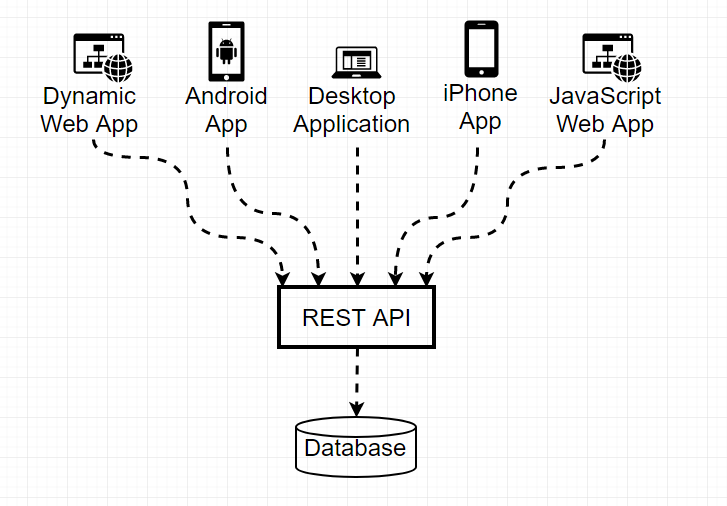
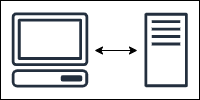
This high-level diagram shows how you might organize your code: you’d have a database (or multiple databases), and your REST API would sit on top of that. It would use SQL and JDBC to interact with the database, exactly like we’ve already learned about. Then other applications would call your REST API, which lets you centralize all of your core logic in one place instead of rewriting it every time you wanted to create a new application.
To put it another way: a REST API is just a web app, very similar to all of the web apps we’ve already built. The only difference is that instead of showing a website for a GET request, it provides data. And instead of using HTML forms to create a POST request, it takes POST requests from other applications! (Of course, one of those applications could be another web app that gets user input using HTML forms!)
REST
REST stands for representational state transfer, which is just a fancy name for a set of rules that you can follow to build a web app that provides access to data in a way that’s reusable by multiple applications, or many users of the same application. REST doesn’t actually involve any new technical concepts. It’s more a way of using the concepts we’ve already learned.
There are a few basic ideas behind REST:
- You access data via URLs. For example,
/users/Adalets you access data about a person named Ada. - You use HTTP methods to access or change data. For example, you’d view Ada’s data by issuing a
GETrequest to/people/Ada, and you’d modify Ada’s data by issuing aPOSTrequest to/people/Ada. You can use the other HTTP methods (likePUTorDELETE) to interact with the data as well. - You can represent data however you want. For example that
GETrequest might return a JSON string that represents the user data. ThePOSTrequest might then take aJSONstring. Or it could take a binary string, or XML, or a list of properties. It’s up to you. - Each request should be standalone. In other words, you should not store session information on the server! Everything needed to fulfill a request must be included in the request itself!
All of these “rules” exist for a reason, but it’s important to keep in mind that in the end, everything is up to you. You’re the programmer. The REST police aren’t going to come kick your door down if your code “violates” one of these rules. You should treat REST as a tool, not as a strict set of rules that you must follow at all costs. Do what makes sense to you and what works for your context.
API stands for application programmer interface, which is a fancy name for whatever a programmer uses to interact with a language or library. For example, Processing’s reference is an API: it’s the classes and functions we used to write Processing code. Similarly, the Java API is the list of classes and functions we use to write Java code. You can view JavaScript’s API on MDN. The point is that an API is a collection of things we can do when writing code. So when we say we’re creating a REST API, we just mean that we’re using REST ideas to create something that programmers can use to interact with our data.
Simple Example REST API
Let’s use all of these ideas to create a REST API. First off, let’s say we have a class that provides access to our data:
import java.util.HashMap;
import java.util.Map;

/**
 * Example DataStore class that provides access to user data.
 * Pretend this class accesses a database.
 */
public class DataStore {

	//Map of names to Person instances.
	private Map<String, Person> personMap = new HashMap<>();

	//this class is a singleton and should not be instantiated directly!
	private static DataStore instance = new DataStore();
	public static DataStore getInstance(){
		return instance;
	}

	//private constructor so people know to use the getInstance() function instead
	private DataStore(){
		//dummy data
		personMap.put("Ada", new Person("Ada", "Ada Lovelace was the first programmer.", 1815));
		personMap.put("Kevin", new Person("Kevin", "Kevin is the author of HappyCoding.io.", 1986));
		personMap.put("Stanley", new Person("Stanley", "Stanley is Kevin's cat.", 2007));
	}

	public Person getPerson(String name) {
		return personMap.get(name);
	}

	public void putPerson(Person person) {
		personMap.put(person.getName(), person);
	}
}
This example uses a Map to store data in memory, but this could just as easily use a database connection. The point is that this class provides access to our data. It uses a simple Person class:
public class Person {
	private String name;
	private String about;
	private int birthYear;

	public Person(String name, String about, int birthYear) {
		this.name = name;
		this.about = about;
		this.birthYear = birthYear;
	}

	public String getName() {
		return name;
	}

	public String getAbout() {
		return about;
	}

	public int getBirthYear() {
		return birthYear;
	}
}
This is just a plain old Java class that contains variables and functions for accessing those variables. Now we can create our servlet class:
import java.io.IOException;

import javax.servlet.ServletException;
import javax.servlet.http.HttpServlet;
import javax.servlet.http.HttpServletRequest;
import javax.servlet.http.HttpServletResponse;

import org.json.JSONObject;

public class PersonServlet extends HttpServlet {

	@Override
	public void doGet(HttpServletRequest request, HttpServletResponse response) throws IOException, ServletException {

		String requestUrl = request.getRequestURI();
		String name = requestUrl.substring("/people/".length());

		Person person = DataStore.getInstance().getPerson(name);

		if(person != null){
			String json = "{\n";
			json += "\"name\": " + JSONObject.quote(person.getName()) + ",\n";
			json += "\"about\": " + JSONObject.quote(person.getAbout()) + ",\n";
			json += "\"birthYear\": " + person.getBirthYear() + "\n";
			json += "}";
			response.getOutputStream().println(json);
		}
		else{
			//That person wasn't found, so return an empty JSON object. We could also return an error.
			response.getOutputStream().println("{}");
		}
	}


	@Override
	public void doPost(HttpServletRequest request, HttpServletResponse response) throws IOException, ServletException {

		String name = request.getParameter("name");
		String about = request.getParameter("about");
		int birthYear = Integer.parseInt(request.getParameter("birthYear"));

		DataStore.getInstance().putPerson(new Person(name, about, birthYear, password));
	}
}
This servlet class contains a doGet() function that gets a person’s name from the URL, and then uses the DataStore class to fetch that person. It then creates a JSON string from that person’s data, and returns that JSON as the response to the GET request. (If you don’t remember JSON, check out the JSON tutorial.) This code uses the json.org Java library to escape the String values before adding them to our JSON. This is important! Remember that JSON uses keys and values surrounded by quotation marks, like this:
{
"name": "Ada",
"about": "Ada Lovelace was the first programmer.",
"birthYear": 1815
}
But what if name or about contain a quotation mark? We’d have something like this:
{
"name": "Ada",
"about": "This contains " a quote",
"birthYear": 1815
}
This is not valid JSON, and you’ll get an error when you try to parse it. We need to escape the quotation mark so it looks like this:
{
"name": "Ada",
"about": "This contains \" a quote",
"birthYear": 1815
}
The escaped quotation mark \" is treated as a single character that doesn’t break the JSON format. We’re using the JSON library to handle this case for us through the JSONObject.quote() function.
Then the doPost() function gets three parameters from the POST request and uses them to add data to the DataStore class.
Finally, we just need a web.xml file to map our servlet to a URL:
<web-app
	xmlns="http://xmlns.jcp.org/xml/ns/javaee"
	xmlns:xsi="http://www.w3.org/2001/XMLSchema-instance"
	xsi:schemaLocation="http://xmlns.jcp.org/xml/ns/javaee
		http://xmlns.jcp.org/xml/ns/javaee/web-app_3_1.xsd"
	version="3.1">

	<servlet>
		<servlet-name>PersonServlet</servlet-name>
		<servlet-class>PersonServlet</servlet-class>
	</servlet>

	<servlet-mapping>
		<servlet-name>PersonServlet</servlet-name>
		<url-pattern>/people/*</url-pattern>
	</servlet-mapping>

</web-app>
This maps any URL that starts with /people/ to our servlet. Try running this on a local server and then navigating to http://localhost:8080/people/Ada in your browser. You should see the JSON representation:
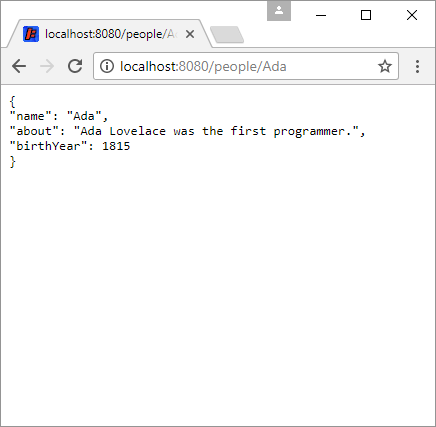
This isn’t very exciting, but that’s not the point. You’re not really supposed to view a REST API in a browser anyway. The whole point is that you can use this data to build other applications!
Simple Java REST Client
The details of exactly how to build one of those applications (also called clients) are a little bit outside this tutorial, whose goal is to show you how to create the REST API, not a client. But just to show you how everything fits together, here’s a very basic command line program that uses our REST API to get or set user data:
import java.io.IOException;
import java.io.OutputStreamWriter;
import java.net.HttpURLConnection;
import java.net.URL;
import java.net.URLEncoder;
import java.util.Scanner;
import org.json.JSONObject;

public class RestApiClient {

	public static void main(String[] args) throws IOException{

		Scanner scanner = new Scanner(System.in);

		System.out.println("Welcome to the Person Info Command Line Editor.");
		System.out.println("(PICLER for short.)");
		System.out.println("Do you want to get or set a person's info?");
		System.out.println("(Type 'get' or 'set' now.)");
		String getOrSet = scanner.nextLine();
		if("get".equalsIgnoreCase(getOrSet)){
			System.out.println("Whose info do you want to get?");
			System.out.println("(Type a person's name now.)");
			String name = scanner.nextLine();

			String jsonString = getPersonData(name);
			JSONObject jsonObject = new JSONObject(jsonString);

			int birthYear = jsonObject.getInt("birthYear");
			System.out.println(name + " was born in " + birthYear + ".");

			String about = jsonObject.getString("about");
			System.out.println(about);
		}
		else if("set".equalsIgnoreCase(getOrSet)){
			System.out.println("Whose info do you want to set?");
			System.out.println("(Type a person's name now.)");
			String name = scanner.nextLine();

			System.out.println("When was " + name + " born?");
			System.out.println("(Type a year now.)");
			String birthYear = scanner.nextLine();

			System.out.println("Can you tell me about " + name + "?");
			System.out.println("(Type a sentence now.)");
			String about = scanner.nextLine();

			setPersonData(name, birthYear, about, password);
		}

		scanner.close();

		System.out.println("Thanks for using PICLER.");

	}

	public static String getPersonData(String name) throws IOException{

		HttpURLConnection connection = (HttpURLConnection) new URL("http://localhost:8080/people/" + name).openConnection();

		connection.setRequestMethod("GET");

		int responseCode = connection.getResponseCode();
		if(responseCode == 200){
			String response = "";
			Scanner scanner = new Scanner(connection.getInputStream());
			while(scanner.hasNextLine()){
				response += scanner.nextLine();
				response += "\n";
			}
			scanner.close();

			return response;
		}

		// an error happened
		return null;
	}

	public static void setPersonData(String name, String birthYear, String about) throws IOException{
		HttpURLConnection connection = (HttpURLConnection) new URL("http://localhost:8080/people/" + name).openConnection();

		connection.setRequestMethod("POST");

		String postData = "name=" + URLEncoder.encode(name);
		postData += "&about=" + URLEncoder.encode(about);
		postData += "&birthYear=" + birthYear;

		connection.setDoOutput(true);
	    OutputStreamWriter wr = new OutputStreamWriter(connection.getOutputStream());
	    wr.write(postData);
	    wr.flush();

		int responseCode = connection.getResponseCode();
		if(responseCode == 200){
			System.out.println("POST was successful.");
		}
		else if(responseCode == 401){
			System.out.println("Wrong password.");
		}
	}
}
This program asks the user whether they want to get or set user data. If they want to get data, then the program gets a name from the user, and then calls the getPersonData() function. That function uses the HttpUrlConnection class, which is just a regular Java class available in the standard API. That class lets you make requests to a server, and the getPersonData() function uses it to make a GET request to our REST API (make sure your server is running when you run this code). The response is the JSON our REST API outputs, which this client program then parses using the JSON library to output to the command line.
If the user wants to set data, then the program gets a name, birth year, and an about sentence from the user, and then calls the setPersonData() function. That function uses the HttpUrlConnection class to send a POST request to our server. The code uses the URLEncoder.encode() function to encode our String values, just in case they contain characters like & ampersands which would break the format of the data. Then our server handles that request and stores the data.
Welcome to the Person Info Command Line Editor.
(PICLER for short.)
Do you want to get or set a person's info?
(Type 'get' or 'set' now.)
get
Whose info do you want to get?
(Type a person's name now.)
Ada
Ada was born in 1815.
Ada Lovelace was the first programmer.
Thanks for using PICLER.
We now have two separate applications: our REST API running in a server, and a client application that runs in the command line. We could use very similar code to create a desktop application or an Android app, or even another server that provides a user interface.
Simple JavaScript REST Client
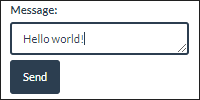
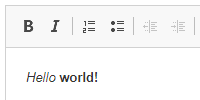
Similarly, here’s a simple HTML webpage that uses JavaScript to get or set person data using our REST API:
<!DOCTYPE html>
<html>
	<head>
		<title>PIJON</title>

		<script>
			function getPersonInfo(){
				var name = document.getElementById('name').value;

				var ajaxRequest = new XMLHttpRequest();
				ajaxRequest.onreadystatechange = function(){
					if(ajaxRequest.readyState == 4){
						if(ajaxRequest.status == 200){
							var person = JSON.parse(ajaxRequest.responseText);
							document.getElementById('birthYear').value = person.birthYear;
							document.getElementById('about').value = person.about;
						}
					}
				}
				ajaxRequest.open('GET', 'http://localhost:8080/people/' + name);
				ajaxRequest.send();
			}

			function setPersonInfo(){
				var name = document.getElementById('name').value;
				var about = document.getElementById('about').value;
				var birthYear = document.getElementById('birthYear').value;

				var postData = 'name=' + name;
				postData += '&about=' + encodeURIComponent(about);
				postData += '&birthYear=' + birthYear;

				var ajaxRequest = new XMLHttpRequest();
				ajaxRequest.open('POST', 'http://localhost:8080/people/' + name);
				ajaxRequest.setRequestHeader("Content-type", "application/x-www-form-urlencoded");
				ajaxRequest.send(postData);
			}
		</script>
	</head>
	<body>
		<h1>PIJON</h1>
		<p>(Person Info in JavaScript Object Notation)</p>
		<p><input type="text" value="Ada" id="name"><button type="button" onclick="getPersonInfo()">Get</button></p>
		<p>Birth year:</p>
		<input type="text" id="birthYear">
		<p>About:</p>
		<textarea id="about"></textarea>
		<p><button type="button" onclick="setPersonInfo()">Save</button></p>
	</body>
</html>
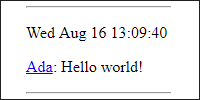
This webpage shows three input boxes. If the user types a name and presses the Get button, the getPersonInfo() function uses AJAX to make a GET request to our REST API. It then parses the JSON response and populates the other text boxes. If the user then modifies those text boxes and clicks the Save button, the setPersonInfo() function uses AJAX to make a POST request to our REST API.
Try making a change in the JavaScript client and then viewing it in the command line application!
CORS
Depending on your settings, you might have gotten an error when you tried to run the above JavaScript. Something like:
XMLHttpRequest cannot load http://localhost:8080/people/Ada. No 'Access-Control-Allow-Origin' header is present on the requested resource. Origin 'null' is therefore not allowed access.
This is because by default, JavaScript on one server is not allowed to access stuff on another server. In our case our JavaScript is not even on a server (we just opened the .html file in our browser), and our REST API is on a server at localhost:8080. The point is that our JavaScript isn’t allowed to access our server.
To fix this, we need to enable cross-origin resource sharing, or CORS, in our server. How you do this depends on which server you’re using. So if your real hosting is on AWS Elastic Beanstalk, you might want to Google something like “AWS Elastic Beanstalk enable CORS”.
We’re using a local Jetty server, so to enable CORS first we need to add jetty-servlets.jar and jetty-util.jar to our classpath. Then we need to add a filter to our web.xml file:
<web-app
	xmlns="http://xmlns.jcp.org/xml/ns/javaee"
	xmlns:xsi="http://www.w3.org/2001/XMLSchema-instance"
	xsi:schemaLocation="http://xmlns.jcp.org/xml/ns/javaee
		http://xmlns.jcp.org/xml/ns/javaee/web-app_3_1.xsd"
	version="3.1">

	<servlet>
		<servlet-name>PersonServlet</servlet-name>
		<servlet-class>PersonServlet</servlet-class>
	</servlet>

	<servlet-mapping>
		<servlet-name>PersonServlet</servlet-name>
		<url-pattern>/people/*</url-pattern>
	</servlet-mapping>

	<filter>
	    <filter-name>cross-origin</filter-name>
	    <filter-class>org.eclipse.jetty.servlets.CrossOriginFilter</filter-class>
	    <init-param>
	        <param-name>allowedOrigins</param-name>
	        <param-value>*</param-value>
	    </init-param>
	    <init-param>
	        <param-name>allowedMethods</param-name>
	        <param-value>GET,POST</param-value>
	    </init-param>
	    <init-param>
	        <param-name>allowedHeaders</param-name>
	        <param-value>X-Requested-With,Content-Type,Accept,Origin,Authorization</param-value>
	    </init-param>
	</filter>

	<filter-mapping>
	    <filter-name>cross-origin</filter-name>
	    <url-pattern>/*</url-pattern>
	</filter-mapping>

</web-app>
The <filter> and <filter-mapping> tags enable CORS for our local server.
Again, how you enable CORS for your server depends on which server you’re using!
Handling Logins in REST
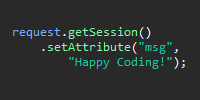
We’ve already learned that we can use sessions to store per-user information on our server, which allows us to handle things like logins. But when creating a REST API, every request should be standalone, which means we shouldn’t store per-user information on the server. In other words, we shouldn’t use sessions to track user logins in a REST server.
But what if we want to restrict access to some of our data? For example, what if we only want a user to be able to edit their own information? If we could store per-user data on the server, we could track whether a user was logged in. But since we can’t store data on the server, we have to do something else.
We solve this problem by sending in the user’s login information (username and password) with every request.
To demonstrate this, let’s add a password field to our Person class:
public class Person {
	private String name;
	private String about;
	private int birthYear;
	private String password;

	public Person(String name, String about, int birthYear, String password) {
		this.name = name;
		this.about = about;
		this.birthYear = birthYear;
		this.password = password;
	}

	public String getName() {
		return name;
	}

	public String getAbout() {
		return about;
	}

	public int getBirthYear() {
		return birthYear;
	}

	public String getPassword(){
		return password;
	}
}
(Remember that in real life we wouldn’t store the password directly; we’d store a hash of the password.)
Then let’s add some passwords to our fake dummy data in the DataStore class
personMap.put("Ada", new Person("Ada", "Ada Lovelace was the first programmer.", 1815, "password one"));
personMap.put("Kevin", new Person("Kevin", "Kevin is the author of HappyCoding.io.", 1986, "password two"));
personMap.put("Stanley", new Person("Stanley", "Stanley is Kevin's cat.", 2007, "password three"));
In real life you’d get these passwords (again, the hashes of the passwords) from users when they register.
Finally, let’s change the doPost() function of our PersonServlet class:
public void doPost(HttpServletRequest request, HttpServletResponse response) throws IOException, ServletException {

	String name = request.getParameter("name");
	String about = request.getParameter("about");
	String password = request.getParameter("password");
	int birthYear = Integer.parseInt(request.getParameter("birthYear"));

	Person personToEdit = DataStore.getInstance().getPerson(name);

	if(personToEdit != null && personToEdit.getPassword().equals(password)){
		DataStore.getInstance().putPerson(new Person(name, about, birthYear, password));
	}
	else{
		response.sendError(HttpServletResponse.SC_UNAUTHORIZED);
	}
}
Now this function gets the password from the request, and checks to make sure it’s valid before it goes through with submitting the edit. If it’s not valid, it returns an error code.
This is just a simple example to show you the basics, but the idea is the same for more complicated projects: you pass in the login data with every request, and the server checks it before doing any processing.
Authorization Header
Remember that GET requests usually have parameters passed in through the URL itself, usually through query parameters. So if we wanted to make it so users could only view their own information but not view the information of other users, we’d have to use URLs like this:
http://localhost:8080/people/Ada?password=MyPasswordHere
We could take this approach and modify the doGet() function in our PeopleServlet class to get the password from the query parameter and check it before returning any user data. Then we’d modify our REST client applications to build the URL so it contains the query parameter. This is very similar to what we did for the POST request, except we’re using query parameters in the URL instead of data in the request body.
Nothing is stopping us from doing exactly that, and it would work. But in general, passing login information via the URL is considered a bad idea. The URL might get cached or logged, which could allow hackers to get our login information. And from a design perspective it’s a little messy. This is pretty subjective, but we’re mixing login information with request information, which isn’t ideal. We want to separate the request (the what) from information about the request (the how). In other words, we don’t want to mix login information into our request URLs.
Instead of putting login information in the URL itself, most REST APIs use an authorization header to handle login information. A request header allows a request to include information about itself: stuff like the browser version and cache data. The authorization header is just a username and a password that goes along with a request.
We’re the ones writing the code, so how we represent the username and password is up to us. But traditionally, it’s represented as a 64-bit encoded string. That might sound complicated, but it’s just a way of storing the username and password so it doesn’t mess up the formatting of the request, exactly like we’ve already seen with URLEncoder.encode() and JSONObject.quote() in our code above. We can do that using the Base64 class that comes standard with Java.
In a servlet function, first we get the authorization header:
String authHeader = request.getHeader("authorization");
The authHeader variable will hold something like Basic dXNlcm5hbWU6cGFzc3dvcmQ=, which tells us how to authenticate (Basic just means to use a username and password), followed by a username and password encoded in base 64. Next we need to isolate the encoded part, which we can do using the substring() function:
String encodedAuth = authHeader.substring(authHeader.indexOf(' ') + 1);
This gets the part of the String that starts after the space, which gives us just the encoded username and password. Next we need to decode the encoded value:
String decodedAuth = new String(Base64.getDecoder().decode(encodedAuth));
This decodes dXNlcm5hbWU6cGFzc3dvcmQ= to be something like username:password. So now we need to separate the username and the password:
String username = decodedAuth.substring(0, decodedAuth.indexOf(':'));
String password = decodedAuth.substring(decodedAuth.indexOf(':')+1);
This uses the substring() function to separate the String into the part before and after the : colon. Note that this means your usernames should not contain a colon!
Putting it all together, it looks like this:
public void doPost(HttpServletRequest request, HttpServletResponse response) throws IOException, ServletException {

	String authHeader = request.getHeader("authorization");
	String encodedAuth = authHeader.substring(authHeader.indexOf(' ')+1);
	String decodedAuth = new String(Base64.getDecoder().decode(encodedAuth));
	String username = decodedAuth.substring(0, decodedAuth.indexOf(':'));
	String password = decodedAuth.substring(decodedAuth.indexOf(':')+1);

	String nameToEdit = request.getParameter("name");
	String about = request.getParameter("about");
	int birthYear = Integer.parseInt(request.getParameter("birthYear"));

	Person personToEdit = DataStore.getInstance().getPerson(nameToEdit);
	Person loggedInPerson = DataStore.getInstance().getPerson(username);

	//make sure user is in our data
	if(personToEdit == null || loggedInPerson == null){
		response.sendError(HttpServletResponse.SC_UNAUTHORIZED);
		return;
	}

	//don't let users edit other users
	if(!nameToEdit.equals(loggedInPerson.getName())){
		response.sendError(HttpServletResponse.SC_UNAUTHORIZED);
		return;
	}

	//make sure password is valid
	//use hashed passwords in real life!
	if(!password.equalsIgnoreCase(loggedInPerson.getPassword())){
		response.sendError(HttpServletResponse.SC_UNAUTHORIZED);
		return;
	}

	//if we made it here, everything is okay, save the user
	DataStore.getInstance().putPerson(new Person(nameToEdit, about, birthYear, password));
}
Now our doPost() function expects a username and password to be encoded in base 64 in the authorization header of the request. It still expects data to be in the request body, and it uses the request.getParameter() function to get that stuff. It then uses several if statements to make sure the login information matches the requirements. If not, it returns an error. If the login information is valid, then it stores the information from the request in the DataStore class (which would probably be going to a database in real life).
In our REST clients, we’d have to do the same thing, just in reverse:
String authString = name + ":" + password;
String encodedAuth = Base64.getEncoder().encodeToString(authString.getBytes());
String authHeader = "Basic " + encodedAuth;
connection.setRequestProperty ("Authorization", authHeader);
This code takes a username and password and creates an authorization string from them by simply combining them with a : colon in the middle. It then encodes that authorization string in base 64. It then creates a header string by adding Basic to the beginning, so the server knows to expect a username and password. Finally, it sets the Authorization header to be sent to the server.
Putting it all together, it looks like this:
public static void setPersonData(String name, String birthYear, String about, String password) throws IOException{
	HttpURLConnection connection = (HttpURLConnection) new URL("http://localhost:8080/people/" + name).openConnection();

	connection.setRequestMethod("POST");

	String authString = name + ":" + password;
	String encodedAuth = Base64.getEncoder().encodeToString(authString.getBytes());
	String authHeader = "Basic " + encodedAuth;
	connection.setRequestProperty ("Authorization", authHeader);

	String postData = "name=" + URLEncoder.encode(name);
	postData += "&about=" + URLEncoder.encode(about);
	postData += "&birthYear=" + birthYear;

	connection.setDoOutput(true);
	OutputStreamWriter wr = new OutputStreamWriter(connection.getOutputStream());
	wr.write(postData);
	wr.flush();

	int responseCode = connection.getResponseCode();
	if(responseCode == 200){
		System.out.println("POST was successful.");
	}
	else if(responseCode == 401){
		System.out.println("Wrong password.");
	}
}
Note that we’re using base 64 as an encoding, not as encryption! In other words, using base 64 doesn’t make it harder for hackers to get at a username and password! We only use it so we don’t break the formatting of the request with special characters in the username or password. To prevent hackers from getting the username and password, you need to use HTTPS and the other precautions we’ve already covered.
Also note that you can create a request that uses the authorization header, including the base 64 encoding, from JavaScript as well.
Token Authentication
With all of the above approaches, we need to send the username and password with every request, which means that clients need to keep the username and password in memory at all times. This gives hackers more opportunities to get at usernames and passwords: they might find ways to hack our clients, or they might find ways to look at our server logs, or any number of other attack vectors.
Instead of sending the username and password with every request, we can submit them to our REST API just once, and have the REST API return what’s called a token, which is just a random String value. The server stores that token, along with which username it maps to, as well as an expiration time (usually about 15 minutes in the future). The client then stores the token in memory instead of the password, and sends the token along with every request. The server uses that token to look up which username it maps to, and makes sure that requests using that token only work until the expiration time.
With this approach, if an attacker gets the token, they only have 15 minutes to do any damage. This is much better than a hacker getting a user’s password.
On the server side, we’d start by creating a way to store token information:
import java.util.HashMap;
import java.util.Map;
import java.util.UUID;

/**
 * Class that holds token data. In real life this might use a database.
 */
public class TokenStore {

	//Map of token (ranodm string) to TokenData (username and expiration time)
	private Map<String, TokenData> tokenMap = new HashMap<>();

	//this class is a singleton and should not be instantiated directly!
	private static TokenStore instance = new TokenStore();
	public static TokenStore getInstance(){
		return instance;
	}

	//private constructor so people know to use the getInstance() function instead
	private TokenStore(){}

	/**
	 * Generates a token for the username, stores that token along with an
	 * expiration time, and then returns the token so clients can store it.
	 */
	public String putToken(String username){
		String token = UUID.randomUUID().toString();
		tokenMap.put(token, new TokenData(username));
		return token;
	}

	/**
	 * Returns the username mapped to the username, or null
	 * if the token isn't found or has expired.
	 */
	public String getUsername(String token){
		if(tokenMap.containsKey(token)){
			if(tokenMap.get(token).expirationTime > System.currentTimeMillis()){
				return tokenMap.get(token).username;
			}
			else{
				//the token has expired, delete it
				tokenMap.remove(token);
			}
		}
		return null;
	}

	/**
	 * Internal class that holds a username and an expiration time.
	 */
	private static class TokenData{
		String username;
		long expirationTime;

		private TokenData(String username){
			this.username = username;
			//15 minutes from now
			expirationTime = System.currentTimeMillis() + 15 * 60 * 1000;
		}
	}
}
This class contains a Map of tokens (which are just random String values) to TokenData instances (which are just a username and an expiration time). The putToken() function uses the UUID class (which is just a regular Java class) to generate a random string to use as a token, then stores that token along with a username and an expiration time, and finally returns the token so clients can use it. The getUserName() function takes a token and checks that the token is valid and not expired, and if so it returns the associated username. Otherwise it returns null.
Then we would create a servlet class that allows clients to post a username and password to get a token:
import java.io.IOException;
import java.util.Base64;

import javax.servlet.ServletException;
import javax.servlet.http.HttpServlet;
import javax.servlet.http.HttpServletRequest;
import javax.servlet.http.HttpServletResponse;

public class AuthServlet extends HttpServlet {

	@Override
	public void doPost(HttpServletRequest request, HttpServletResponse response) throws IOException, ServletException {
		String authHeader = request.getHeader("authorization");
		String encodedAuth = authHeader.substring(authHeader.indexOf(' ')+1);
		String decodedAuth = new String(Base64.getDecoder().decode(encodedAuth));
		String username = decodedAuth.substring(0, decodedAuth.indexOf(':'));
		String password = decodedAuth.substring(decodedAuth.indexOf(':')+1);

		Person loggedInPerson = DataStore.getInstance().getPerson(username);

		//make sure user is in our data
		if(loggedInPerson == null){
			response.sendError(HttpServletResponse.SC_UNAUTHORIZED);
			return;
		}

		//make sure password is valid
		//use hashed passwords in real life!
		if(!password.equalsIgnoreCase(loggedInPerson.getPassword())){
			response.sendError(HttpServletResponse.SC_UNAUTHORIZED);
			return;
		}

		String token = TokenStore.getInstance().putToken(username);

		//the body of the response is just the token
		response.getOutputStream().print(token);
	}

}
This servlet class only contains a doPost() function, which gets the username and password from the authorization header. It then checks that username and password against the person data, and returns an error if it doesn’t match. If it does match, it uses the TokenStore class to generate a token, and it returns the token as the body of the response. Now clients can make a POST request to the URL we map to this servlet to get a token.
Next, we need to make it so the rest of our API accepts a token for authentication:
import java.io.IOException;
import java.util.Base64;

import javax.servlet.ServletException;
import javax.servlet.http.HttpServlet;
import javax.servlet.http.HttpServletRequest;
import javax.servlet.http.HttpServletResponse;

import org.json.JSONObject;

public class PersonServlet extends HttpServlet {

	@Override
	public void doGet(HttpServletRequest request, HttpServletResponse response) throws IOException, ServletException {

		String requestUrl = request.getRequestURI();
		String name = requestUrl.substring("/people/".length());

		Person person = DataStore.getInstance().getPerson(name);

		if(person != null){
			String json = "{\n";
			json += "\"name\": " + JSONObject.quote(person.getName()) + ",\n";
			json += "\"about\": " + JSONObject.quote(person.getAbout()) + ",\n";
			json += "\"birthYear\": " + person.getBirthYear() + "\n";
			json += "}";
			response.getOutputStream().println(json);
		}
		else{
			//That person wasn't found, so return an empty JSON object. We could also return an error.
			response.getOutputStream().println("{}");
		}
	}

	@Override
	public void doPost(HttpServletRequest request, HttpServletResponse response) throws IOException, ServletException {

		String authHeader = request.getHeader("authorization");
		String encodedToken = authHeader.substring(authHeader.indexOf(' ')+1);
		String decodedToken = new String(Base64.getDecoder().decode(encodedToken));
		String username = TokenStore.getInstance().getUsername(decodedToken);

		//token is invalid or expired
		if(username == null){
			response.sendError(HttpServletResponse.SC_UNAUTHORIZED);
			return;
		}

		String nameToEdit = request.getParameter("name");
		String about = request.getParameter("about");
		int birthYear = Integer.parseInt(request.getParameter("birthYear"));

		Person loggedInPerson = DataStore.getInstance().getPerson(username);

		//don't let users edit other users
		if(!nameToEdit.equals(loggedInPerson.getName())){
			response.sendError(HttpServletResponse.SC_UNAUTHORIZED);
			return;
		}

		loggedInPerson.setAbout(about);
		loggedInPerson.setBirthYear(birthYear);

		//if we made it here, everything is okay, save the user
		DataStore.getInstance().putPerson(loggedInPerson);
	}
}
The only thing that changes is our doPost() function, which now expects an encoded token in the authorization header. It then uses that token to authenticate the user. We no longer have to check the password here, since that’s already handled by the user getting the token in the first place! If the token is invalid or expired, or if the user is trying to update another user’s data, we return an error to the client.
Here’s a JavaScript client that interacts with our new token-based REST API:
<!DOCTYPE html>
<html>
	<head>
		<title>PIJON</title>

		<script>

			var name;

			function login(){
				name = document.getElementById('name').value;
				var password = document.getElementById('password').value;
				document.getElementById('password').value = '';

				var authString = name + ':' + password;
				var encodedAuth = btoa(authString);
				var authHeader = 'Basic ' + encodedAuth;

				var ajaxRequest = new XMLHttpRequest();
				ajaxRequest.onreadystatechange = function(){
					if(ajaxRequest.readyState == 4){
						if(ajaxRequest.status == 200){
							token = ajaxRequest.responseText;
							getPersonInfo();
						}
					}
				};
				ajaxRequest.open('POST', 'http://localhost:8080/auth');
				ajaxRequest.setRequestHeader("authorization", authHeader);
				ajaxRequest.send();
			}

			function getPersonInfo(){

				var encodedAuth = btoa(token);
				var authHeader = 'Bearer ' + encodedAuth;

				var ajaxRequest = new XMLHttpRequest();
				ajaxRequest.onreadystatechange = function(){
					if(ajaxRequest.readyState == 4){
						if(ajaxRequest.status == 200){
							var person = JSON.parse(ajaxRequest.responseText);
							document.getElementById('birthYear').value = person.birthYear;
							document.getElementById('about').value = person.about;

							// hide login, show content
							document.getElementById('login').style.display = 'none';
							document.getElementById('content').style.display = 'block';
						}
					}
				};
				ajaxRequest.open('GET', 'http://localhost:8080/people/' + name);
				ajaxRequest.setRequestHeader("authorization", authHeader);
				ajaxRequest.send();
			}

			function setPersonInfo(){
				var about = document.getElementById('about').value;
				var birthYear = document.getElementById('birthYear').value;

				var postData = 'name=' + name;
				postData += '&about=' + encodeURIComponent(about);
				postData += '&birthYear=' + birthYear;

				var encodedAuth = btoa(token);
				var authHeader = 'Bearer ' + encodedAuth;

				var ajaxRequest = new XMLHttpRequest();
				ajaxRequest.onreadystatechange = function(){
					if(ajaxRequest.readyState == 4){
						if(ajaxRequest.status != 200){

							// hide content, show login
							document.getElementById('content').style.display = 'none';
							document.getElementById('login').style.display = 'block';
						}

					}
				};
				ajaxRequest.open('POST', 'http://localhost:8080/people/' + name);
				ajaxRequest.setRequestHeader("authorization", authHeader);
				ajaxRequest.setRequestHeader("Content-type", "application/x-www-form-urlencoded");
				ajaxRequest.send(postData);
			}
		</script>
	</head>
	<body>
		<h1>PIJON</h1>
		<p>(Person Info in JavaScript Object Notation)</p>

		<div id="login">
			<p>Name: <input type="text" value="Ada" id="name" /></p>
			<p>Password: <input type="password" id="password" /></p>
			<p><button type="button" onclick="login()">Login</button></p>
		</div>

		<div id="content" style="display:none">
			<p>Birth year:</p>
			<input type="text" id="birthYear">
			<p>About:</p>
			<textarea id="about"></textarea>
			<p><button type="button" onclick="setPersonInfo()">Save</button></p>
		</div>

	</body>
</html>
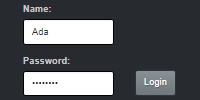
This JavaScript client first shows a login screen. When the user clicks the Login button, this client makes a POST request to our REST API to get a token. This allows the user to stay logged in, without the client keeping the password around in memory. Then the edit screen is shown, where the user can edit their own info. When they click the Save button, the token is sent in the authorization header, and the server uses that for authentication. After fifteen minutes, the user will have to login again to get a new token!
This is just a barebones example of a token-based REST API and a client. There are a ton of enhancements you could make: you could send “token refresh” requests so the user doesn’t have to login every fifteen minutes, or you could add other endpoints (URLs) in your REST API for more functionality, or you could make the clients look prettier. But these basics were meant to show you how a token-based REST API works.
Summary
That was probably a lot to take in, but REST comes down to a few ideas:
- URLs (aka “endpoints”) represent your data. For example, the URL
/people/Adapoints to a person named Ada. - HTTP methods like
GETandPOSTallow clients to interact with the data at those URLs. You could make aGETrequest to/people/Adato get Ada’s data, or aPOSTrequest to/people/Adato set Ada’s data. - The format is up to you! Maybe you want to use JSON, or XML, or property strings, or some other format.
- Each request should be standalone. The server should not store information about requests. This means that every request should contain all of the information needed to form a response. No sessions!
- Clients can authenticate by sending in a username and password with every request. Or your REST API could offer a token system, and clients would send in the token with every request.
These ideas are designed to make it easier to separate your business logic from your presentation. In other words, it lets you work on your underlying data separately from working on the view that the user interacts with. This also makes it easier to create multiple clients, for example a website, an Android app, and a desktop application.
But like I said at the top, this is all entirely up to you! The REST police aren’t going to kick your door down if you want to only use a subset of these “rules” in your server. Do whatever makes the most sense to you and your application!
Homework
- Convert your server into a REST API, and then create two different clients that interact with it.