JSP
JSP
- JSP Files
- Scriptlets
- Expressions
- Mixing Scriptlets and Expressions
- Directives
- Errors
- Mixing Servlets and JSP Files
- Expression Language
- Hiding JSP Files
- MVC
- Static Files
- Examples
Now you know how to add servlets to your web app. A servlet looks like this:
import java.io.IOException;
import java.io.PrintWriter;
import java.util.Date;
import jakarta.servlet.annotation.WebServlet;
import jakarta.servlet.http.HttpServlet;
import jakarta.servlet.http.HttpServletRequest;
import jakarta.servlet.http.HttpServletResponse;

@WebServlet("/my-servlet")
public class MyServlet extends HttpServlet {

	@Override
	public void doGet(HttpServletRequest request, HttpServletResponse response) throws IOException {
		PrintWriter out = response.getWriter();
		out.println("<!DOCTYPE html>");
		out.println("<html>");
		out.println("<head>");
		out.println("<title>My Web App</title>");
		out.println("</head>");
		out.println("<body>");
		out.println("<h1>My Web App</h1>");
		out.println("<p>The current time is: " + new Date().toString() + "</p>");
		out.println("</body>");
		out.println("</html>");
	}
}
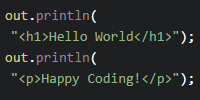
This code uses the out.println() function to output HTML one line at a time. In other words, this is HTML inside Java.
There are a few problems with having HTML inside Java:
- It’s hard to edit. Even this little bit of HTML is annoying to work with.
- It’s hard to format with proper indentation or syntax highlighting.
- It’s hard to debug: how do you find a typo in the middle of a bunch of String values?
In other words, it’s annoying to work this way.
This tutorial introduces JSP, or Jakarta Server Pages, which are more like Java inside HTML.
JSP Files
Instead of writing Java code that outputs HTML, JSP lets you write HTML that contains Java code. Here’s a JSP file that outputs the same dynamic content (the current date) as the above servlet:
<%@ page import="java.util.Date" %>
<!DOCTYPE html>
<html>
	<head>
		<title>JSP Date</title>
	</head>
	<body>
		<h1>JSP Date</h1>
		<p>The current date is: <%= new Date() %></p>
	</body>
</html>
Save this to a file named date.jsp in your web app’s directory next to your index.html file.
Follow whichever approach you chose for compiling your web app and then start your server.
You can view or download this example here:
Now open a browser to date.jsp, and you should see this:
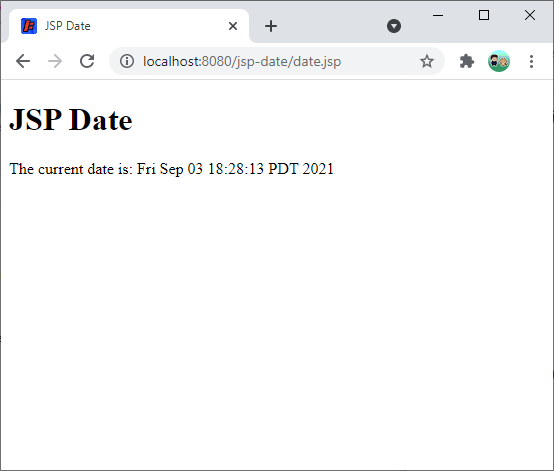
When you visit the date.jsp file, the Jetty server automatically compiles it into a servlet class, which then works just like any other servlet. Note that this requires a Java server! So you can’t upload a .jsp file to any file host. It has to be a Java server.
But now instead of writing Java code that contains HTML, you can write HTML that contains Java code. This makes it much easier to write a webpage.
There are a few ways to include Java code in a JSP page. The rest of this tutorial introduces them.
Scriptlets
A scriptlet is Java code that does something and is placed between opening <% and closing %> scriptlet tags. Here’s an example:
<!DOCTYPE html>
<html>
  <head>
    <title>Coin Flipper</title>
  </head>
  <body>
    <h1>Coin Flipper</h1>
    <p>Flipping a coin...</p>
    <% if(Math.random() < .5){ %>
      <p>Heads!</p>
    <% } else{ %>
      <p>Tails!</p>
    <% } %>
    <hr>
    <p>Refresh to flip again.</p>
  </body>
</html>
This code uses an if statement and the Math.random() function to show Heads! or Tails! randomly.
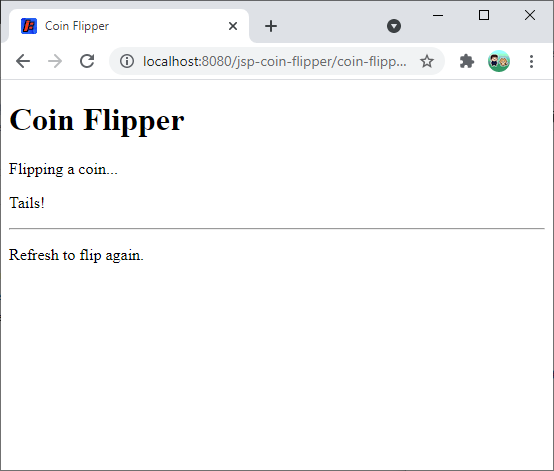
Notice a couple things in the above code:
- You can use regular Java code, like
ifstatements andforloops. - The Java code’s flow determines the HTML output. For example this code only prints out
<p>Heads!</p>or<p>Tails!</p>depending on the result of theifstatement. - Scriptlets can contain multiple lines of code.
- You can split the Java code into multiple scriptlets. For example one scriptlet can contain the opening of the
ifstatement, and another scriptlet contains the closing bracket.
You can view or download this example project here:
Expressions
An expression is Java code that evaluates to a value and is placed between opening <%= and closing %> expression tags. The above date.jsp example used an expression to output the current date. Here’s another example:
<!DOCTYPE html>
<html>
  <head>
    <title>Unix Time</title>
  </head>
  <body>
    <h1>Unix Time</h1>
    <p>The current Unix time is: <%= System.currentTimeMillis() %></p>
    <hr>
  <p>Click <a href="https://en.wikipedia.org/wiki/Unix_time">here</a> to learn more.</p>
  </body>
</html>
This code uses an expression to insert the value returned from the System.currentTimeMillis() function into the HTML of the page.
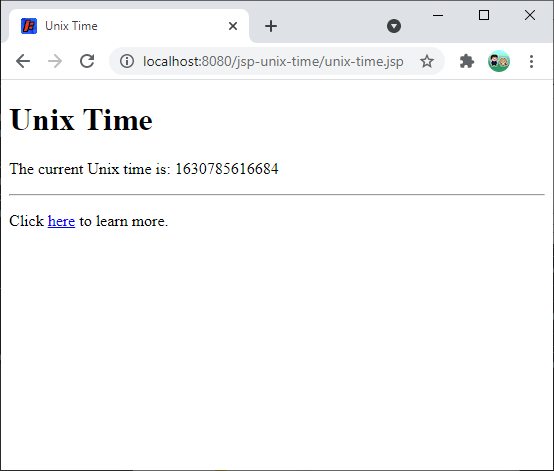
You can view or download this project here:
Mixing Scriptlets and Expressions
You can use both scriptlets (code that does something) and expressions (code that evaluates to a value) in the same JSP file. Here’s an example:
<% String message = "hello!"; %>
<p>Here's some HTML</p>
<p>Message: <%= message %></p>
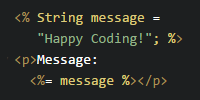
This code contains a scriptlet that creates a message variable. Then it uses an expression to insert the value of that variable into the HTML.
Here’s a more complicated example:
<% String[] animals = {
  "lions", "tigers", "bears", "lizards", "zebras",
  "kangaroos", "elephants", "cows", "monkeys", "anteaters"
  }; %>
<!DOCTYPE html>
<html>
  <head>
    <title>JSP Zoo</title>
  </head>
  <body>
    <h1>JSP Zoo</h1>
    <p>Here are the animals we visited at the zoo:</p>
    <% for(int i = 0; i < animals.length; i++){ %>
      <p><%= i+1 %>: <%= animals[i] %></p>
    <% } %>
  </body>
</html>
This code uses a scriptlet to define an array named animals. Then it uses another scriptlet to iterate over that array using a for loop. Inside the for loop, it uses an expression to print the index, and the animal at that index. Finally, it uses another scriptlet to close the loop.
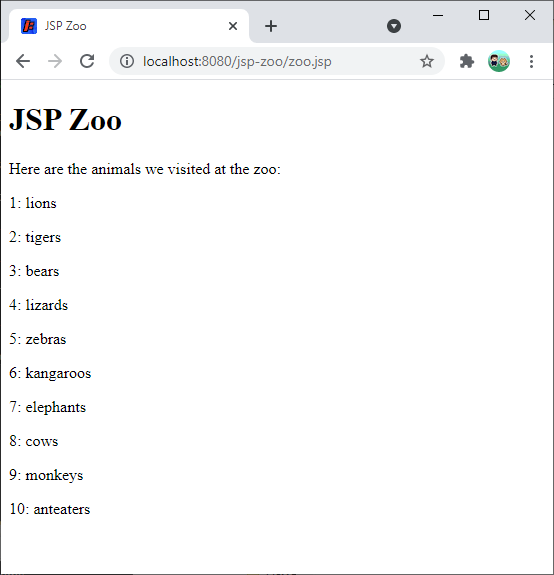
You can view or download this project here:
Directives
So far, you’ve learned that scriptlets contain code that does something, and expressions contain code that evaluates to a value.
Directives are placed between opening <%@ and closing %> tags, and they contain code that tells the page itself what to do.
Directives include things like Java import statements, like in the first line of this code:
<%@ page import="java.util.Date" %>
<!DOCTYPE html>
<html>
	<head>
		<title>JSP Date</title>
	</head>
	<body>
		<h1>JSP Date</h1>
		<p>The current date is: <%= new Date() %></p>
	</body>
</html>
One handy directive is the include directive, which lets you include content from other files. For example, you can use this to create a navigation bar in one file, and then include that file in all of your JSP pages.
Save this content to a file named header.html:
<div style="border: thin solid black; padding:5px;">
  <a href="index.jsp">Home</a>
  <a href="about.jsp">About</a>
  <a href="pictures.jsp">Pictures</a>
</div>
Now that you have that file, you can use the include directive to include it in your JSP pages:
<!DOCTYPE html>
<html>
  <head>
    <title>About</title>
  </head>
  <body>

    <%@ include file = "header.html" %>

    <p>About me: I'm an example!</p>
  </body>
</html>
The include directive inside the <body> tag copies the content from header.html into the content of the JSP file, so you see the header in your page:
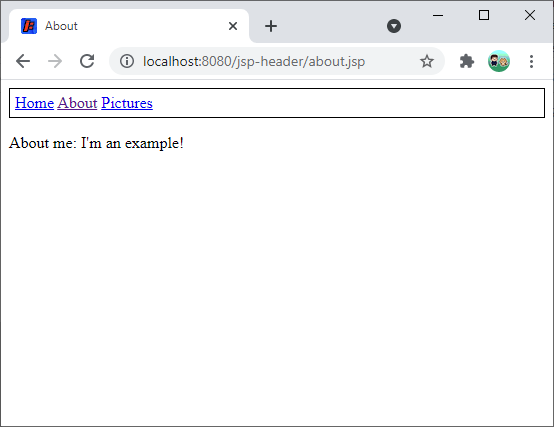
This makes it easy to share content between multiple pages. If you had 100 pages that included the header, you would only need to change one file to change the header on every page.
You can view or download this project here:
Errors
Remember that JSP files are automatically compiled into servlet classes. That means you have to pay attention to the output, so you know when errors happen.
Let’s take this example JSP:
<!DOCTYPE html>
<html>
  <head>
    <title>Error Example</title>
  </head>
  <body>
    <% String messageOne = "hello"; %>
    <p>Message: <%= messageTwo %></p>
  </body>
</html>
This code creates a messageOne variable, but then tries to read a messageTwo variable. The messageTwo variable doesn’t exist, so this code won’t compile.
If you try to visit this page, you’ll see an error:
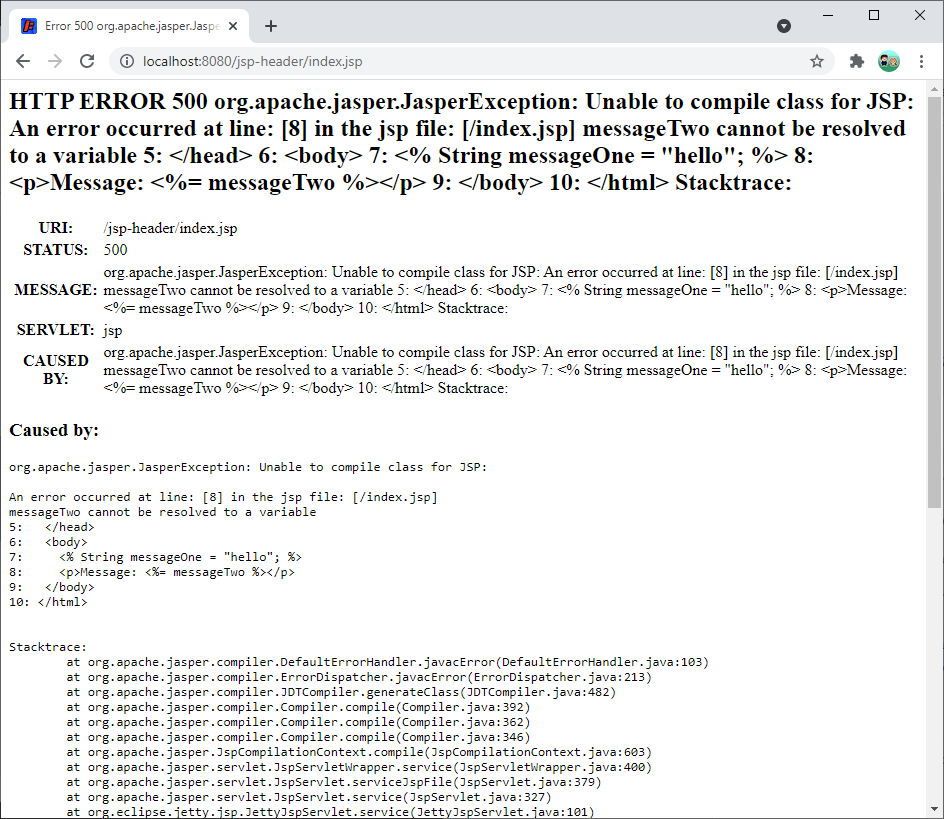
This is overwhelming at first, but you can use this to figure out what the error is.
org.apache.jasper.JasperException: Unable to compile class for JSP:

An error occurred at line: [8] in the jsp file: [/index.jsp]
messageTwo cannot be resolved to a variable
5:   </head>
6:   <body>
7:     <% String messageOne = "hello"; %>
8:     <p>Message: <%= messageTwo %></p>
9:   </body>
10: </html>
This is telling you that the error is on line 8, and that it can’t find the messageTwo variable.
For better or worse, encountering errors like this is a natural part of programming! If you can’t figure out where an error is coming from, try to isolate the problem in a smaller example.
Mixing Servlets and JSP Files
Now you know how to use servlets. A servlet looks like this:
import java.io.IOException;
import java.io.PrintWriter;
import java.util.Date;
import jakarta.servlet.annotation.WebServlet;
import jakarta.servlet.http.HttpServlet;
import jakarta.servlet.http.HttpServletRequest;
import jakarta.servlet.http.HttpServletResponse;

@WebServlet("/my-servlet")
public class MyServlet extends HttpServlet {

	@Override
	public void doGet(HttpServletRequest request, HttpServletResponse response) throws IOException {
		PrintWriter out = response.getWriter();
		out.println("<!DOCTYPE html>");
		out.println("<html>");
		out.println("<head>");
		out.println("<title>My Web App</title>");
		out.println("</head>");
		out.println("<body>");
		out.println("<h1>My Web App</h1>");
		out.println("<p>The current time is: " + new Date().toString() + "</p>");
		out.println("</body>");
		out.println("</html>");
	}
}
And you know how to use JSP files. A JSP file looks like this:
<%@ page import="java.util.Date" %>
<!DOCTYPE html>
<html>
	<head>
		<title>JSP Date</title>
	</head>
	<body>
		<h1>JSP Date</h1>
		<p>The current date is: <%= new Date() %></p>
	</body>
</html>
There are pros and cons to each approach. Servlets make it easier to use Java code, but it’s annoying to program HTML in them. On the other hand, JSP files make it easier to write HTML, but it can be annoying to include complicated Java logic inside a JSP file.
You can use a mix of both servlets and JSP files to get the best of both worlds: you can use servlets to run your Java code, and you can use JSP files to render a page using parameters generated from the servlet.
For example, let’s redo the above example to use a servlet that formats the current time and passes it as a parameter to a JSP file for rendering.
Here’s what the servlet would look like:
package io.happycoding.servlets;

import java.io.IOException;
import java.text.SimpleDateFormat;
import java.util.Date;
import jakarta.servlet.annotation.WebServlet;
import jakarta.servlet.http.HttpServlet;
import jakarta.servlet.http.HttpServletRequest;
import jakarta.servlet.http.HttpServletResponse;
import jakarta.servlet.ServletException;

@WebServlet("/date")
public class DateServlet extends HttpServlet {

  @Override
  public void doGet(HttpServletRequest request, HttpServletResponse response)
      throws IOException, ServletException {

    SimpleDateFormat dateFormat =
        new SimpleDateFormat("hh:mm aa 'on' EEEE, MMMM dd, yyyy");
    Date now = new Date();
    String formattedDate = dateFormat.format(now);

    request.setAttribute("date", formattedDate);
    request.getRequestDispatcher("/date-view.jsp").forward(request,response);
  }
}
This code uses the SimpleDateFormat class to format the current time. It then uses the request.setAttribute() function to include the formatted date in the request, and then it uses the request.getRequestDispatcher("/date-view.jsp").forward(request, response) function to send the request to a JSP file.
Next, the date-view.jsp file handles the request:
<!DOCTYPE html>
<html>
  <head>
    <title>Current Time</title>
  </head>
  <body>
    <h1>Current Time</h1>
    <p>The current time is <%= request.getAttribute("date") %></p>
  </body>
</html>
Notice the <%= request.getAttribute("date") %> expression, which gets the date attribute that the servlet added.
This lets you keep all your Java logic in your servlet classes, and your JSP files output the content without worrying about complicated logic code.
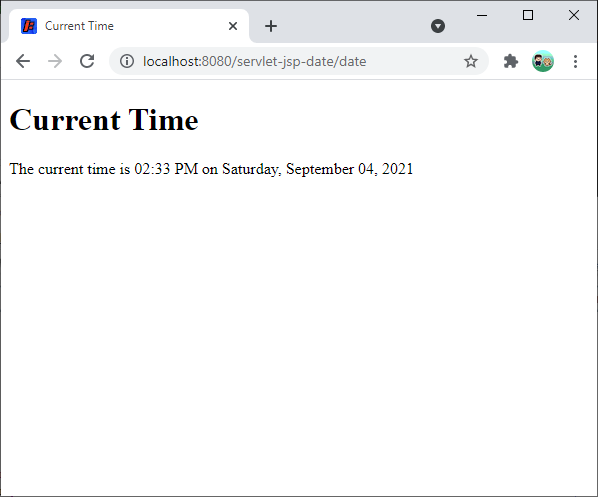
You can view or download this example here:
Expression Language
The example above uses the request.getAttribute("date") in JSP to make it more obvious what’s happening, but you can use expression language to shorten this.
Expression language (or EL) provides a shorthand syntax for doing things like accessing attributes. With EL, you can use ${date} instead of <%= request.getAttribute("date") %>:
<!DOCTYPE html>
<html>
  <head>
  <title>Current Time</title>
  </head>
  <body>
    <h1>Current Time</h1>
    <p>The current time is ${date}</p>
  </body>
</html>
Hiding JSP Files
The above example has a potential problem: the date-view.jsp file is publicly available. That means users can visit date-view.jsp directly, which shows a page like this:
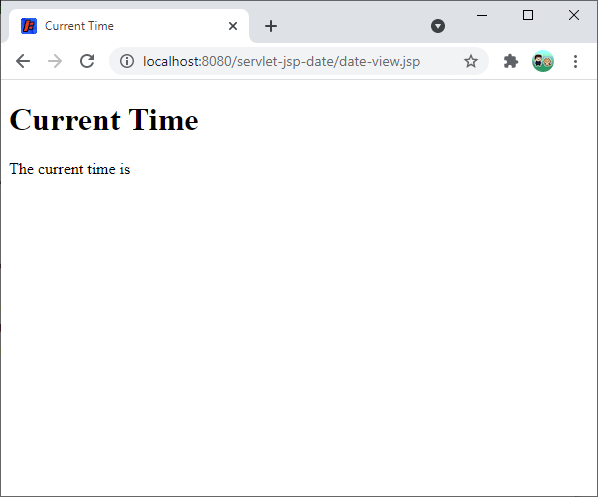
Notice that the current time is blank. Because the user navigated to date-view.jsp directly, the servlet wasn’t triggered, so it didn’t add the current time to the request’s attributes.
You can prevent users from seeing buggy pages like this by hiding your JSP files.
To hide a JSP file, create a WEB-INF directory and move your JSP files into that directory.
-
If you’re creating your web app directory manually, you already have a
WEB-INFdirectory that contains yourclassesdirectory. Your web app directory would look like this:MyWebApp/index.htmlWEB-INF/date-view.jspclasses/io/happycoding/servlets/DateServlet.class
-
If you’re using Maven to create your web app directory (or a
.warfile), put yourWEB-INFdirectory in thewebappdirectory, like this:MyWebApp/pom.xmlsrc/main/java/io/happycoding/servlets/DateServlet.java
webapp/index.htmlWEB-INF/date-view.jsp
Now that you have your date-view.jsp file hidden inside the WEB-INF directory, modify the DateServlet class to forward the request to the new location of date-view.jsp:
package io.happycoding.servlets;

import java.io.IOException;
import java.text.SimpleDateFormat;
import java.util.Date;
import jakarta.servlet.annotation.WebServlet;
import jakarta.servlet.http.HttpServlet;
import jakarta.servlet.http.HttpServletRequest;
import jakarta.servlet.http.HttpServletResponse;
import jakarta.servlet.ServletException;

@WebServlet("/date")
public class DateServlet extends HttpServlet {

  @Override
  public void doGet(HttpServletRequest request, HttpServletResponse response)
      throws IOException, ServletException {

    SimpleDateFormat dateFormat =
        new SimpleDateFormat("hh:mm aa 'on' EEEE, MMMM dd, yyyy");
    Date now = new Date();
    String formattedDate = dateFormat.format(now);

    request.setAttribute("date", formattedDate);
    request.getRequestDispatcher("/WEB-INF/date-view.jsp").forward(request,response);
  }
}
This code now forwards the request to /WEB-INF/jsp/date-view.jsp. Your code is allowed to access the WEB-INF directory, but users can’t see what’s inside it. This lets you keep things mostly hidden from users.
Try navigating to the date-view.jsp file directly. You should see a 404 error instead, because the file is not accessible directly anymore.
You can view or download this example here:
MVC
This approach of using servlets to contain your logic and JSP files to contain your rendering code is a big part of the Model-View-Controller design pattern, or MVC.
MVC is the idea of separating your data from your logic from your rendering. It lets you focus on one thing at a time, and makes debugging and making changes to one piece easier. You can use this idea in any type of programming, but when developing server code it generally works like this:
- Your model is the data structures that hold your site’s data. This can be things like a database or
ArrayListobjects that hold data. - Your controller is your servlet classes. These read from your model and execute logic.
- Your view is your JSP files. These take parameters from your controller to render a page.
You don’t have to worry about getting everything exactly correct, and concepts like MVC are more of a way of thinking about organization than it is a strict set of rules. But keeping your data, your logic, and your rendering separate will definitely make your life easier. And this approach of splitting your servlets and your JSP files will help with that.
Static Files
You can still use static files alongside your servlets and JSP files. You can have static HTML files that link to servlets, and JSP files that link to static HTML files, and everything in between.
Remember: the end result that gets sent to your browser is plain old HTML!

