Databases


Databases
- Rows
- Tables
- Databases
- Creating a Database
- SQL
- JDBC
- Sanitizing Data and Prepared Statements
- (Not) Storing Passwords
- Database Services
- AWS Relational Database Service
- Google Cloud SQL
- Database Design
- From Database Tables to Java Classes
- Putting it all Together
- Summary
- Homework
So far, we’ve been keeping all of our data in memory, using data structures like ArrayList and HashMap. This is fine for small example projects, but it has a pretty huge downside: whenever your code is restarted (any time you make a change), all of your memory is reset and you lose all of your data.
Obviously that’s not going to work for real web applications, which are updated all the time and have to maintain data over multiple years!
Using what you’ve learned so far, you might start thinking about storing your data in a file. For example, you could read from the file at startup, and write to it whenever your data changes. That might work, but it makes it harder to update your server, and many server hosts don’t even give you access to the underlying file system! You’ll also run into a problem if your data takes up more memory than your server has. That’s a hard problem to try to solve yourself.
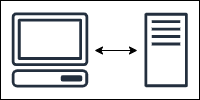
That’s where databases come in handy. A database lets you store your data separately from your main server code, instead of storing all of it in memory or in a file that you manage yourself.
To learn more about databases, let’s start with the simple stuff and work our way up from there.
Rows
In a database, all data is organized in rows. A row is just a collection of values, organized by column. Here’s one row:
| Name | Birth Year | Favorite Color |
|---|---|---|
| Ada | 1823 | Green |
This row represents a single object with a name of Ada, a birth year of 1823, and a favorite color of green. You can think of a row as a list of properties or facts about a single object or event.
Tables
A table is a set of rows.
People
| Name | Birth Year | Favorite Color |
|---|---|---|
| Ada | 1823 | Green |
| Grace | 1906 | Red |
| Stanley | 2007 | Pink |
You can think of a table as a list of objects. Each row represents a different object, and the columns describe the object in each row of table. The People table represents one person with a name of Ada, birth year of 1823, and favorite color of green; another person with a name of Grace, a birth year of 1906, and a favorite color or red, and a third person with a name of Stanley, birth year of 2007, and favorite color of pink.
You can think of a table as a class, and each row of that table as an instance of that class. A table defines the properties that each row must have, just like a class defines the variables that each instance must have.
Tables and columns can have various properties and rules: for example, a table can mark a column as a key, which basically means that each row has a unique value for that column. We might mark the name column as a key, which means that two rows can’t have the same name. As we add rows, two people can have the same birth year or the same favorite color, but they can’t have the same name. (This is why most websites you join require a unique username to log in.)
This kind of rule makes it easier to reference a particular row of a table. For example, if the table contains 1000 rows, we could say something like “find me the row that represents a person with a name of Kevin and tell me their birth year and favorite color.”
Staying at a high level for now, it’s also possible to reference multiple rows at a time. For example, you might say something like “find me all of the rows that represent people with a favorite color of blue, and tell me all of their names.” There’s nothing too magical going on (yet). It’s just a table of data that you can talk about exactly like any other table of data.
Databases
A database is a collection of tables. In addition to the above table, we might also have this table:
Quotes
| Name | Quote | Year |
|---|---|---|
| Ada | That brain of mine is something more than mortal; as time will show. | 1843 |
| Grace | I've always been more interested in the future than in the past. | 1991 |
| Stanley | Meow | 2009 |
| Grace | From then on, when anything went wrong with a computer, we said it had bugs in it. | 1984 |
| Ada | Mathematical Science shows what is. It is the language of the unseen relations between things. | 1841 |
| Grace | Please cut off a nanosecond and send it over to me. | 1986 |
| Stanley | Purr | 2017 |
| Stanley | Growl | 2013 |
This table represents a list of quotes, where each row is a quote said by one of the people in our People table. So our database contains two tables, and those tables describe a relation between names, people objects, and quote objects. For example, a person can only have one favorite color, but they can have multiple quotes. This ability to describe relations between objects is why we call them relational databases.
Creating a Database
Now that we know what a database is, let’s actually create one.
You can think of creating a database as three things:
- The physical storage. The data has to go somewhere: either on your local harddrive or in a service like Amazon RDS or Google Cloud Sql.
- A driver (which is just a Java library) that lets you interact with the database. Each database generally has its own
.jarfile that you need to download to use the database from Java. - Code that creates tables, modifies rows in those tables, and fetches data. You usually use SQL to interact with a database.
Just to test things out, let’s create a Derby database. Derby is just a regular database that’s easy to use on your local computer. I like to use Derby to test things out locally before signing up for a real database.
Go to Derby’s download page and download the latest version of Derby. We care about the derby.jar file in the download.
Now let’s write a simple Java program just to test out some basic databse concepts. Note that this isn’t a server yet, it’s just a regular Java class.
import java.sql.Connection;
import java.sql.DriverManager;
import java.sql.SQLException;
import java.sql.Statement;

public class Main {

	public static void main(String[] args){
		try {
			System.out.println("Connecting to database.");
			String connectionUrl = "jdbc:derby:C:/Users/kevin/Desktop/DerbyDatabase;create=true";
			Connection connection = DriverManager.getConnection(connectionUrl);

			Statement createPeopleTableStatement = connection.createStatement();
			createPeopleTableStatement.executeUpdate("create table People(name varchar(16), birthYear integer, favoriteColor varchar(16), primary key(name))");
			System.out.println("People table created.");
		}
		catch (SQLException e) {
			e.printStackTrace();
		}

		System.out.println("Done.");
	}
}
Compile and run this class. Make sure derby.jar is on your classpath when you run this code!
This code does a few things:
- The
connectionUrlincludes three things we care about:-
jdbc:derbyspecifies the type of database we’re connecting to. In this case, we’re connecting to a Derby database. -
C:/Users/kevin/Desktop/DerbyDatabasespecifies a location on your local hard drive to use as a databse. Change this to use a directory on your own computer. -
create=truetells Derby to create a database if there isn’t one already.
-
- The
Connection connection = DriverManager.getConnection(connectionUrl);line uses ourconnectionUrlto connect to (and create) the Derby database. This line requiresderby.jarto be on your classpath. - The
createPeopleTableStatement.executeUpdate("create table People(name varchar(16), birthYear integer, favoriteColor varchar(16), primary key(name))");line passes SQL into theexecuteUpdate()function. We’ll talk more about SQL in a second, but this line creates a table inside our database.
Now you can go to the directory you specified in your connectionUrl, and you should see a bunch of files in it. Note that none of these files are meant to be human readable! This is your database, and you can now use SQL to interact with it.
Let’s modify our test program to add some rows to our table:
import java.sql.Connection;
import java.sql.DriverManager;
import java.sql.SQLException;
import java.sql.Statement;

public class Main {

	public static void main(String[] args){
		try {
			System.out.println("Connecting to database.");
			String connectionUrl = "jdbc:derby:C:/Users/kevin/Desktop/DerbyDatabase";
			Connection connection = DriverManager.getConnection(connectionUrl);

			Statement insertRowStatement = connection.createStatement();

			insertRowStatement.executeUpdate("insert into People (name, birthYear, favoriteColor) values('Ada', 1823, 'Green')");
			System.out.println("Added Ada to the People table.");

			insertRowStatement.executeUpdate("insert into People (name, birthYear, favoriteColor) values('Grace', 1906, 'Red')");
			System.out.println("Added Grace to the People table.");

			insertRowStatement.executeUpdate("insert into People (name, birthYear, favoriteColor) values('Stanley', 2007, 'Pink')");
			System.out.println("Added Stanley to the People table.");
		}
		catch (SQLException e) {
			e.printStackTrace();
		}

		System.out.println("Done.");
	}
}
Now our program uses SQL to add three rows to the table. We’ll talk more about what the SQL is doing in a minute. For now, let’s make our program fetch results from the table:
import java.sql.Connection;
import java.sql.DriverManager;
import java.sql.ResultSet;
import java.sql.SQLException;
import java.sql.Statement;

public class Main {

	public static void main(String[] args){
		try {
			System.out.println("Connecting to database.");
			String connectionUrl = "jdbc:derby:C:/Users/kevin/Desktop/DerbyDatabase";
			Connection connection = DriverManager.getConnection(connectionUrl);

			Statement getRowStatement = connection.createStatement();
			ResultSet resultSet = getRowStatement.executeQuery("select * from People");
			while(resultSet.next()){
				String name = resultSet.getString("name");
				int birthYear = resultSet.getInt("birthYear");
				String favoriteColor = resultSet.getString("favoriteColor");
				System.out.println(name + " was born in " + birthYear + ". Their favorite color is " + favoriteColor + ".");
			}
		}
		catch (SQLException e) {
			e.printStackTrace();
		}

		System.out.println("Done.");
	}
}
Now our program uses SQL to fetch results from our database, and it loops over those results to print the information to the console:
Connecting to database.
Ada was born in 1823. Their favorite color is Green.
Grace was born in 1906. Their favorite color is Red.
Stanley was born in 2007. Their favorite color is Pink.
Done.
Note that we could have done all of the above (creating a table, adding rows, and fetching data) in a single program, but I wanted to show you that our data is persisting between runs to our program. Our data is no longer lost whenever we restart our code!
SQL
Let’s take a closer look at the SQL that we just used in the above code.
Most databases use SQL (structured query language) to provide access to their data. Like its name suggest, SQL allows us to query the database using statements. There are a few types of statements:
Create
A create statement looks like this:
create table People(name varchar(16), birthYear integer, favoriteColor varchar(16), primary key(name))
This tells our database to create a table named People, and to add columns for name, birthYear, and favoriteColor. It also marks the name column as a primary key, which means all of the values in that column must be unique.
Notice that each column is also given a type: name and favoriteColor are both varchar(16), which means that they hold text that can’t be longer than 16 characters. If you try to insert a value that’s longer than 16 characters, you’ll get an error. The birthYear column is an integer, which is just a whole number.
You can read more about SQL types on W3Schools, or by doing a Google search. But you’ll notice that many types include a size component, like varchar above. This helps minimize the size our database takes up: there’s no point making room for a million characters if nobody’s name will be that long. Maybe more importantly: since you’ll probably want to use a database service (which costs money), you don’t want to pay for storage that you’ll never use!
Also note that different databases support different types, so always consult the documentation for your database. Derby’s type documentation is here.
You don’t have to become an expert on all of this right now, as long as you remember that database columns have types, which you specify when you execute a create statement.
You only have to execute create statements when you’re creating a table, which usually only happens during setup. So it’s pretty common to have a standalone program that just contains the setup code, separate from the code that actually uses the database. Also note that most database services have a user interface that you can use to create tables instead of doing it through SQL.
Insert
An insert statement looks like this:
insert into People (name, birthYear, favoriteColor) values('Ada', 1823, 'Green')
This statement tells the database to add a row to the People table with a name of 'Ada', a birthYear of 1823, and a favoriteColor of 'Green'. Note that the column names are in the same order as the values, which allows us to specify whatever columns we want. For example:
insert into People (name, favoriteColor) values('Kevin', 'Black')
This would insert a row with a name of Kevin and a favoriteColor of Black, but no birthYear. This birthYear in this row would not have a value, or in other words it would be null.
| Name | Birth Year | Favorite Color |
|---|---|---|
| Kevin | null |
Black |
Note that primary key columns must contain a value (in other words, they cannot be null). You can also add this restriction to other columns by including a not null modifier during table creation.
Select Statements
A select statement looks like this:
select * from People
This statements selects every column from the People table, which returns the whole table. We can select specific columns:
select name, birthYear from People
This would return a view of the table that did not include the favoriteColor column. This can be useful when you only care about a few of the columns.
Similarly, you can limit which rows are returned using a where clause:
select name, birthYear from people where name='Ada'
This statement would only return rows that have a name of Ada. Since name is unique, this will only return 1 row (or zero rows if the table does not contain that name).
Update Statements
An update statement looks like this:
update People set favoriteColor='Blue' where name='Ada'
This statement changes the row with a name of Ada to have a favoriteColor of Blue.
Sometimes I find it helpful to think about the where clause being first. I’d read this statement as “Look in the People table, find rows where the name is Ada, and set the favoriteColor to Blue”.
More Advanced SQL
This tutorial is meant to give you a basic understanding of databases, but there is a ton of other stuff you can do in SQL. I encourage you to read more on W3Schools or by doing Google searches. The goal of this tutorial is to give you a foundation that you can build on using your own research.
Here are some things you might want to look into:
- Join statements allow you to combine results from multiple tables
- You can use SQL to do things like take the average of a column, find the maxium, or compute totals. It’s usually better to do this in SQL than it is to do it in Java.
- You can create views into your table that allow you to split your logic into multiple steps.
Again, don’t be afraid to do your own research!
JDBC
Now we understand the basics of how SQL works. But SQL just modifies or fetches data. To actually build logic around that data, we have to use a language like Java.
The Java classes that allow you to execute SQL and interact with the returned data comprise the JDBC (Java database connectivity) library. This library comes standard with Java, so you don’t have to download anything. You can read more about them in the Java API under the java.sql package, but we’ve already seen a few classes:
-
Connectionis the actual connection to the database. You create it using theDriverManager.getConnection()function, which generally takes a URL parameter. This also requires the JDBC driver to be on the classpath: in our case, that was theDerby.jarfile. -
Statementrepresents a statement. You create it using theconnection.createStatement()function, and then you callstatement.executeUpdate(sql)to execute a create or update statement, orstatement.executeQuery(sql)to execute a select statement. -
ResultSetcontains the rows returned from a select statement. TheResultSetis a pointer to a row, and you iterate over the results by calling thenext()function. Use thenext()function inside awhileloop to iterate over all of the rows, or use it inside anifstatement if the results should only contain one row.
There are a ton of other things you can do with JDBC and SQL. You now know enough to start Googling stuff you need to do! (Searches like “JDBC get average of column” will return a ton of results.)
Sanitizing Data and Prepared Statements
If you’re using input from a user to write SQL, you need to write your code in a way that prevents users from hijacking your code to interact with your database. For example, consider this function:
public void setFavoriteColor(Connection connection, String person, String color){
	try{
		Statement updateStatement = connection.createStatement();
		updateStatement.executeUpdate("update People set favoriteColor='" + color + "' where name='" + person + "'");
	}
	catch(SQLException e){
		e.printStackTrace();
	}
}
This function takes a person and color parameter and uses that to set the favoriteColor of the row with that name. This will work fine as long as we call it with arguments like Grace and Yellow or Ada and Blue.
But what if a user is devious and uses a name of Robert' or name='Ada? Think about what our SQL looks like if we call setFavoriteColor(connection, "Robert' or name='Ada", "polka dot"). It ends up looking like this:
update People set favoriteColor='polka dot' where name='Robert' or name='Ada'
Now our SQL finds rows with a name of Robert or a name of Ada, and sets the favoriteColor of those rows to polka dot. In other words, this modifies the Ada row even though the user isn’t the owner of that row!
This type of hack is called SQL injection, and it’s one of the most common hacks. This can be used to get access to information, change your data, or even delete your database entirely.

You could try writing logic that prevents SQL injection by disallowing certain characters, but you’re probably not going to be able to think of every combination. The problem is that we’re mixing logic and data in our SQL, so it’s easy for a user to change the logic part through the data part.
We can use prepared statements to separate our logic from our data so this doesn’t happen. Prepared statements are a way of writing SQL so you specify the logic first and then pass the data into that logic, similar to how you can write a function and pass in parameters.
Here’s our setFavoriteColor() function using a prepared statement:
public static void setFavoriteColor(Connection connection, String person, String color){
		try{
			PreparedStatement preparedStatement = connection.prepareStatement("update People set favoriteColor=? where name=?");
			preparedStatement.setString(1, color);
			preparedStatement.setString(2, person);
			preparedStatement.executeUpdate();
		}
		catch(SQLException e){
			e.printStackTrace();
		}
	}
This function now uses the PreparedStatement class, which creates a prepared statement. Notice the SQL we’re passing into the connection.prepareStatement() function contains ? question marks, which are parameters. Then we called the preparedStatement.setString() function to set those parameters, and finally we called the preparedStatement.executeUpdate() function to actually run the statement.
You should use prepared statements whenever you’re dealing with user input. Another benefit of using prepared statements is that it’s more efficient to reuse a PreparedStatement instance than it is to always execute raw SQL. This means that you should probably create your PreparedStatement instances at startup instead of inside a class like the above example did. However, note that the PreparedStatement class is not thread-safe, so make sure you use the techniques we talked about in the /tutorials/java-server/thread-safety!
You can find more info about prepared statements in JDBC in this tutorial.
(Not) Storing Passwords
One more note before we actually create a “real” database: don’t store passwords as plain-text in your database!
No matter how secure we think our database is, hacks still happen all the time. SQL injection, storing the wrong file in a public repository, bugs in our code… there are just too many risks out there. We want to make sure that even if a hacker gets a copy of our database, they still don’t have access to our user’s passwords.
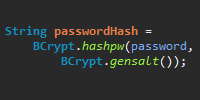
So, you should never store a password directly in your database. Instead, you should hash the password, which means you need to convert the password into a new value that can’t be converted back to the password. You don’t have to do it yourself! Use a library that supports hashing algorithms like bcrypt or PBKDF2. You can find more info in this discussion.
For example, running a String value of password through bcrypt gives you a value like $2a$10$VxsYQeOqRqUYyGLflUrTp.BO009BIHb3e9N07evJ7DvFBpkNnXeK6. (You can try it yourself here.) It’s impossible to go from that big ugly value back to password, so if a hacker gets access to your database, they still don’t have your users’ passwords.
So, when a user registers, you send their password through a hash function and store the hashed value in your database. Then to check a user’s password when they login, you send the password they entered through the same algorithm to get the hashed value, and you check that hashed value against the hashed value you stored in your database when the user registered. (It gets a little more complicated than that, but like I said, just use a library that handles all of this for you!)
Now if a hacker wants to figure out a user’s password, they would have to run potential passwords through the same hash function and check those hashed values against what’s in your database. However, users tend to have predictable passwords, like password, and those have already been passed through various hash functions to make it easier for hackers to spot them in hacked databases. These results are called rainbow tables, which is just a colorful word that means a list of common passwords and their hashes.
To get around this problem, you can salt your passwords, which basically means appending a value to the password before you hash it. For example, you might use a salt value of my_salt_value_123 (in real life you would generate a different random salt for each user), so a user’s password of password becomes my_salt_value_123_password, which you then pass through a hash function to store in your database. You can find more info in this discussion, but the idea is to make it as hard as possible for a hacker to get your users’ passwords.
Database Services
So far, we’ve been using Derby to create a database on our own computers. That’s good for testing things out, and it’s a good idea to have a local version of your database that you use for testing instead of using real data.
But just like we used a hosting service like AWS Elastic Beanstalk or Google App Engine to host our servers so other people could use them, we can use a database service to host our database so our server can interact with it.
I’m going to walk through two options below, but there are a ton of database services out there. If you’ve already paid for file hosting, you might want to check whether you already have a database. Also note that you don’t have to match your hosting service and your database service: you can use an AWS database from a Google App Engine server and vice-versa. Which one you choose is really up to you. I’d suggest maybe trying out a few different options and seeing which one works best (and is cheapest) for what you’re trying to do.
The steps for hooking up a database service are usually the same no matter which service you choose:
- Register for an account and setup your service.
- Download the JDBC driver, which is usually just a
.jarfile. - Create tables using SQL or the user interface.
- Write code that access the database using the URL the service gives you.
Let’s walk through that process for two different database services.
AWS Relational Database Service
Like its name suggests, AWS RDS (relational database service) is part of Amazon Web Services and provides a database service. In other words, it lets you host a database in the Amazon cloud. To set up an AWS RDS database:
- Login to the RDS dashboard.
- Click the
Get Started Nowbutton. - That takes you to a tab where you can select the type of database you want. Any of these will work, but for now just choose
MySQL. - The next step asks you whether this is a production database. In the future you’ll want to choose production, but for now let’s choose the
dev/testoption because it’s cheaper. - The next step lets you specify database settings. The default settings are probably fine, and you can specify whatever database name, username, and password you want.
- The final step offers advanced settings. The default settings are fine, but note the backup settings here. Backups are a life saver if something bad ever happens to your database. You can also set that up later.
- Finally, click the
Launch DB Instancebutton!
That will launch your database, which takes a few minutes. When it completes, go back to the RDS dashboard and click the Instances tab on the left. You should see your database listed here. Click on it, and notice the Endpoint it gives you. This is the URL you’ll use to connect to your database!
Next, we have to download a JDBC driver. Since we chose a MySQL database, we need the MySQL JDBD driver. Go to the MySQL JDBC driver download page, download the archive file, and unzip it. That contains a mysql-connector-java-5.1.42-bin.jar file. Add that to your classpath!
Now we can write code that connects to our AWS RDS database:
System.out.println("Connecting to database.");
String connectionUrl = "jdbc:mysql://myrdsdatabase.YOUR_ID.us-east-1.rds.amazonaws.com:3306";
Connection connection = DriverManager.getConnection(connectionUrl, "YOUR_USERNAME", "YOUR_PASSWORD");

Statement createeDatabaseStatement = connection.createStatement();
createeDatabaseStatement.executeUpdate("create database MyDatabase");
System.out.println("MyDatabase created.");

Statement useDatabaseStatement = connection.createStatement();
useDatabaseStatement.executeUpdate("use MyDatabase");
System.out.println("Using MyDatabase.");

Statement createPeopleTableStatement = connection.createStatement();
createPeopleTableStatement.executeUpdate("create table People(name varchar(16), birthYear integer, favoriteColor varchar(16), primary key(name))");
System.out.println("People table created.");
This code uses the endpoint URL that was listed in the AWS RDS dashboard, and passes that in along with the username and password you specified when you created the database.
Then it uses a create database statement to create a database named MyDatabase. Our AWS RDS can actually contain multiple databases (which can each contain multiple tables), so this statement creates a database in our AWS RDS. We only have to do this once.
The use MyDatabase statement tells the connection to use the database we just created. Because an AWS RDS can contain multiple databases, we need to do this whenever we create a connection.
The rest of the code is identical to the code we used with our local Derby database. Try adding rows to the table and then printing the data out!
Google Cloud SQL
Like its name suggests, Google Cloud SQL is part of Google Cloud Platform and provides a database service. In other words, it lets you host a database in the Google cloud. To set up a Google Cloud SQL database:
- Go to the Cloud SQL dashboard.
- Click the
TRY IT FREEbutton. - It’ll ask you to set up a payment account. Check out the Google Cloud SQL price guide here (running a small database for a month costs about 7 dollars).
- After you setup your payment account, you’ll be redirected to the Google Cloud Platform console.
- Create a new Google Cloud Platform project, or choose an existing project if you’re already using App Engine for server hosting.
- Click the SQL link in the list on the left.
- Click the
Enable billingbutton, which links the payment account you just created to your Google Cloud Platform project. - Click the
Create instancebutton. - Choose a database option. Let’s choose MySQL for now. Click the
Nextbutton. - Choose an instance type. The default recommendation (second generation) is fine.
- Set an instance ID (it can be whatever you want). The default seetings are fine for most things. Or you might want to downgrade your machine type to the smallest possible (a shared micro machine) because it’s the cheapest and will probably be enough for now. Similarly, you could downgrade the storage to HDD instead of SSD. You can also set up automatic backups and logging. Also make sure you setup a root password, and remember this because you’ll need it in a minute. When you’re done, click the
Createbutton down at the bottom.
That will launch your database. When it completes, go back to the Cloud SQL console. You should see your database listed here. In the Overview tab, note the IPv4 address listed in the Properties section. This address is your connection URL!
By default, Goole Cloud SQL has strict limitations about who can access your database. You can find more info about connecting to your database here, but for now let’s just set it so you can acces your database from your computer. Click on the Access Control tab, and then click the Add network button. In the dialog that pops up, enter 0.0.0.0/0 into the Newtork input box and click the Done button. This makes it so you can access your database from any computer- but don’t worry, you still need a username and password to do anything. Click the Save button. Note: In the long-term you probably want to just whitelist your own IP address (and the IP address of the server running your code), or you want to connect using the steps outlined here. But whitelisting everything will work for now.
Next, we have to download a JDBC driver. Since we chose a MySQL database, we need the MySQL JDBD driver. Go to the MySQL JDBC driver download page, download the archive file, and unzip it. That contains a mysql-connector-java-5.1.42-bin.jar file. Add that to your classpath!
Now we can write code that connects to our Google Cloud SQL database.
System.out.println("Connecting to database.");
String connectionUrl = "jdbc:mysql://YOUR_DATABASE_IPv4_ADDRESS";
Connection connection = DriverManager.getConnection(connectionUrl, "root", "YOUR_PASSWORD");

Statement createeDatabaseStatement = connection.createStatement();
createeDatabaseStatement.executeUpdate("create database MyDatabase");
System.out.println("MyDatabase created.");

Statement useDatabaseStatement = connection.createStatement();
useDatabaseStatement.executeUpdate("use MyDatabase");
System.out.println("Using MyDatabase.");

Statement createPeopleTableStatement = connection.createStatement();
createPeopleTableStatement.executeUpdate("create table People(name varchar(16), birthYear integer, favoriteColor varchar(16), primary key(name))");
System.out.println("People table created.");
This code uses the IPv4 address that was listed in your Google Cloud SQL dashboard as the endpoint URL, and passes that in along with the root username and password you specified when you created the database.
Then it uses a create database statement to create a database named MyDatabase. Our Cloud SQL account can actually contain multiple databases (which can each contain multiple tables), so this statement creates a database in our Cloud SQL account. We only have to do this once.
The use MyDatabase statement tells the connection to use the database we just created. Because a Cloud SQL account can contain multiple databases, we need to do this whenever we create a connection.
The rest of the code is identical to the code we used with our local Derby database. Try adding rows to the table and then printing the data out!
Database Design
Now we know how to create a database, but it can still be hard to know exactly what should go inside your database. What tables do you need? What columns should those tables have? What types of value does each column hold? What should each row represent? Which tables should point to other tables?
Like a lot of things in programming, this isn’t an exact science. There isn’t always one “correct” way to represent your data. This can be particularly tricky with databases, because once you have your data, it can be hard to change from one representation to another. Database design is a whole field of study!
Many people use UML flowcharts or ER models to help design their databases. At the very least, you should try drawing some tables full of example columns and rows to make sure your design can hold your data.
Here are a few random tips to consider when coming up with your database design:
- Most databases will contain a bunch of tables! Don’t try to fit everything in one table.
- Many of those tables will point to other tables. For example, you might have a
Messagestable that has aSenderrow that contains a person’s name. That name might point to a column in aPeopletable, which contains information about that person. - Don’t store files inside your database. Upload those files to something like Amazon S3 or Google Cloud Storage, and then store a URL pointing to the file in your database.
- Use IDs in your tables instead of names! Different things can have the same name, so names don’t make good IDs.
This tutorial can’t possibly cover every design consideration, and there are a ton of other design decisions you’ll face. The best advice I can give you is to try out different things and see which approach works best for you! A lot of this is figuring out how data fits into your own brain, and how you organize relationships between different types of things!
From Database Tables to Java Classes
Okay, so now our data is in a database. But our code uses Java classes, so we need a way to go from database data to instances of Java classes. We can do that using everything we’ve already learned, but it can be a little confusing if you’ve never “thought in databases” before, so here’s an example. Let’s say we have a Person class:
public class Person {

	private String name;
	private int birthYear;
	private String favoriteColor;

	public Person(String name, int birthYear, String favoriteColor) {
		this.name = name;
		this.birthYear = birthYear;
		this.favoriteColor = favoriteColor;
	}

	public String getName() {
		return name;
	}

	public int getBirthYear() {
		return birthYear;
	}

	public String getFavoriteColor() {
		return favoriteColor;
	}
}
This is just a normal Java class with some variables, a constructor, and some getter functions. Now let’s say we have some data in a People table:
| Name | Birth Year | Favorite Color |
|---|---|---|
| Ada | 1823 | Green |
| Grace | 1906 | Red |
| Stanley | 2007 | Pink |
We want to convert the rows of this table into instances of the Person class. We can do that by fetching data from a row, and then using the results to create an instance. Here’s an example:
public Person getPerson(String name) {
		try{
			ResultSet resultSet = connection.createStatement().executeQuery("select * from People where name='" + name + "'");
			if(resultSet.next()){
				int birthYear = resultSet.getInt("birthYear");
				String favoriteColor = resultSet.getString("favoriteColor");
				Person person = new Person(name, birthYear, favoriteColor);
				return person;
			}
			else{
				//that name was not found
				return null;
			}
		}
		catch(SQLException e){
			e.printStackTrace();
		}

		//an error ocurred
		return null;
}
This function queries the database for a row that matches the name parameter, and it uses the data from that row to construct a Person instance and returns that. If it can’t find the name or an error occurs, it returns null. (Note that this should probably use a prepared statement, but I wanted to keep it as short as possible.)
We could extend this logic to return a List of all of the people in the database:
public List<Person> getAllPeople() {
	List<Person> people = new ArrayList<Person>();
	try{
		ResultSet resultSet = connection.createStatement().executeQuery("select * from People");
		while(resultSet.next()){
			String name = resultSet.getString("name");
			int birthYear = resultSet.getInt("birthYear");
			String favoriteColor = resultSet.getString("favoriteColor");
			Person person = new Person(name, birthYear, favoriteColor);
			people.add(person);
		}
	}
	catch(SQLException e){
		e.printStackTrace();
	}

	return people;
}
This function queries the database for all of its data, and then constructs a Person instance for each row and adds those instances to a List that it returns. Note that we could also do something like take a year parameter and add a where clause to select only people born after a certain year, for example. The process is the same: loop through the results, create an instance of the class for each row, and add those instances to a List that you return.
Similarly, we can go the other way and write functions that add rows to a table based on an instance:
public void addPerson(Person person) {
	try {
		connection.createStatement().executeUpdate("insert into People (name, birthYear, favoriteColor) values('" person.getName() + "', " + person.getBirthYear() + ", '" + person.getFavoriteColor() + "')");
	}
	catch (SQLException e) {
		e.printStackTrace();
	}
}
This function takes a Person instance parameter and uses it to construct a SQL query that adds a row to the People table. Again, note that we should probably use a prepared statement here.
It’s not always this simple, and your tables won’t always line up with a Java class exactly. For example you might need to get data from multiple classes to build an instance, or you might need multiple instances to build one table row. But the point is that you can go from Java code to database data and back again!
You might also consider checking out Hibernate ORM, which is a set of Java libraries that basically converts between Java code and database data for you. You can even get away with writing “pure Java” code without any SQL!
Putting it all Together
Now we know how to create a database, host it in a cloud service, and write code that connects to it and modifies and fetches data. Let’s put all of that knowledge to use and create a web application that stores its information in a database and allows users to post messages.
For starters, let’s setup our database. First go through the steps above to create either an AWS RDS database or a Google Cloud SQL database. (Or use whatever database service you want.) Then create a class that creates the database and a Posts table:
import java.sql.Connection;
import java.sql.DriverManager;
import java.sql.SQLException;
import java.sql.Statement;

public class Main {

	public static void main(String[] args){
		try {
			System.out.println("Connecting to database.");
			String connectionUrl = YOUR_CONNECTION_URL_HERE;
			Connection connection = DriverManager.getConnection(connectionUrl, YOUR_USERNAME, YOUR_PASSWORD);

			Statement createeDatabaseStatement = connection.createStatement();
			createeDatabaseStatement.executeUpdate("create database MyDatabase");
			System.out.println("MyDatabase created.");

			Statement useDatabaseStatement = connection.createStatement();
			useDatabaseStatement.executeUpdate("use MyDatabase");
			System.out.println("Using MyDatabase.");

			Statement createPeopleTableStatement = connection.createStatement();
			createPeopleTableStatement.executeUpdate("create table Posts(name varchar(32), post text, postTime timestamp)");
			System.out.println("Posts table created.");
		}
		catch (SQLException e) {
			e.printStackTrace();
		}

		System.out.println("Done.");
	}
}
This code connects to a database and creates a Posts table with three columns: a name column, a post column, and a postTime column. Make sure this code runs successfully, as from this point on we’re going to assume our database and tables are already setup.
Next, let’s create a utility class that handles all of the database stuff for our web app:
import java.sql.Connection;
import java.sql.DriverManager;
import java.sql.PreparedStatement;
import java.sql.ResultSet;
import java.sql.SQLException;
import java.sql.Timestamp;
import java.util.ArrayList;
import java.util.List;

public class DatabaseConnection {

	//make sure these match what you used during setup
	private final String connectionUrl = YOUR_CONNECTION_URL
	private final String username = YOUR_USERNAME
	private final String password = YOUR_PASSWORD
	private final String databaseName = YOUR_DATABASE_NAME

	private Connection connection;
	private PreparedStatement addPostStatement;

	//this class is a singleton and should not be instantiated directly!
	private static DatabaseConnection instance = new DatabaseConnection();
	public static DatabaseConnection getInstance(){
		return instance;
	}

	//private constructor so people know to use the getInstance() function instead
	private DatabaseConnection(){
		try {
			connection = DriverManager.getConnection(connectionUrl, username, password);
			connection.createStatement().executeUpdate("use " + databaseName);
			addPostStatement = connection.prepareStatement("insert into Posts (name, post, postTime) values(?, ?, ?)");
		}
		catch (SQLException e) {
			e.printStackTrace();
		}
	}

	/**
	 * Returns a List of all of the Posts in the database, sorted by postTime (newest first)
	 */
	public List<Post> getAllPosts() {
		List<Post> posts = new ArrayList<Post>();
		try{
			ResultSet resultSet = connection.createStatement().executeQuery("select * from Posts order by postTime desc");
			while(resultSet.next()){
				String name = resultSet.getString("name");
				String postText = resultSet.getString("post");
				Timestamp postTime = resultSet.getTimestamp("postTime");
				Post post = new Post(name, postText, postTime);
				posts.add(post);
			}
		}
		catch(SQLException e){
			e.printStackTrace();
		}

		return posts;
	}

	public synchronized void addPost(String name, String post, Timestamp postTime) {
		try {
			addPostStatement.setString(1, name);
			addPostStatement.setString(2, post);
			addPostStatement.setTimestamp(3, postTime);
			addPostStatement.executeUpdate();
		}
		catch (SQLException e) {
			e.printStackTrace();
		}
	}
}
This code connects to a database, and provides functions for fetching data and adding a row. This is the only class in our web app that touches the database! Everything else just calls the functions in this class. This allows us to not really care about the database in our servlet classes, and we could use this class in non-web applications as well. Note that the code uses a prepared statement to insert the data, because that data is coming from users! Also note that the addPost() function is synchronized, because the PreparedStatement class is not thread-safe.
This code also uses a Post class, which is pretty standard:
import java.sql.Timestamp;

public class Post {

	private String name;
	private String post;
	private Timestamp timestamp;

	public Post(String name, String post, Timestamp timestamp) {
		this.name = name;
		this.post = post;
		this.timestamp = timestamp;
	}

	public String getName() {
		return name;
	}

	public String getPost() {
		return post;
	}

	public Timestamp getTimestamp() {
		return timestamp;
	}
}
Now that we have our DatabaseConnection class, we can create a servlet class that uses it:
import java.io.IOException;
import java.sql.Timestamp;

import javax.servlet.ServletException;
import javax.servlet.http.HttpServlet;
import javax.servlet.http.HttpServletRequest;
import javax.servlet.http.HttpServletResponse;

public class PostsServlet extends HttpServlet {

	@Override
	public void doGet(HttpServletRequest request, HttpServletResponse response) throws IOException, ServletException {

		response.getOutputStream().println("<h1>New Post</h1>");
		response.getOutputStream().println("<form action=\"/posts\" method=\"POST\">");
		response.getOutputStream().println("Name: ");
		response.getOutputStream().println("<input type=\"text\" name=\"name\">");
		response.getOutputStream().println("<br/>");
		response.getOutputStream().println("Post: ");
		response.getOutputStream().println("<input type=\"text\" name=\"post\">");
		response.getOutputStream().println("<br/>");
		response.getOutputStream().println("<input type=\"submit\" value=\"Submit\">");
		response.getOutputStream().println("</form>");
		response.getOutputStream().println("<hr/>");
		response.getOutputStream().println("<h1>Prior Posts</h1>");
		response.getOutputStream().println("<p>(newest on top)</p>");

		for(Post post : DatabaseConnection.getInstance().getAllPosts()){
			response.getOutputStream().println("<p>[" + post.getTimestamp() + "] " + post.getName() + ": " + post.getPost() + "</p>");
			response.getOutputStream().println("<hr/>");
		}
	}

	@Override
	public void doPost(HttpServletRequest request, HttpServletResponse response) throws IOException, ServletException {

		String name = request.getParameter("name");
		String post = request.getParameter("post");
		Timestamp timestamp = new Timestamp(System.currentTimeMillis());
		DatabaseConnection.getInstance().addPost(name, post, timestamp);

		response.sendRedirect("/posts");
	}
}
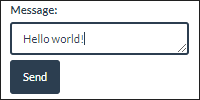
This servlet class renders a basic form that allows a user to enter a name and some text to post. Below the form, it loops over every previous post and renders each one. (Note that we should really strip out potentially harmful HTML from our user content, which we learned how to do in the libraries tutorial.) When the user submits their post, the doPost() function gets their name, post text, and the current timestamp, and then tells the DatabaseConnection class to add a row with those values. Note that our servlet class doesn’t have to care how the DatabaseConnection class is storing the data!
Finally, we need a web.xml file to map the /posts URL to our servlet:
<web-app
	xmlns="http://xmlns.jcp.org/xml/ns/javaee"
	xmlns:xsi="http://www.w3.org/2001/XMLSchema-instance"
	xsi:schemaLocation="http://xmlns.jcp.org/xml/ns/javaee
		http://xmlns.jcp.org/xml/ns/javaee/web-app_3_1.xsd"
	version="3.1">

	<servlet>
		<servlet-name>PostsServlet</servlet-name>
		<servlet-class>PostsServlet</servlet-class>
	</servlet>

	<servlet-mapping>
		<servlet-name>PostsServlet</servlet-name>
		<url-pattern>/posts</url-pattern>
	</servlet-mapping>

</web-app>
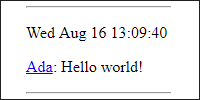
Don’t forget to include the JDBC driver .jar file in the lib directory of the web app and on your classpath. Now you should be able to compile everything, run the web app, and go to the /posts URL to see this:
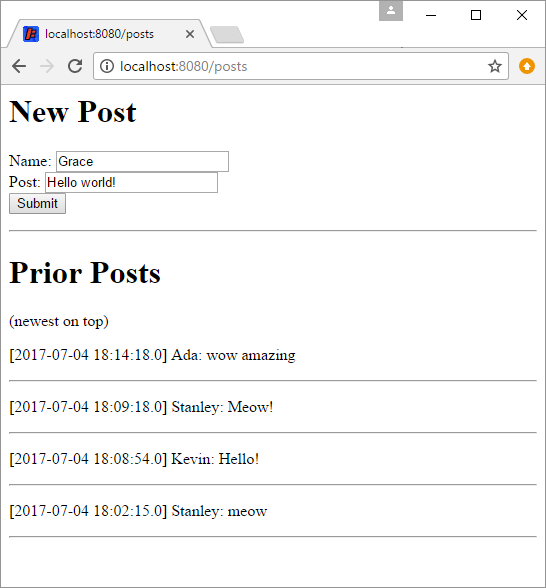
It’s not very pretty, but that’s not the point. The point is that all of our data is now stored in a database! We can now make changes to our code and restart our server as often as we want, and our data will still be there! ![]()
Summary
This tutorial was meant to give you a crash course in what a database is, how to create one using a database service, and how to write code to store and retrieve data. Databases are a huge topic though, so it would be impossible to cover everything in one tutorial.
For example, you can use transactions to group database requests together. This is useful if you have requests that depend on each other, like taking money from one account and adding it to another. You can also use sharding to split your data up into multiple databases. This is useful if you have a ton of data.
But the point is that you now know enough to do your own research. Don’t be afraid to use Google and try things out! And if you get stuck, you can always ask questions on the forum.
select * from People
 where name = 'Ada'
Homework
- Add a database to one of your previous web applications so that your data is saved even when you update the code.
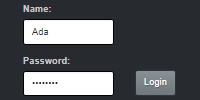
- Expand our messaging web app to support logging in and user profiles. Add private messaging. And make it look pretty!