Background Info


Background Info
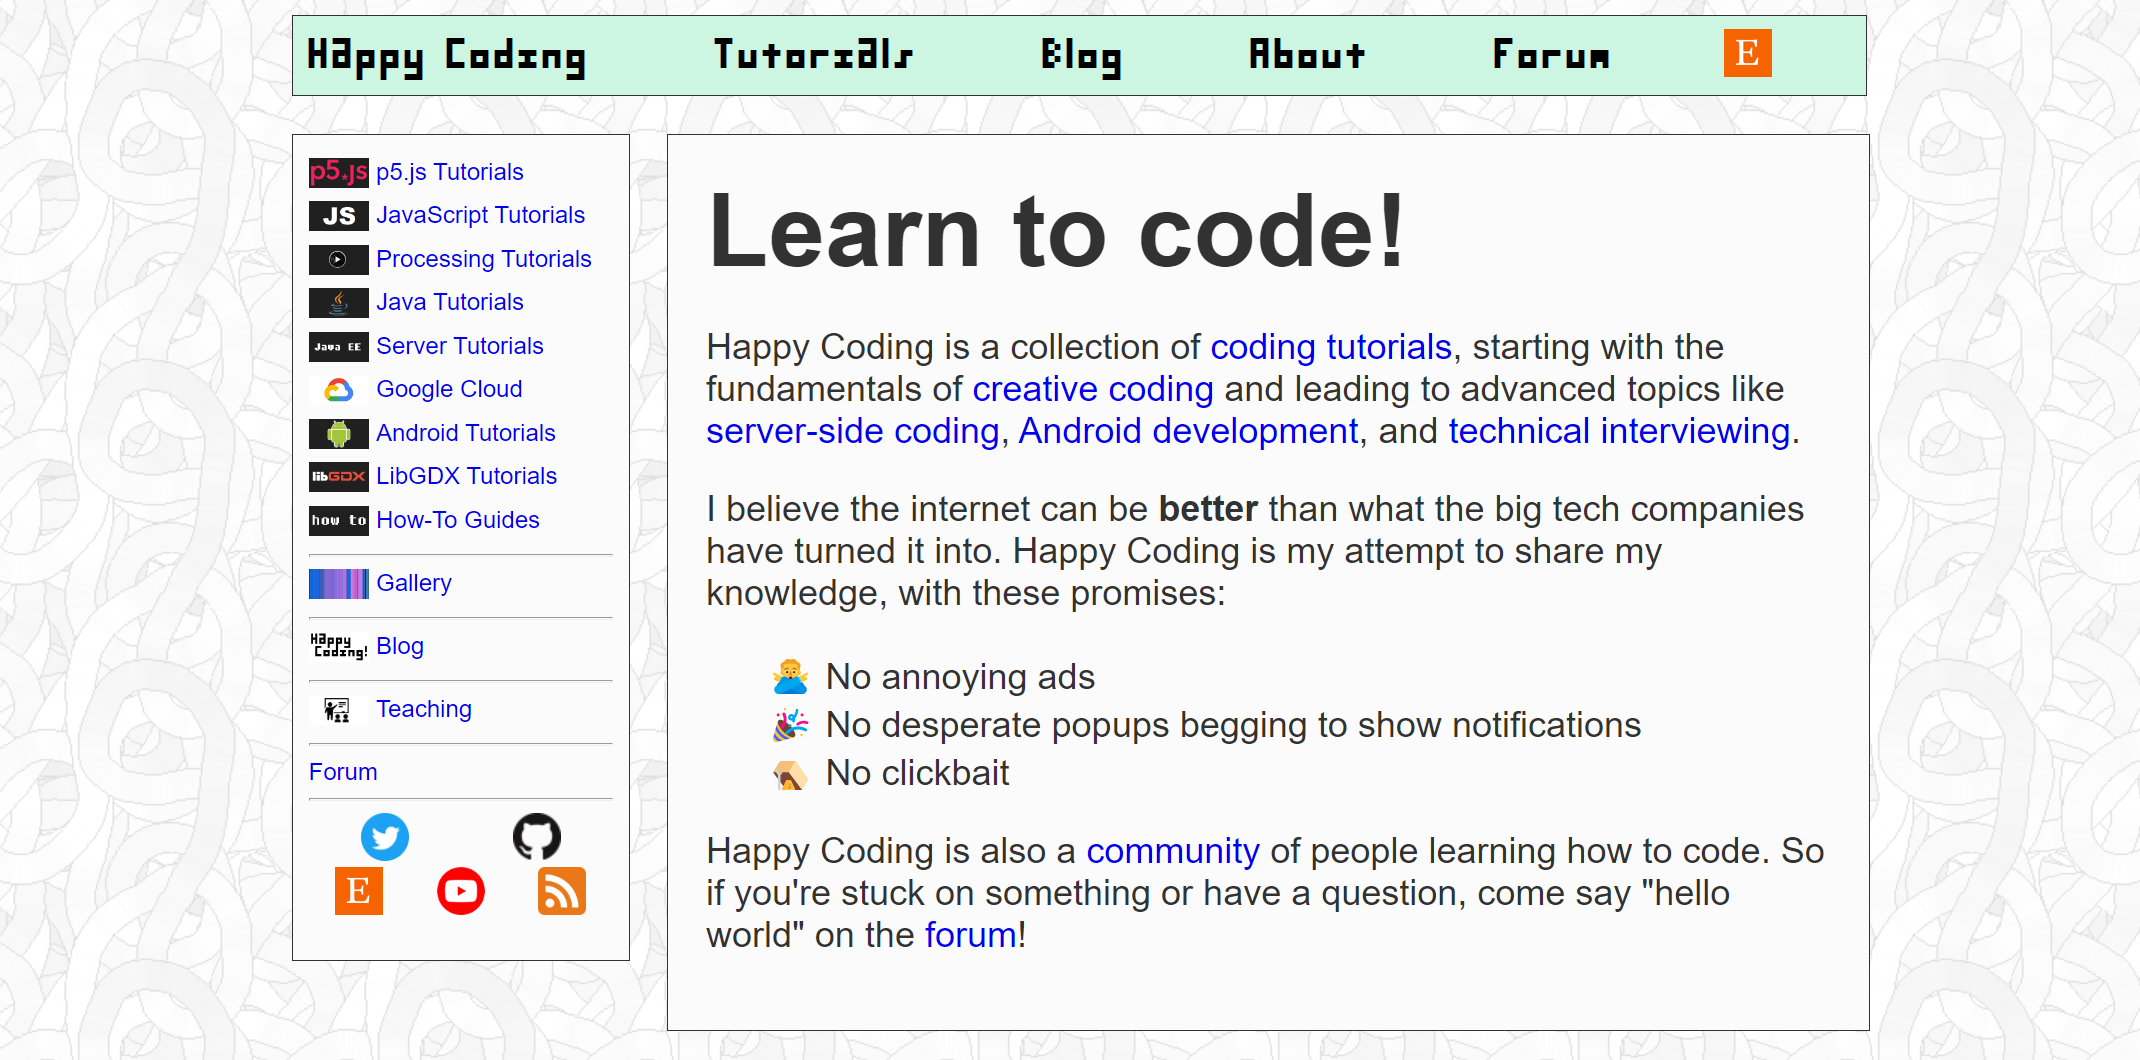
The site now has random background images that were generated using Processing code, and you can view the source code that generated the background by scrolling to the bottom of the page and looking in the footer!
The random backgrounds aren’t new. I’ve been using backgrounds from Subtle Patterns, and they’ve been great.
But I wanted something a little more codey. Something that was a little bit fun and encouraged people to play around and learn more.
I thought about using a Processing sketch as a background by having it run behind everything else. That opens up a lot of possibilities, but I didn’t want it to be too distracting or to take up too many resources on mobile devices.
So I decided to generate static images ahead of time using Processing. The save() function makes it easy to save a sketch as an image:
void keyPressed(){
 save("circles-1.png");
}

void draw(){
  fill(random(256), random(256), random(256));
  float size = random(10, 50);
  ellipse(random(width), random(height), size, size);
}
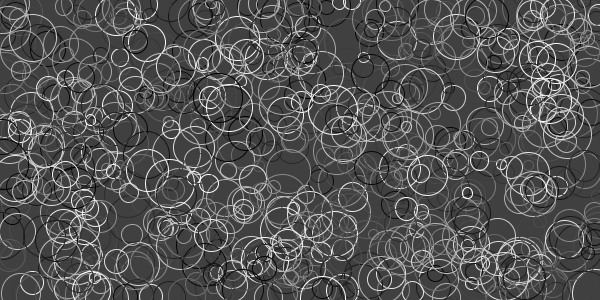
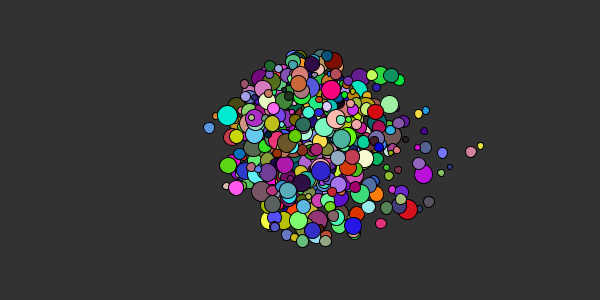
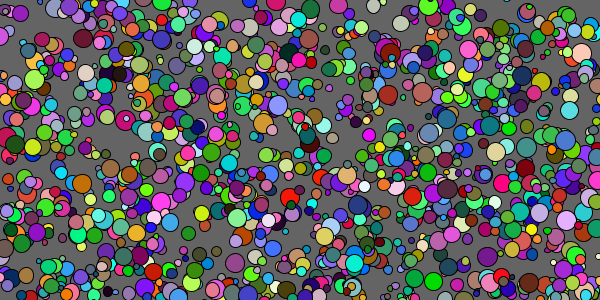
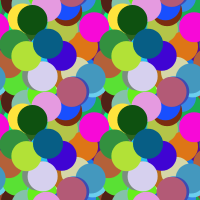
This code draws random circles on the screen until a key is pressed, and then it saves the current sketch as an image named circles-1.png, which looks like this:

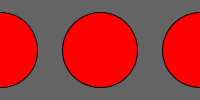
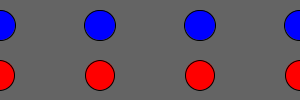
So far so good. But when I tiled the image, I had a problem:
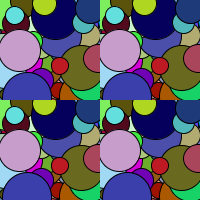
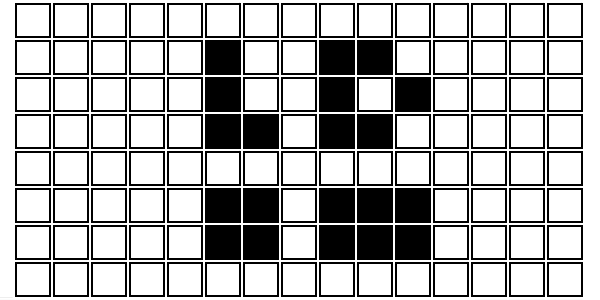
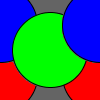
Ugly! The circles are cut off at the edges, so the image doesn’t tile very well. To understand this better, think about a single circle:
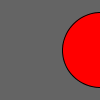
Obviously, this won’t tile:

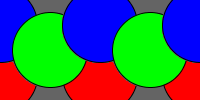
What we need is for the circle to wrap around the edge of the screen, like this:
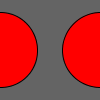
So that when it tiles, it looks like this:
Using Buffers
I knew what I had to do, so then it was “just” a matter of figuring out how to do it.
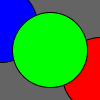
My first idea was that I would use 5 buffers. The center buffer would contain stuff drawn normally, and the rest would contain stuff drawn with an offset by adding and subtracting width and height from the stuff being drawn. It might make more sense with pictures. Let’s say I have this image:
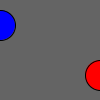
For that to tile, I need the blue circle to wrap by drawing it on the right side (which I do by adding width to its X value), and I need the red circle to wrap by drawing it on the left side (by subtracting width from its X value). In other words, everything I draw has to be drawn to each buffer, using each offset.
So my buffers look like this:

Which I combine into one image by just drawing them all to the screen:
Which tiles:
I’m only showing the left and right buffers, but the idea is the same for the top and bottom buffers. Progress!
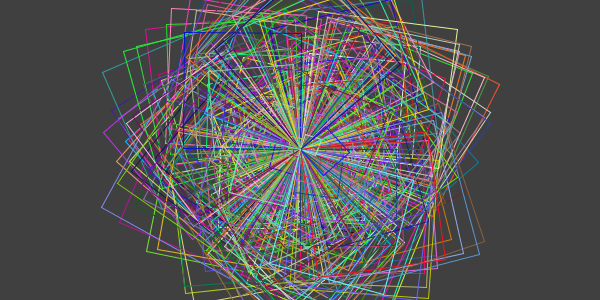
Here is the result of using the buffer approach:

That almost tiles:
Notice that even though there isn’t a hard cutoff anymore, there are still weird lines of circles at the right and bottom edges that make the tiling look ugly.
It took me a while to debug this. Maybe my random location was off, or maybe the buffers were causing the circles to gather at the edges for some reason?
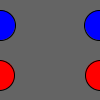
I finally realized that the draw order of the buffers mattered. In the above pictures, I’m drawing the right and bottom buffers last, which means they’re drawn on top of the center buffer. This causes those circles to be drawn on top of the other circles instead of being drawn in the order they were originally drawn. Let’s say we had these buffers:

Because the right buffer is drawn on top of the center buffer, the stacked image looks like this:
Which tiles like this:
Notice that the blue circle is drawn on top of the green circle, even though our original drawing had the green circle on top. This is the cause of the weird lines on the stacked images!
Keeping it Simple
I briefly thought about using a 3D renderer to keep track of the Z-index of the circles, but that would have been overkill. Plus the code for using buffers was already too complicated, so I decided to take a step back and try to simplify.
I knew my goal was to draw stuff, in the correct order, at various offsets in my sketch. If I drew a circle at X, Y, I also wanted to draw it at X-width, Y-height and X, Y-height and X, Y+height, etc. I realized I could do the same thing just by using a nested for loop.
So this line:
ellipse(x, y, w, h);
Becomes this nested for loop:
for (int yOffset = -1; yOffset <= 1; yOffset++) {
    for (int xOffset = -1; xOffset <= 1; xOffset++) {
      ellipse(x+xOffset*width, y+yOffset*height, w, h);
    }
}
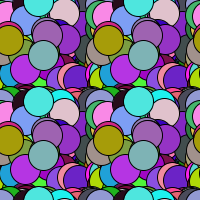
This ends up drawing 9 circles (turned out I also needed the corners, not just the top, bottom, left, right, and center), and if I repeatedly do this with random values, I end up with tileable images that don’t contain those ugly lines of circles!
Overriding
This was still a little gross, because now every time I wanted to make a circle I had to write several lines of code. I wanted to change my code so that it did this automatically every time I called the ellipse() function. In other words, I wanted to override the ellipse() function. I did this by creating my own ellipse() function in my sketch:
void ellipse(float x, float y, float w, float h) {
  for (int yOffset = -1; yOffset <= 1; yOffset++) {
    for (int xOffset = -1; xOffset <= 1; xOffset++) {
      super.ellipse(x+xOffset*width, y+yOffset*height, w, h);
    }
  }
}
This ellipse() function uses the nested for loop and calls the “real” ellipse() function using the super keyword. Now that this was in my sketch, I could call it like normal and it would draw the 9 circles for me:
void keyPressed(){
  saveFrame("circles-5.png");
}

void draw() {
  noStroke();
  fill(random(256), random(256), random(256));
  ellipse(random(width), random(height), 30, 30);
}

void ellipse(float x, float y, float w, float h) {
  for (int yOffset = -1; yOffset <= 1; yOffset++) {
    for (int xOffset = -1; xOffset <= 1; xOffset++) {
      super.ellipse(x+xOffset*width, y+yOffset*height, w, h);
    }
  }
}
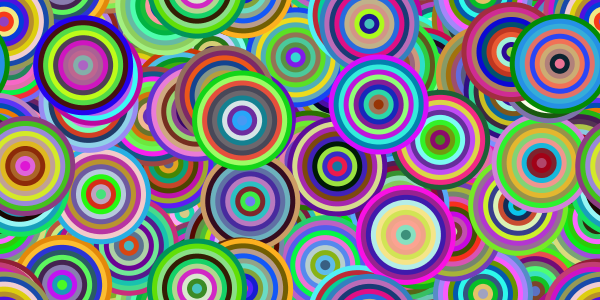
This results in this image:

Which tiles just fine:
To the Artmobile
I can override any other drawing function, like rect() or line(), which meant that it was time to play!
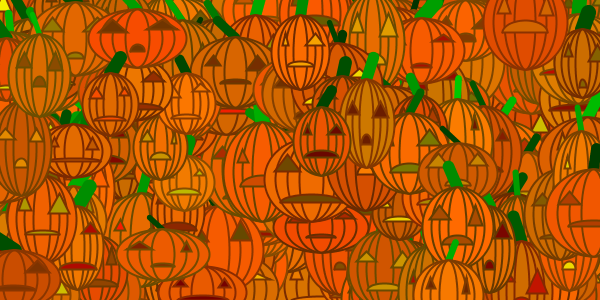
I came up with a few designs, which you can view on GitHub, or just look at the background of the page you’re looking at right now! (Refresh to get a new random background.) You can also view the source code that generated that image by scrolling to the bottom and finding it in the footer, or by going to GitHub.
I love when sites have little easter eggs like this, so I’m hoping that at the very least this is fun and encourages people to see the artistic side of programming when they realize that the background images were created using code.
I’d also love if people went a step further and wanted to contribute their own backgrounds! I’ve written a guide on how to submit your own backgrounds, and I’d love to see what other people come up with!