Cloud Vision


Cloud Vision
- Enable Cloud Vision API
- Credentials
- Maven Dependency
- Standalone Hello World
- Web App Hello World
- Learn More
Cloud Vision is a set of tools designed for image analysis.
The Cloud Vision APIs use machine learning models that have already been trained, so you can skip straight to the fun stuff. It’s also possible to train your own models (you can learn more about that on the AutoML docs), but this guide is going to stick with the pre-trained models.
Enable Cloud Vision API
Before you can use the Cloud Vision API, you have to enable it. Go here:
https://console.cloud.google.com/flows/enableapi?apiid=vision.googleapis.com
Make sure your project is selected, and click the Continue button.
Credentials
The Cloud Vision API requires your Cloud project’s credentials to work. When you deploy to App Engine this will work automatically, but when running or deploying locally you have to set your credentials manually. Follow the steps on Google Cloud documentation to set up your local credentials.
Important: Before proceeding, make sure you have your GOOGLE_APPLICATION_CREDENTIALS environment variable set. Nothing will work without this.
Maven Dependency
The Cloud Vision API is available as a web service, or as a library that can be called from many languages. This tutorial uses it as a Java library.
To add the library to your classpath, add this maven dependency to your pom.xml file:
<dependency>
  <groupId>com.google.cloud</groupId>
  <artifactId>google-cloud-vision</artifactId>
  <version>1.100.0</version>
</dependency>
Standalone Hello World
You can call the Cloud Vision library from any Java code, including standalone (non-server) code. To see how the library works, let’s start with that.
You can view this hello world example project , or download it as a .zip file from DownGit.
First, load a file:
String filePath = "C:\\Users\\kevin\\Desktop\\Stanley.jpg";
ByteString imageBytes = ByteString.readFrom(new FileInputStream(filePath));
Image image = Image.newBuilder().setContent(imageBytes).build();
Now the image variable points to an Image that the Cloud Vision library can work with.
Next, create a request that asks the Cloud Vision library to analyze your image:
Feature feature = Feature.newBuilder().setType(Type.LABEL_DETECTION).build();
    AnnotateImageRequest request =
AnnotateImageRequest.newBuilder().addFeatures(feature).setImage(image).build();
List<AnnotateImageRequest> requests = new ArrayList<>();
requests.add(request);
This example uses Type.LABEL_DETECTION to ask Cloud Vision to tell you what it sees in your image, but check out the Feature.Type enum for other types of requests you can make.
You might also notice that this code creates a List that only contains a single request. That’s because the Cloud Vision library supports sending multiple requests at one time, so for example you could also request face detection if you wanted. For now just include the request for label detection.
Next, send the request and get the response:
ImageAnnotatorClient client = ImageAnnotatorClient.create();
BatchAnnotateImagesResponse batchResponse = client.batchAnnotateImages(requests);
List<AnnotateImageResponse> imageResponses = batchResponse.getResponsesList();
AnnotateImageResponse imageResponse = imageResponses.get(0);
Because you only sent a single request, you can assume you only got a single response.
Now you can use that response to get the labels that Cloud Vision found in your image:
for (EntityAnnotation annotation : imageResponse.getLabelAnnotationsList()) {
  System.out.println(annotation.getDescription() + ": " + annotation.getScore());
}
Because you requested label detection, the response’s getLabelAnnotationsList() function returns a List of EntityAnnotation instances, which in turn each have a description (like "cat") and a score (like 0.75). The higher the score, the more sure Cloud Vision is that your image contains that label.
Finally, close out the client you created for sending the request:
client.close();
Putting it all together, it looks like this:
package io.happycoding.vision;

import com.google.cloud.vision.v1.AnnotateImageRequest;
import com.google.cloud.vision.v1.AnnotateImageResponse;
import com.google.cloud.vision.v1.BatchAnnotateImagesResponse;
import com.google.cloud.vision.v1.EntityAnnotation;
import com.google.cloud.vision.v1.Feature;
import com.google.cloud.vision.v1.Feature.Type;
import com.google.cloud.vision.v1.Image;
import com.google.cloud.vision.v1.ImageAnnotatorClient;
import com.google.protobuf.ByteString;
import java.io.FileInputStream;
import java.io.IOException;
import java.util.ArrayList;
import java.util.List;

public class CloudVisionHelloWorld {

  public static void main(String[] args) throws IOException {

    String filePath = "C:\\Users\\kevin\\Desktop\\Stanley.jpg";

    // Load the file
    ByteString imageBytes = ByteString.readFrom(new FileInputStream(filePath));
    Image image = Image.newBuilder().setContent(imageBytes).build();

    // Create a label detection request for the image
    Feature feature = Feature.newBuilder().setType(Type.LABEL_DETECTION).build();
    AnnotateImageRequest request =
        AnnotateImageRequest.newBuilder().addFeatures(feature).setImage(image).build();
    List<AnnotateImageRequest> requests = new ArrayList<>();
    requests.add(request);

    // Send the request and get the response
    ImageAnnotatorClient client = ImageAnnotatorClient.create();
    BatchAnnotateImagesResponse batchResponse = client.batchAnnotateImages(requests);
    List<AnnotateImageResponse> imageResponses = batchResponse.getResponsesList();
    AnnotateImageResponse imageResponse = imageResponses.get(0);

    // Handle errors
    if (imageResponse.hasError()) {
      System.out.println("Error: " + imageResponse.getError().getMessage());
    }

    // Print the labels extracted from the image
    for (EntityAnnotation annotation : imageResponse.getLabelAnnotationsList()) {
      System.out.println(annotation.getDescription() + ": " + annotation.getScore());
    }

    client.close();
  }
}
To run this example, first make sure your GOOGLE_APPLICATION_CREDENTIALS environment variable is set and that you’ve enabled the Vision API. Then change the filePath variable to point to an image on your computer, and execute this command:
mvn clean package exec:java
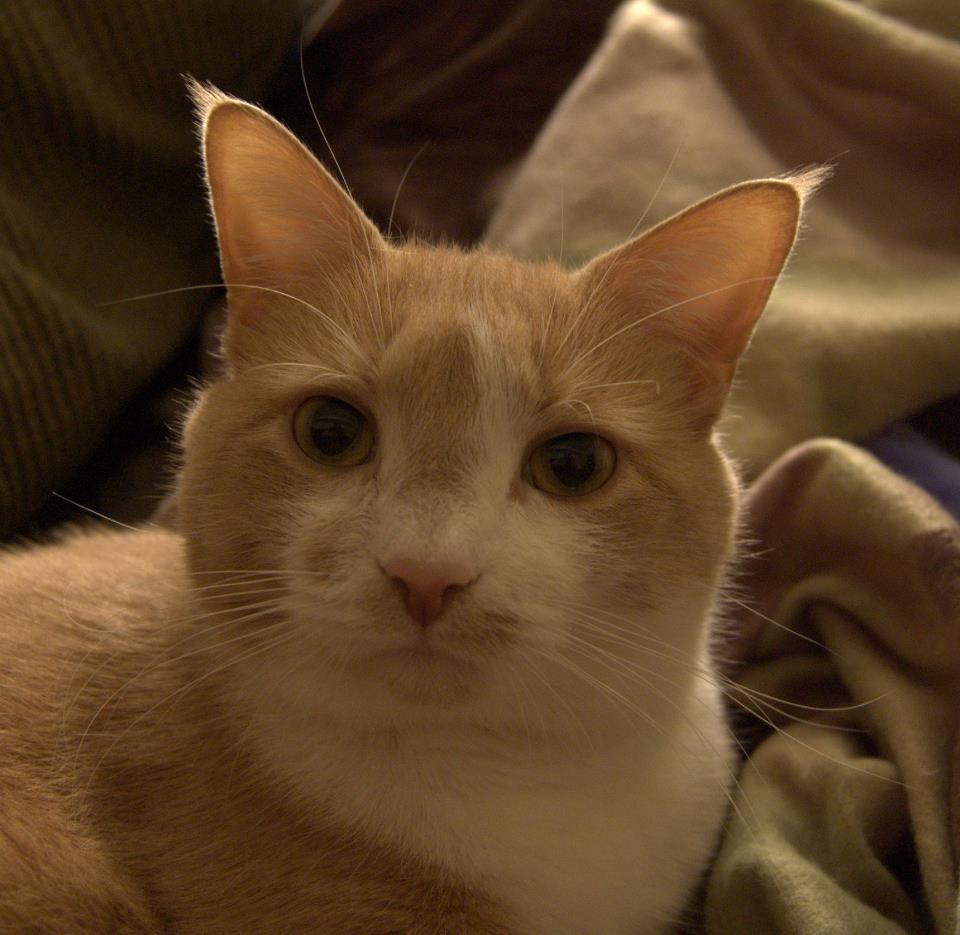
You should see something like this printed to the console:
Cat: 0.99598557
Mammal: 0.9890478
Vertebrate: 0.9851104
Whiskers: 0.9777251
Small to medium-sized cats: 0.97744334
Felidae: 0.96784574
Carnivore: 0.9342105
This is the result of requesting labels for this image:
Web App Hello World
The above example performs image analysis in a standalone Java application. This is useful if you want to build a desktop application or analyze images on your own computer. But you can also use the Vision API in server code, which comes in handy if you want to build a web app.
You can view this hello world webapp example project from , or download it as a .zip file from DownGit.
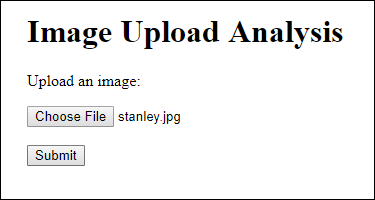
Let’s start with the HTML:
index.html
<!DOCTYPE html>
<html>
  <head>
    <meta charset="UTF-8">
    <title>Image Upload Analysis</title>
  </head>
  <body>
    <h1>Image Upload Analysis</h1>

    <form method="POST" enctype="multipart/form-data" action="/image-analysis">
      <p>Upload an image:</p>
      <input type="file" name="image">
      <br/><br/>
      <button>Submit</button>
    </form>
  </body>
</html>
This HTML shows a form that lets the user upload an image, which sends a POST request to the /image-analysis URL. This URL maps to a servlet:
ImageAnalysisServlet.java
package io.happycoding.servlets;

import com.google.cloud.storage.Blob;
import com.google.cloud.storage.BlobId;
import com.google.cloud.storage.BlobInfo;
import com.google.cloud.storage.Storage;
import com.google.cloud.storage.StorageOptions;
import com.google.cloud.vision.v1.AnnotateImageRequest;
import com.google.cloud.vision.v1.AnnotateImageResponse;
import com.google.cloud.vision.v1.BatchAnnotateImagesResponse;
import com.google.cloud.vision.v1.EntityAnnotation;
import com.google.cloud.vision.v1.Feature;
import com.google.cloud.vision.v1.Image;
import com.google.cloud.vision.v1.ImageAnnotatorClient;
import com.google.protobuf.ByteString;
import java.io.IOException;
import java.io.InputStream;
import java.io.PrintWriter;
import java.util.ArrayList;
import java.util.List;
import javax.servlet.ServletException;
import javax.servlet.annotation.MultipartConfig;
import javax.servlet.annotation.WebServlet;
import javax.servlet.http.HttpServlet;
import javax.servlet.http.HttpServletRequest;
import javax.servlet.http.HttpServletResponse;
import javax.servlet.http.Part;

@MultipartConfig
@WebServlet("/image-analysis")
public class ImageAnalysisServlet extends HttpServlet {

  @Override
  public void doPost(HttpServletRequest request, HttpServletResponse response) throws IOException, ServletException {

    // Get the file chosen by the user
    Part filePart = request.getPart("image");
    String fileName = filePart.getSubmittedFileName();
    InputStream fileInputStream = filePart.getInputStream();
    byte[] imageBytes = fileInputStream.readAllBytes();

    // Upload the file to Cloud Storage and get its URL
    String imageUrl = uploadToCloudStorage(fileName, imageBytes);

    // Ask Cloud Vision for the labels from the image
    List<EntityAnnotation> imageLabels = getImageLabels(imageBytes);

    // Output some HTML that shows the image and its labels
    // A real codebase would probably store these in Datastore
    response.setContentType("text/html");
    PrintWriter out = response.getWriter();

    // Show the image
    out.println("<p>Here's the image you uploaded:</p>");
    out.println("<a href=\"" + imageUrl + "\">");
    out.println("<img src=\"" + imageUrl + "\" />");
    out.println("</a>");

    // Show the image's labels
    out.println("<p>Here are the labels we extracted:</p>");
    out.println("<ul>");
    for(EntityAnnotation label : imageLabels){
      out.println("<li>" + label.getDescription() + " " + label.getScore());
    }
    out.println("</ul>");
  }

  /**
   * Uses Google Cloud Vision to generate a list of labels that apply to the image
   * represented by the binary data stored in imgBytes.
   */
  private List<EntityAnnotation> getImageLabels(byte[] imgBytes) throws IOException {
    ByteString byteString = ByteString.copyFrom(imgBytes);
    Image image = Image.newBuilder().setContent(byteString).build();

    // Create a label detection request for the image
    Feature feature = Feature.newBuilder().setType(Feature.Type.LABEL_DETECTION).build();
    AnnotateImageRequest request =
        AnnotateImageRequest.newBuilder().addFeatures(feature).setImage(image).build();
    List<AnnotateImageRequest> requests = new ArrayList<>();
    requests.add(request);

    // Send the request and get the response
    ImageAnnotatorClient client = ImageAnnotatorClient.create();
    BatchAnnotateImagesResponse batchResponse = client.batchAnnotateImages(requests);
    client.close();
    List<AnnotateImageResponse> imageResponses = batchResponse.getResponsesList();
    AnnotateImageResponse imageResponse = imageResponses.get(0);

    // Handle errors
    if (imageResponse.hasError()) {
      System.err.println("Error getting image labels: " + imageResponse.getError().getMessage());
      return null;
    }

    // Return the labels extracted from the image
    return imageResponse.getLabelAnnotationsList();
  }

  /** Uploads a file to Cloud Storage and returns the uploaded file's URL. */
  private static String uploadToCloudStorage(String fileName, byte[] fileBytes) {
    String projectId = "happy-coding-gcloud";
    String bucketName = "happy-coding-gcloud.appspot.com";
    Storage storage =
        StorageOptions.newBuilder().setProjectId(projectId).build().getService();
    BlobId blobId = BlobId.of(bucketName, fileName);
    BlobInfo blobInfo = BlobInfo.newBuilder(blobId).build();
    Blob blob = storage.create(blobInfo, fileBytes);
    return blob.getMediaLink();
  }
}
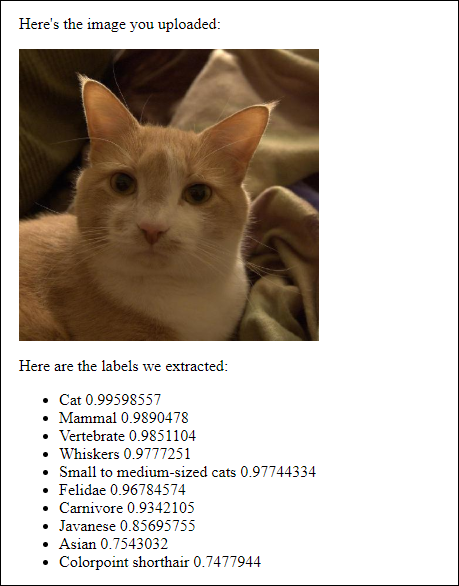
This servlet uploads the image to Cloud Storage, then uses Cloud Vision to generate a list of labels for the image, and finally outputs all of that as HTML.
Also note that if you’re packaging your project as an uber jar, then you need to exclude the signature files that come from the Cloud Vision library:
<filters>
  <filter>
    <artifact>*:*</artifact>
    <!-- The Cloud Vision library signs its jar, so exclude its signature in the output jar -->
    <excludes>
      <exclude>META-INF/*.SF</exclude>
      <exclude>META-INF/*.DSA</exclude>
      <exclude>META-INF/*.RSA</exclude>
    </excludes>
  </filter>
</filters>
See the full pom.xml file on GitHub.
To run this example, first make sure your GOOGLE_APPLICATION_CREDENTIALS environment variable is set and that you’ve enabled the Vision API, and then execute this command:
mvn clean package exec:java
Then navigate to localhost:8080. You should see something like this:
Learn More
- Cloud Vision AI
- Cloud Vision Quickstart
- Cloud Vision Client Libraries
- Cloud Vision How-to Guides
- Cloud Vision Javadoc
