Setup


Setup
- Java
- Maven
- Google Cloud SDK
- Google Cloud Project
- App Engine Application
- Hello World
- Run a Local Server
- Run a Live Server
- Editors
- Summary
- More Info
- Homework
To use Google Cloud, first you have to install a few tools that Google Cloud uses.
Note: If you’re on a device like a tablet or a Chromebook that doesn’t let you install arbitrary programs (or if you want to skip some setup steps), you can use the Google Cloud Shell environment. See below for more info, and then come back here.
Java
First, make sure you have Java installed. If you’ve already been writing Java, you probably already did this. (If you’re using Google Cloud Shell, skip this step.)
If not, you can download Java JDK from AdoptOpenJDK. Google Cloud uses Java 11.
(That link is for OpenJDK, which is an open-source version of Java that Google Cloud uses. You can also get the JDK from Oracle. Either one will work fine.)
Path
After you install Java, make sure your Java directory is added to your PATH environment variable. You can follow Java docs.
To check that you’ve set your PATH correctly, run this command in a command line window:
javac -version
You should see something like this print out:
javac 11.0.8
JAVA_HOME
Next, set your JAVA_HOME environment variable so it points to your Java directory. You can follow Java for Windows 10 article.
To check that you’ve set JAVA_HOME correctly, run this command in a command line window:
echo %JAVA_HOME%
You should see something like this print out:
C:\Program Files\AdoptOpenJDK\jdk-11.0.8.10-hotspot
Maven
You’re going to use Maven to run your programs and deploy to Google Cloud. (If you’re using Google Cloud Shell, skip this step.)
Download Maven from download section and then follow Apache docs to add your Maven directory to your PATH environment variable.
At this point you should be able to execute mvn -version in a command line window.
Google Cloud SDK
Depending on which libraries you’re going to use, you might need a local copy of the Google Cloud SDK, so it’s worth installing now. (If you’re using Google Cloud Shell, skip this step.)
Download an installer from Google CLoud docs and then run it.
Important: Make sure the Beta Commands option is checked:
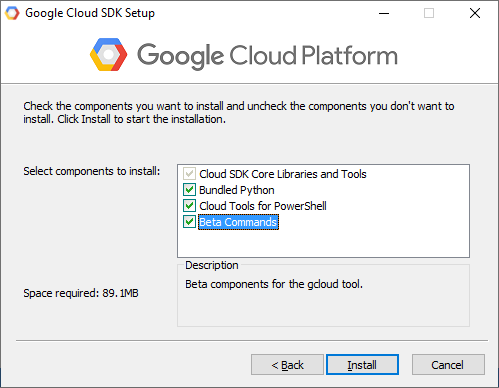
When the installer completes, you should be able to execute gcloud -v in a command line window.
Google Cloud Project
Google Cloud uses projects to organize its tools and resources. A Google Cloud project can contain different Google Cloud services, and services within a project can talk to each other.
You might think of a Google Cloud project as a playground, and it’s up to you what goes in that playground. For example, your Google Cloud project might use App Engine to deploy a web app, Datastore to store data, and Blobstore to store files. After you add these services to your project, Google Cloud handles the communication between them. You can also have multiple Google Cloud projects, and each one is its own standalone environment.
If that doesn’t make sense yet, that’s okay, you’ll learn more in the next few tutorials.
For now, the important thing to know is that to use Google Cloud, you first have to create a Google Cloud project.
Go to console.cloud.google.com and then click create project (direct link to projectcreate).
You should see something like this:
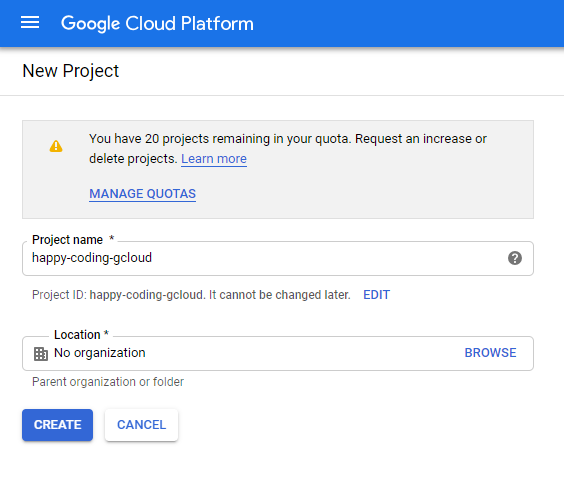
Give your project a name and then click the Create button.
When that step finishes finishes, you should see something like this:

This is the Google Cloud console, which lets you view and add services in your Google Cloud project, as well as read logs and change settings.
Note the Project ID on this page, because you’re going to need it later.
App Engine Application
Now you have a Google Cloud project, which is like a playground that you can fill with various Google Cloud services. Next, let’s start adding services to your project!
App Engine is a Google Cloud framework for launching and running your code on Google servers so anyone can access it using a public URL.
To use App Engine, you first have to create an App Engine application. This tells Google to create a server that you can use to deploy our code.
From the Google Cloud console, expand the navigation menu on the left, and then click the App Engine link. You should see something like this:
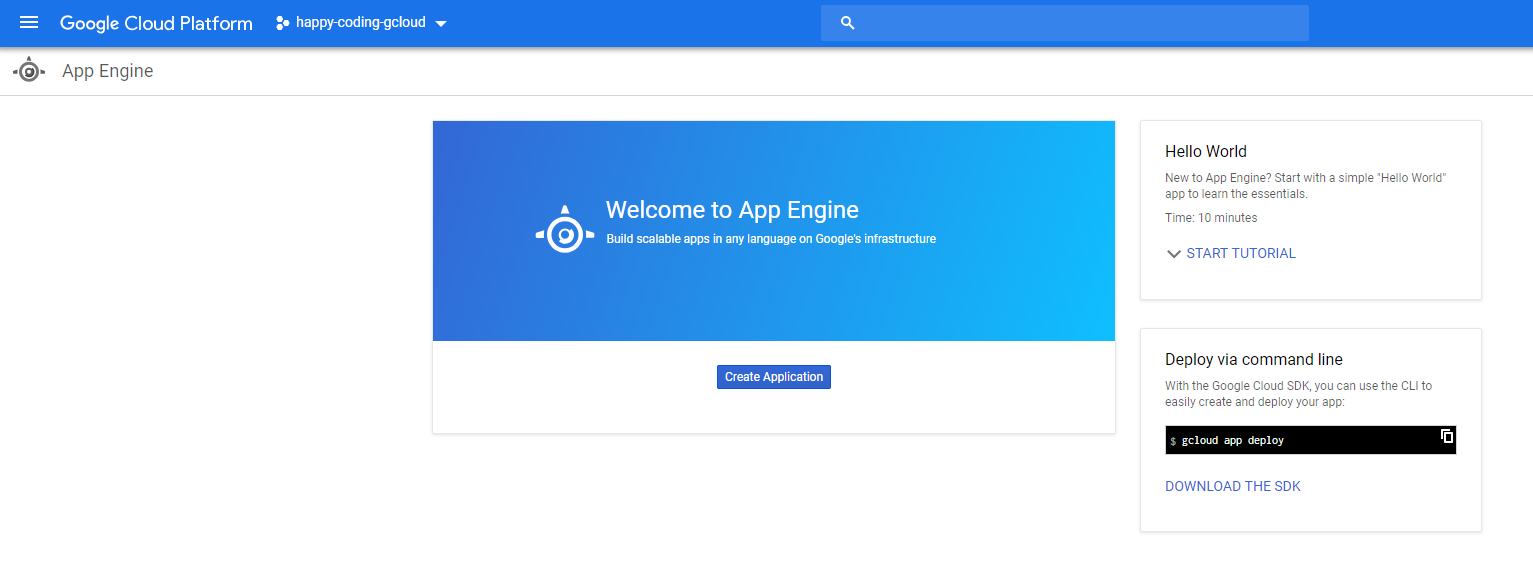
Click the Create Application button. You’ll then see a screen like this:
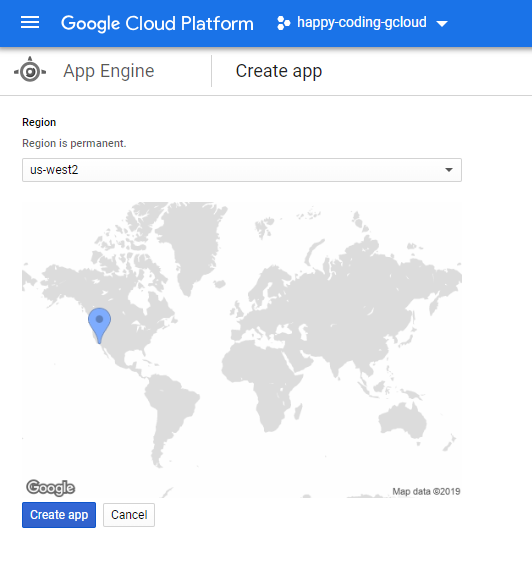
This lets you choose where in the world your server is hosted. You can read more about this here, but for now the default is fine.
Click the Create app button.
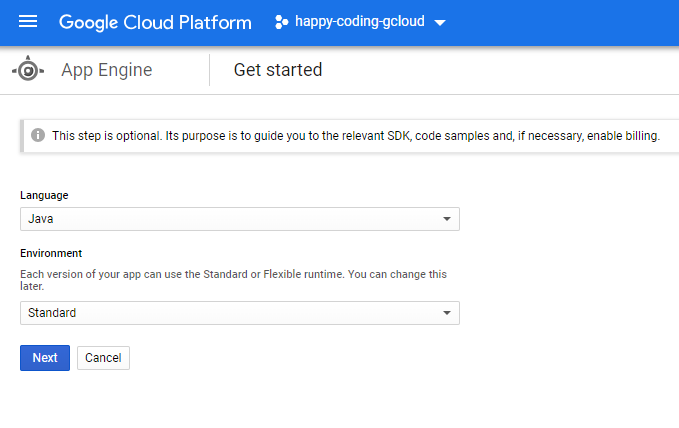
On this screen, choose Java for the language, and Standard as the environment, and click the Next button.
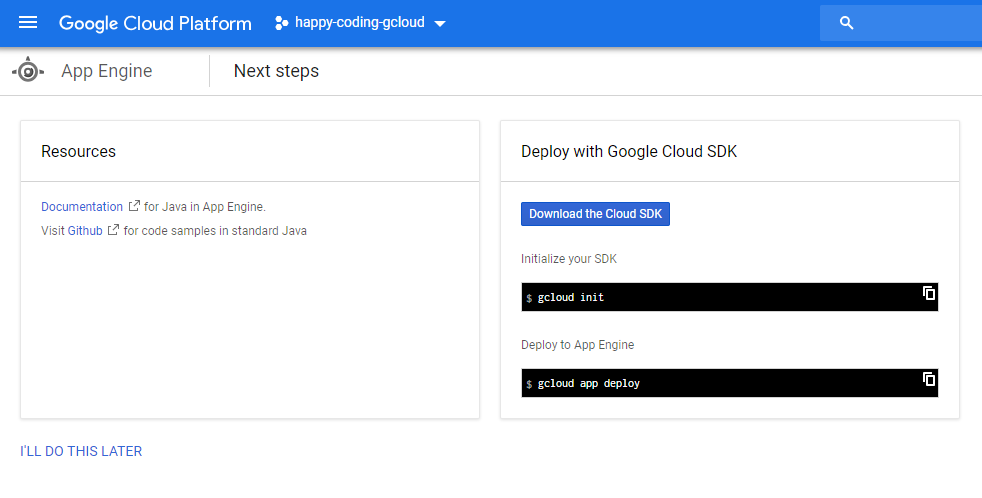
On the last screen, you can click the I'll do this later button at the bottom.
You’re done! If App Engine displays an option for deploying a sample project, you can ignore that. You’re going to deploy your own project in a minute.
Hello World
You can download a barebones example “hello world” Google Cloud project from DownGit.
Note: All of the example projects used in these tutorials are available in the Happy Coding repo. The above link uses DownGit to create a download link for a specific project directory, but you can also download the whole repo, including all of the example projects, from GitHub.
No matter how you download the example project, you’ll end up with an app-engine-hello-world directory with subdirectories that contain 5 files:
app-engine-hello-world/pom.xmlis a Maven POM file that defines the project.src/main/is a directory that contains the code.appengine/app.yamlis a config file that sets up App Engine. The hello world project only uses a single property that sets the runtime to Java 11.java/is a directory that contains server-side code.io.happycoding.ServerMain.javais the main class that sets up the server.io.happycoding.servlets.HelloWorldServlet.javais a Java servlet that returns some HTML content.
webapp/is a directory that contains web files.index.htmlis an HTML file that shows static content.
Run a Local Server
Navigate to the app-engine-hello-world directory in a command line, and then execute this command:
mvn package exec:java
Tip: This is the most common command you’ll use when developing Google Cloud projects, so remember it! (Or bookmark this page.)
This tells Maven to run the exec-maven-plugin defined in the pom.xml file, which runs the ServerMain class. The ServerMain class creates and runs a server.
Since you’re running this on your own computer, this turns your computer into a server. This is very helpful for testing during development, before you deploy it to your live server. You can experiment without worrying about breaking your web app for any users.
The first time you run this command it’ll take a couple minutes while it automatically downloads all of the libraries it needs. After this first time it’ll be much faster.
When the command completes and you’ll see this in your command line:
Server started!
Next, visit this URL in a web browser:
(If you’re using Google Cloud Shell, use the web preview button. Anywhere you see localhost in these tutorials, use the web preview button instead.)
This URL points to the local server that you just ran. When you navigate to that URL, you should see this:
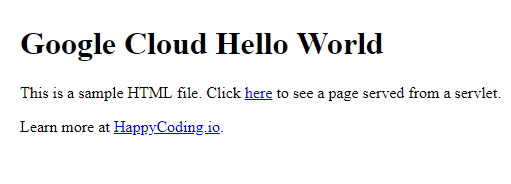
This is the HTML content of the index.html file in the project.
Navigate to localhost:8080/hello to view the content that’s served by the HelloWorldServlet class.
Bring your server down by pressing ctrl+c in your command line. Try making a simple change to the index.html and HelloWorldServlet files, running the server again, and then refreshing your web browser to see your change.
Run a Live Server
Running a local server is useful for developing, but if you want to share your project with other people, you’ll want to deploy your code to a live URL.
Set your projectId
First, open up the pom.xml file and find this line:
<googleCloudProjectId>YOUR_PROJECT_ID_HERE</googleCloudProjectId>
Change YOUR_PROJECT_ID_HERE to your actual project ID, which you can find in the Google Cloud console.
Login
Next, you need to login so Google Cloud knows you have access to your project. You wouldn’t want anybody to be able to update your live site! (If you’re using Google Cloud Shell, skip this step.)
Navigate to the app-engine-hello-world directory in a command line, and then execute this command:
mvn appengine:cloudSdkLogin
This will open a new page in your browser asking you to login to your Google account and give access to the Google Cloud SDK.
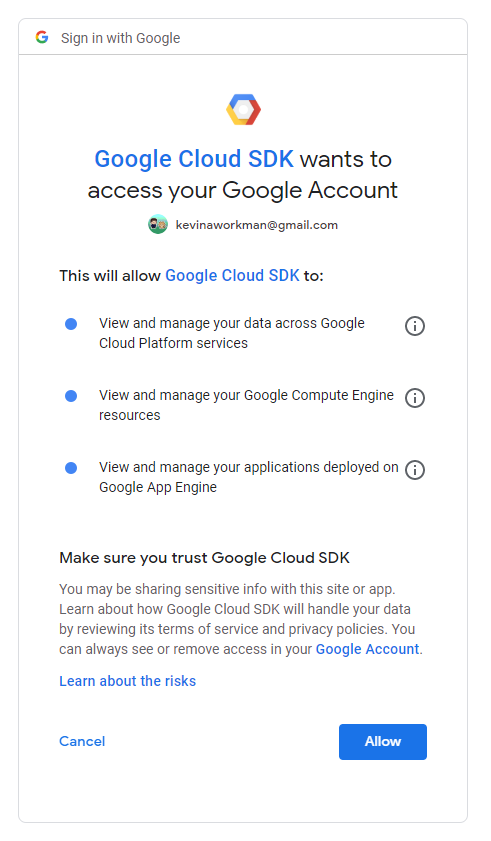
Click Allow, and you should see a screen like this:
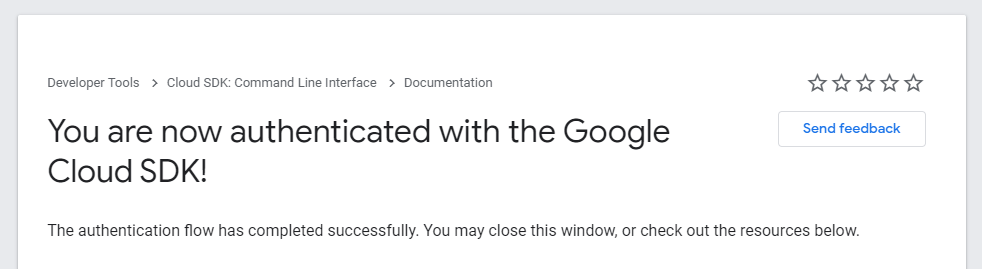
You can now close this browser tab. Back in the command line, the command you ran should be complete with a success message.
Deploying
Finally, execute this command:
mvn package appengine:deploy
This command tells Maven to use the App Engine Maven plugin defined in the pom.xml file to deploy the project to the App Engine application inside your Google Cloud project. In other words, it deploys the code to your live site.
After this command completes, navigate to YOUR_PROJECT_ID_HERE.appspot.com to view the live version of your project. You can also send this URL to other people for them to see your work.
Make a change to the index.html file or HelloWorldServlet class, and then run this command again to update your live site. Note that you only have to set the projectId and login once. After that, you can execute the mvn package appengine:deploy command as many times as you want.
Editors
The hello world project, and every other example project in these tutorials, will work with any editor or IDE.
If you’re using Eclipse or Intellij, you can import it as a Maven project.
You can also use editors like Atom, Sublime, or Notepad++.
I personally use Eclipse or Intellij to edit code, or I use jEdit for smaller projects. I prefer to use the command line to deploy rather than going through an IDE. And I use Google Cloud Shell if I don’t feel like installing a bunch of things.
Google Cloud Shell
In addition to services like App Engine and Datastore, Google Cloud also offers a web-based coding environment that you can access from a web browser. This is handy if you’re on a device that doesn’t allow installing Java and Maven, or if you want to skip a few setup steps.
Access Google Cloud Shell here:
https://ssh.cloud.google.com/cloudshell/editor
Google Cloud Shell gives you your own Linux environment with Java, git, and Maven already installed. It also comes with its own code editor, command line, and web preview.
All of the example projects in these tutorials will work fine from Google Cloud Shell. The only difference is that anytime you see localhost, use the web preview instead.
See Google Cloud docs for shell for info using the Cloud Shell editor, Uplaod page for info on uploading files to the Google Cloud Shell environment, and Web preview page for info on using the web preview.
Google Cloud Shell is honestly one of my favorite things about Google Cloud, so check it out!
Summary
Congratulations! You’ve now prepared your computer to use Google Cloud, and you’ve setup a Google Cloud project and an App Engine application. And you’ve deployed your first hello world project to both a local and live server!
From here, the rest of these tutorials will introduce you to other Google Cloud tools.
More Info
Here are some links you might find useful:
- Google Cloud console - your new best friend
- Google Cloud Shell - skip the setup
- Using Maven and the App Engine Plugin - more info about the Maven plugin
- App EngineMaven Plugin Goals and Parameters - other stuff you can do with the Maven plugin
- Google App Engine Java 11 Standard Environment documentation - official docs
- Setting up a Java Development environment - more official docs
Homework
- Add some JavaScript and CSS to the
index.htmlfile. - Add some Java code to the
HelloWorldServletclass. Try printing out the current date, or some server stats like the startup time and memory usage. - Share your live URL on the Happy Coding forum!