Setup


Setup
LibGDX is a game development framework that gives you a bunch of useful features (a 60 fps render loop, animation, input, physics, and lighting for example) and allows you to deploy as a packaged executable, an HTML/JavaScript page, or an Android or iOS app.
This multiple deployment feature is extremely useful. It allows you to write your code only once and have it work on pretty much any platform.
A libGDX project is actually multiple projects: a core project that contains all of your game logic, and then platform-specific projects that point to your core project and can be deployed to a particular platform.
LibGDX Project Generator Tool
Setting up all those projects can be pretty annoying, so libGDX offers a tool that does all of the setup for you. Download the tool from here.
Run that program. If double-clicking it doesn’t work, try running it manually via the command line using this command:
java -jar gdx-setup.jar
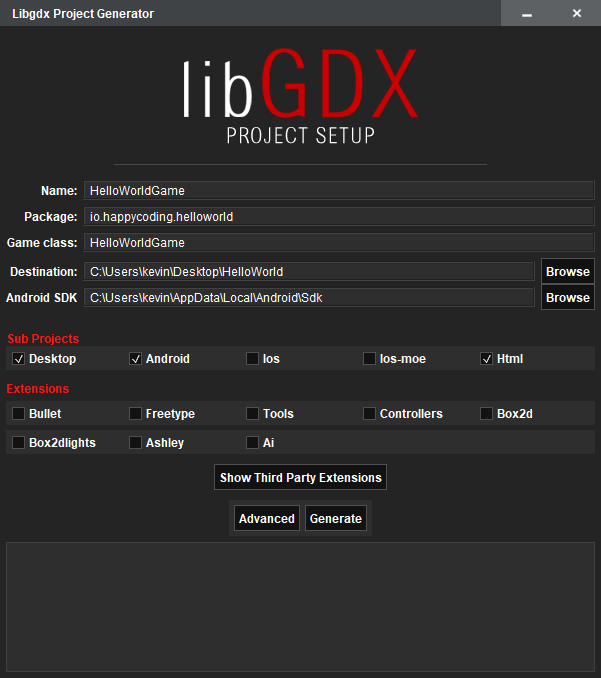
Fill out all of the fields. Give your game whatever name you want, and put it in a package. Locate your Android SDK. If you used Android Studio to download the Android SDK, go to Android Studio and click Tools > Android > SDK Manager to find out where your SDK is.
Check which types of projects you want to generate. For now I’m going to create Desktop, Android, and Html projects. You can uncheck all of the Extensions for now. Click the Generate button. That will create the projects in the directory you specified.
Android Studio
This tutorial assumes you’re planning on deploying your game as an Android app. If you’re planning on deploying as multiple apps (such as an HTML page or a desktop application), that’s fine. As long as at least one of your apps is Android, then it makes the most sense to use Android Studio for all of your development. This is because Android Studio can run desktop apps, but other IDEs like Eclipse are no longer recommended for Android development.
To import your projects into Android Studio, go to File > Open and then select the build.gradle file in the top-level project directory.
Other Editors
If you’re not deploying to Android, then most of everything else still applies. Look up how to import your libGDX project in your IDE here. Also note that it’s possible to do everything using a basic text editor and the command line. If that’s more your style, check out this page.
Projects
Now that you have the libGDX projects imported into Android Studio, let’s talk a little more about each one.
Core Project
The core project is the code that contains all of your game logic. This is where almost all of your code goes. The other projects all point to the core project, which allows you to write your game once and deploy it to multiple platforms.
The core project should not contain any platform-specific code! Instead, you should use the classes and functions that libGDX offers to write platform-agnostic code that works on every system you’re planning on targetting.
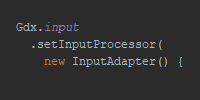
For example, instead of writing code that checks for a mouse position (which won’t work on mobile devices that don’t have a mouse), use the Gdx.input.getX() and Gdx.input.getY() functions, which return the mouse position on computers and the touch position on mobile devices.
We’ll talk more about libGDX code in the following tutorials.
The core project is not runnable by itself. You have to run one of the platform-specific projects.
Android Project
The Android project contains the code that launches your game as an Android app. This project also contains any files you’re using, such as image or sound files. So if you want to use an image or a sound, remember to put it in the Android project. (If you don’t have an Android project, then files go into the core project.)
The Android project also contains settings specific to Android, such as app icons and the AndroidManifest.xml file.
To run the Android project, select it and then go to Run > Run 'Android' or click the green play button in the upper-right corner of Android Studio. Don’t forget to plug your phone in. ![]()
Desktop Project
The desktop project contains the code that launches your game as a Java application. Even if you aren’t planning on releasing your game as a Java application, the desktop project is useful for convenient debugging. This allows you to test your game on your computer before deploying it as an Android app or HTML page.
Before running the desktop project, you first have to set its working directory to the assets folder in the Android project, so it can see the files used by your game. Go to Run > Run... > Edit Configurations and then click the green + plus button and select Application from the menu. Give your launch configuration a name, set the Main class to be DesktopLauncher in the desktop project, and change the Working directory to be the assets directory in the Android project. Choose the desktop module.
You should see something like this:
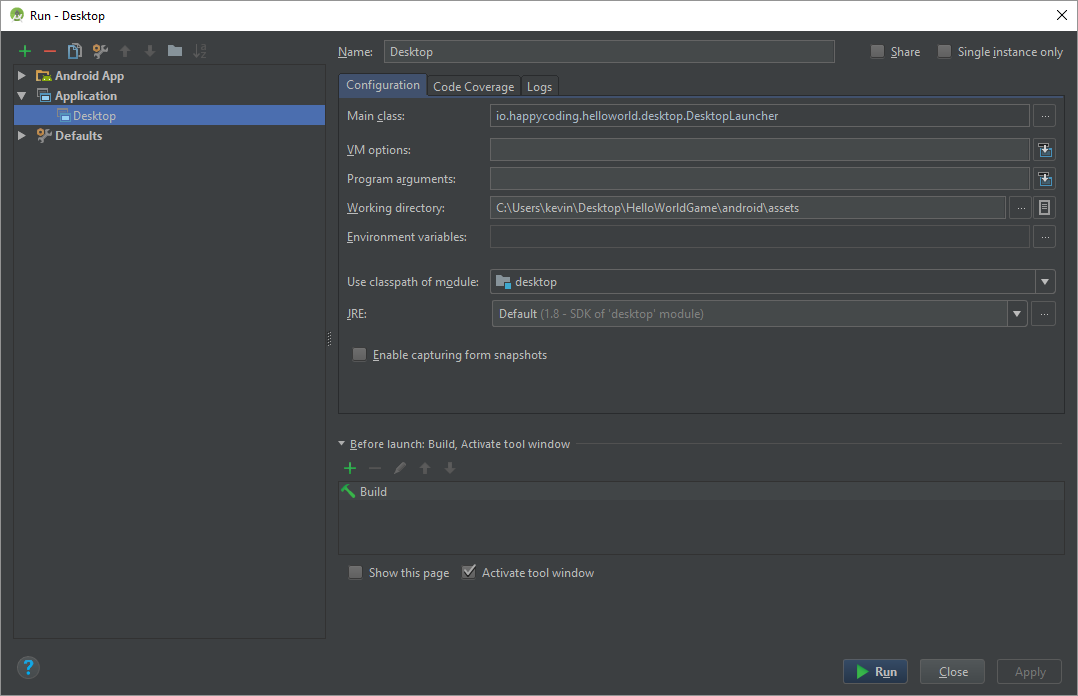
Click Apply and then Run and you should see the game running in a window on your computer.
HTML Project
The HTML project contains the code that launches your game as an HTML page. Behind the scenes, the HTML project uses GWT to transpile your Java code into JavaScript. This won’t work with any arbitrary Java code, but it will work with libGDX code. That’s another reason why it’s important for your core project to not contain any platform-specific code and to go through libGDX abstractions instead.
The easiest way to work with the HTML project is via the command line instead of through any particular IDE.
Running HTML
To run a test version of your HTML project, execute this command in the top-level project directory:
gradlew html:superDev
When you see a message saying “The code server is ready” you can navigate to http://localhost:8080/html to view your game.
Deploying HTML
To generate the HTML and JavaScript files for your game, execute this command in the top-level project directory:
gradlew html:dist
This creates a html/build/dist directory that contains the HTML and JavaScript files for your game. Check out the HTML tutorials for more info on customizing and deploying these files.
Working in LibGDX
The libGDX setup tool creates a basic hello world application that shows a single image and a red background.
Typically you’ll use the desktop project to quickly test your code as you go, and then use the Android and HTML projects when you deploy.