Graphics


Graphics
So far we’ve created games with simple graphics, but libGDX offers more advanced graphics as well. This tutorial goes over some of these options. This is a huge topic, so my goal is to introduce the concepts rather than try to cover everything in a ton of detail. I might simplify things a bit or gloss over the complexities of how things are rendered, but if you want to get into the more advanced stuff, you can start reading here.
Note: For the sake of simplicity I’m going to use simple programs that do not contain multiple screens and draw directly to the main app, but you can do all of this stuff if you’re using the Game and Screen classes as well.
OpenGL
The Open Graphics Library, or OpenGL, is an API specification (a list of functions you can call) that expose the ability to draw to the screen using the graphics card. This makes the drawing code faster, so you can draw more complicated scenes each frame.
OpenGL isn’t a library by itself, it’s “just” a list of functions. The implementation of those functions is up to each graphics card manufacturer. You don’t really need to worry about that, but it’s worth understanding how the pieces fit together. OpenGL forms a contract between your code and the graphics card, which allows you to draw using the graphics card.
OpenGL Context
OpenGL functions are made available through the OpenGL context, which for our purposes is an object that we can call the functions on. In libGDX, this object is stored in the Gdx.gl variable, which holds an instance of the GL20 class.
Here’s an example:
package io.happycoding.helloworld;

import com.badlogic.gdx.ApplicationAdapter;
import com.badlogic.gdx.Gdx;
import com.badlogic.gdx.graphics.GL20;

public class HelloWorldGame extends ApplicationAdapter {

	@Override
	public void render () {
		Gdx.gl.glClearColor(.25f, .25f, .25f, 1);
		Gdx.gl.glClear(GL20.GL_COLOR_BUFFER_BIT);
	}
}
This code uses the Gdx.gl variable to call the glClearColor() function, which sets the background color, and then the glClear() function, which actually draws the background using the color we just set.
There are a bunch of other functions in the GL20 class, which are useful if you want to do low-level OpenGL function calls. You can read more about them here.
ShapeRenderer
The OpenGL context is useful if you want to do low-level OpenGL calls, but for most purposes you probably want to work in a higher level: drawing shapes like rectangles and circles instead of drawing each individual pixels, for example. The ShapeRenderer offers functions that allow you to draw simple shapes.
Here’s an example:
package io.happycoding.helloworld;

import com.badlogic.gdx.ApplicationAdapter;
import com.badlogic.gdx.Gdx;
import com.badlogic.gdx.graphics.GL20;
import com.badlogic.gdx.graphics.glutils.ShapeRenderer;

public class HelloWorldGame extends ApplicationAdapter {
    ShapeRenderer shapeRenderer;

    @Override
    public void create () {
        shapeRenderer = new ShapeRenderer();
    }

    @Override
    public void render () {
        Gdx.gl.glClearColor(.25f, .25f, .25f, 1);
        Gdx.gl.glClear(GL20.GL_COLOR_BUFFER_BIT);

        shapeRenderer.begin(ShapeRenderer.ShapeType.Filled);
        shapeRenderer.setColor(0, 1, 0, 1);
        shapeRenderer.circle(200, 100, 75);
        shapeRenderer.end();
    }

    @Override
    public void dispose () {
        shapeRenderer.dispose();
    }
}
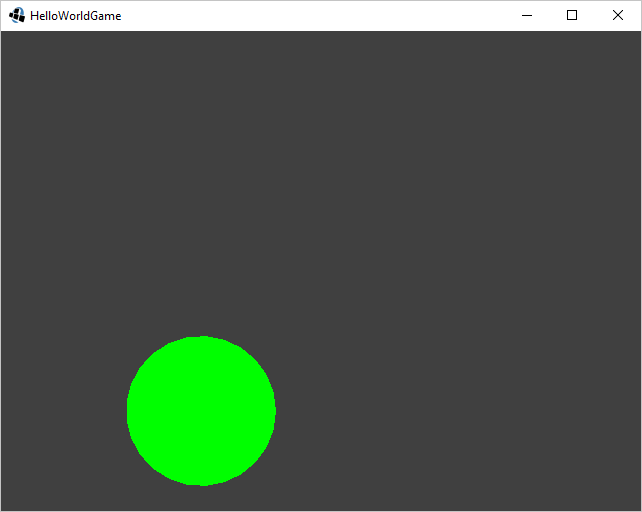
This code uses the functions in ShapeRenderer to draw a green circle.
Batching
Notice that the above code calls the shapeRenderer.begin() and shapeRenderer.end() function. The begin() function tells libGDX (and by extension, OpenGL) what kind of shape to draw: in this case a filled shape. The end() function makes sure that the shape we drew was rendered.
We can use these functions to batch our draw calls, which means grouping similar draw calls together. This allows OpenGL (and by extension, the graphics card) to draw the shapes more efficiently.
For example, consider this program:
package io.happycoding.helloworld;

import com.badlogic.gdx.ApplicationAdapter;
import com.badlogic.gdx.Gdx;
import com.badlogic.gdx.graphics.GL20;
import com.badlogic.gdx.graphics.glutils.ShapeRenderer;
import com.badlogic.gdx.math.MathUtils;

public class HelloWorldGame extends ApplicationAdapter {
    ShapeRenderer shapeRenderer;

    @Override
    public void create() {
        shapeRenderer = new ShapeRenderer();
    }

    @Override
    public void render() {
        Gdx.gl.glClearColor(.25f, .25f, .25f, 1);
        Gdx.gl.glClear(GL20.GL_COLOR_BUFFER_BIT);

        for (int i = 0; i < 10000; i++) {
            shapeRenderer.begin(ShapeRenderer.ShapeType.Filled);
            shapeRenderer.setColor(MathUtils.random(), MathUtils.random(), MathUtils.random(), 1);
            shapeRenderer.circle(MathUtils.random(Gdx.graphics.getWidth()), MathUtils.random(Gdx.graphics.getHeight()), 25);
            shapeRenderer.end();
        }

        System.out.println(Gdx.graphics.getFramesPerSecond());
    }

    @Override
    public void dispose() {
        shapeRenderer.dispose();
    }
}
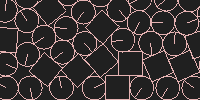
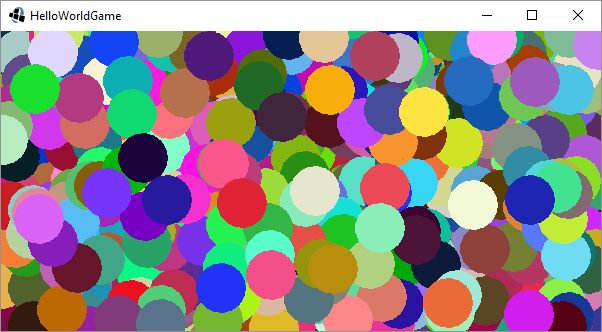
This code draws 10000 randomly colored circles each frame. These draw calls are not batched, because we’re calling the begin() and end() functions for each individual circle. When I run this on my computer, I get about 15 frames per second.
Now consider this modification to the code:
package io.happycoding.helloworld;

import com.badlogic.gdx.ApplicationAdapter;
import com.badlogic.gdx.Gdx;
import com.badlogic.gdx.graphics.GL20;
import com.badlogic.gdx.graphics.glutils.ShapeRenderer;
import com.badlogic.gdx.math.MathUtils;

public class HelloWorldGame extends ApplicationAdapter {
    ShapeRenderer shapeRenderer;

    @Override
    public void create() {
        shapeRenderer = new ShapeRenderer();
    }

    @Override
    public void render() {
        Gdx.gl.glClearColor(.25f, .25f, .25f, 1);
        Gdx.gl.glClear(GL20.GL_COLOR_BUFFER_BIT);

        shapeRenderer.begin(ShapeRenderer.ShapeType.Filled);
        for (int i = 0; i < 1000; i++) {
            shapeRenderer.setColor(MathUtils.random(), MathUtils.random(), MathUtils.random(), 1);
            shapeRenderer.circle(MathUtils.random(Gdx.graphics.getWidth()), MathUtils.random(Gdx.graphics.getHeight()), 25);
        }
        shapeRenderer.end();

        System.out.println(Gdx.graphics.getFramesPerSecond());
    }

    @Override
    public void dispose() {
        shapeRenderer.dispose();
    }
}
Now this code only calls the begin() and end() functions once per frame. In other words, all of our circles are batched together. When I run this code on my computer, I get about 60 frames per second. Much better!
Batching our draw calls allows us to draw more shapes per frame, which is pretty important for games that have a lot of stuff on the screen.
Camera
Let’s say we wanted to create a scene that contained a bunch of shapes, and we wanted to move around in that scene. (Picture a game like Mario where the camera moves around in the game world.) We could move all of the shapes around by modifying the coordinates we pass into the rendering function using an offset, like this:
package io.happycoding.helloworld;

import com.badlogic.gdx.ApplicationAdapter;
import com.badlogic.gdx.Gdx;
import com.badlogic.gdx.Input;
import com.badlogic.gdx.graphics.GL20;
import com.badlogic.gdx.graphics.glutils.ShapeRenderer;

public class HelloWorldGame extends ApplicationAdapter {
    ShapeRenderer shapeRenderer;

    float bottomLeftX = 0;
    float bottomLeftY = 0;
    float rectWidth;
    float rectHeight;
    float moveSpeed = 100;

    @Override
    public void create() {
        shapeRenderer = new ShapeRenderer();
        rectWidth = Gdx.graphics.getWidth() / 2;
        rectHeight = Gdx.graphics.getHeight() / 2;
    }

    @Override
    public void render() {

        if (Gdx.input.isKeyPressed(Input.Keys.W)) {
            bottomLeftY -= moveSpeed * Gdx.graphics.getDeltaTime();
        } else if (Gdx.input.isKeyPressed(Input.Keys.S)) {
            bottomLeftY += moveSpeed * Gdx.graphics.getDeltaTime();
        }

        if (Gdx.input.isKeyPressed(Input.Keys.A)) {
            bottomLeftX += moveSpeed * Gdx.graphics.getDeltaTime();
        } else if (Gdx.input.isKeyPressed(Input.Keys.D)) {
            bottomLeftX -= moveSpeed * Gdx.graphics.getDeltaTime();
        }

        Gdx.gl.glClearColor(.25f, .25f, .25f, 1);
        Gdx.gl.glClear(GL20.GL_COLOR_BUFFER_BIT);

        shapeRenderer.begin(ShapeRenderer.ShapeType.Filled);
        shapeRenderer.setColor(1, 0, 0, 1);
        shapeRenderer.rect(bottomLeftX, bottomLeftY, rectWidth, rectHeight);
        shapeRenderer.setColor(0, 1, 0, 1);
        shapeRenderer.rect(bottomLeftX + rectWidth, bottomLeftY, rectWidth, rectHeight);
        shapeRenderer.setColor(0, 0, 1, 1);
        shapeRenderer.rect(bottomLeftX + rectWidth, bottomLeftY + rectHeight, rectWidth, rectHeight);
        shapeRenderer.setColor(1, 1, 0, 1);
        shapeRenderer.rect(bottomLeftX, bottomLeftY + rectHeight, rectWidth, rectHeight);
        shapeRenderer.end();
    }

    @Override
    public void dispose() {
        shapeRenderer.dispose();
    }
}
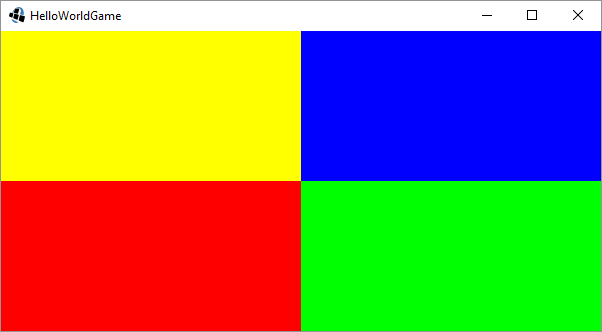
This code allows the user to move 4 rectangles around with the WASD keys.
This approach is fine for some cases, but it can get annoying if you have a bunch of objects in your game or want to do more advanced view manipulation. For these more advanced scenarios, we can use the libGDX camera system.
The Camera class and its subclasses OrthographicCamera and PerspectiveCamera provide functionality that allows us to move a camera around in our scene in order to change what’s drawn to the screen.
Here’s the same program using the OrthographicCamera class:
package io.happycoding.helloworld;

import com.badlogic.gdx.ApplicationAdapter;
import com.badlogic.gdx.Gdx;
import com.badlogic.gdx.Input;
import com.badlogic.gdx.graphics.GL20;
import com.badlogic.gdx.graphics.OrthographicCamera;
import com.badlogic.gdx.graphics.glutils.ShapeRenderer;

public class HelloWorldGame extends ApplicationAdapter {

    OrthographicCamera camera;
    ShapeRenderer shapeRenderer;

    float bottomLeftX = 0;
    float bottomLeftY = 0;
    float rectWidth;
    float rectHeight;
    float moveSpeed = 100;

    @Override
    public void create() {
        camera = new OrthographicCamera(Gdx.graphics.getWidth(), Gdx.graphics.getHeight());
        camera.position.set(Gdx.graphics.getWidth() / 2, Gdx.graphics.getHeight() / 2, 0);
        camera.update();

        shapeRenderer = new ShapeRenderer();
        rectWidth = Gdx.graphics.getWidth() / 2;
        rectHeight = Gdx.graphics.getHeight() / 2;
    }

    @Override
    public void render() {

        if (Gdx.input.isKeyPressed(Input.Keys.W)) {
            camera.translate(0, moveSpeed * Gdx.graphics.getDeltaTime());
        } else if (Gdx.input.isKeyPressed(Input.Keys.S)) {
            camera.translate(0, -moveSpeed * Gdx.graphics.getDeltaTime());
        }

        if (Gdx.input.isKeyPressed(Input.Keys.A)) {
            camera.translate(-moveSpeed * Gdx.graphics.getDeltaTime(), 0);
        } else if (Gdx.input.isKeyPressed(Input.Keys.D)) {
            camera.translate(moveSpeed * Gdx.graphics.getDeltaTime(), 0);
        }

        Gdx.gl.glClearColor(.25f, .25f, .25f, 1);
        Gdx.gl.glClear(GL20.GL_COLOR_BUFFER_BIT);

        camera.update();
        shapeRenderer.setProjectionMatrix(camera.combined);

        shapeRenderer.begin(ShapeRenderer.ShapeType.Filled);
        shapeRenderer.setColor(1, 0, 0, 1);
        shapeRenderer.rect(bottomLeftX, bottomLeftY, rectWidth, rectHeight);
        shapeRenderer.setColor(0, 1, 0, 1);
        shapeRenderer.rect(bottomLeftX + rectWidth, bottomLeftY, rectWidth, rectHeight);
        shapeRenderer.setColor(0, 0, 1, 1);
        shapeRenderer.rect(bottomLeftX + rectWidth, bottomLeftY + rectHeight, rectWidth, rectHeight);
        shapeRenderer.setColor(1, 1, 0, 1);
        shapeRenderer.rect(bottomLeftX, bottomLeftY + rectHeight, rectWidth, rectHeight);
        shapeRenderer.end();
    }

    @Override
    public void dispose() {
        shapeRenderer.dispose();
    }
}
There are a few lines of code worth calling out here:
camera = new OrthographicCamera(Gdx.graphics.getWidth(), Gdx.graphics.getHeight());This line of code creates a newOrthographicCamerawith the specified viewport size. In this case we’re using the same size as the screen, but we can use any size we want here.camera.position.set(Gdx.graphics.getWidth() / 2, Gdx.graphics.getHeight() / 2, 0);This line of code sets the position of the camera to the center of our scene. Again, we’re using the size of the device window to calculate this example, but we could choose any coordinate.camera.update();This line of code tells the camera to calculate everything it needs, based on the properties we’ve set. (In this case, we’ve set the size and position.)- ` camera.translate(x, y);` This line of code moves the camera around. In our code we’re moving the camera when the user presses the WASD keys, but we could also do stuff like move the camera to follow the player.
shapeRenderer.setProjectionMatrix(camera.combined);This line of code tells the shape renderer to use our camera to draw everything.
After that, anything we draw using the shape renderer will automatically move around to make it look like the scene is being viewed through a camera with the properties that we’ve set. Notice that we no longer move the rectangles around directly. We move the camera around, draw our scene in one place, and let libGDX figure out what to draw.
Zoom and Rotate
The Camera class offers more advanced functionality as well, such as the ability to zoom and rotate the camera. Here’s an expanded example:
package io.happycoding.helloworld;

import com.badlogic.gdx.ApplicationAdapter;
import com.badlogic.gdx.Gdx;
import com.badlogic.gdx.Input;
import com.badlogic.gdx.graphics.GL20;
import com.badlogic.gdx.graphics.OrthographicCamera;
import com.badlogic.gdx.graphics.glutils.ShapeRenderer;

public class HelloWorldGame extends ApplicationAdapter {

    OrthographicCamera camera;
    ShapeRenderer shapeRenderer;

    float bottomLeftX = 0;
    float bottomLeftY = 0;
    float rectWidth;
    float rectHeight;
    float moveSpeed = 100;
    float rotateSpeed = 20;
    float zoomSpeed = 1;

    @Override
    public void create() {
        camera = new OrthographicCamera(Gdx.graphics.getWidth(), Gdx.graphics.getHeight());
        camera.position.set(Gdx.graphics.getWidth() / 2, Gdx.graphics.getHeight() / 2, 0);
        camera.update();

        shapeRenderer = new ShapeRenderer();
        rectWidth = Gdx.graphics.getWidth() / 2;
        rectHeight = Gdx.graphics.getHeight() / 2;
    }

    @Override
    public void render() {

        // move camera left and right
        if (Gdx.input.isKeyPressed(Input.Keys.W)) {
            camera.translate(0, moveSpeed * Gdx.graphics.getDeltaTime());
        } else if (Gdx.input.isKeyPressed(Input.Keys.S)) {
            camera.translate(0, -moveSpeed * Gdx.graphics.getDeltaTime());
        }

        // move camera up and down
        if (Gdx.input.isKeyPressed(Input.Keys.A)) {
            camera.translate(-moveSpeed * Gdx.graphics.getDeltaTime(), 0);
        } else if (Gdx.input.isKeyPressed(Input.Keys.D)) {
            camera.translate(moveSpeed * Gdx.graphics.getDeltaTime(), 0);
        }

        // zoom camera
        if(Gdx.input.isKeyPressed((Input.Keys.UP))){
            camera.zoom -= zoomSpeed * Gdx.graphics.getDeltaTime();
        }
        else if(Gdx.input.isKeyPressed((Input.Keys.DOWN))){
            camera.zoom += zoomSpeed * Gdx.graphics.getDeltaTime();
        }

        // rotate camera
        if(Gdx.input.isKeyPressed((Input.Keys.LEFT))){
            camera.rotate(-rotateSpeed * Gdx.graphics.getDeltaTime());
        }
        else if(Gdx.input.isKeyPressed((Input.Keys.RIGHT))){
            camera.rotate(rotateSpeed * Gdx.graphics.getDeltaTime());
        }

        Gdx.gl.glClearColor(.25f, .25f, .25f, 1);
        Gdx.gl.glClear(GL20.GL_COLOR_BUFFER_BIT);

        camera.update();
        shapeRenderer.setProjectionMatrix(camera.combined);

        shapeRenderer.begin(ShapeRenderer.ShapeType.Filled);
        shapeRenderer.setColor(1, 0, 0, 1);
        shapeRenderer.rect(bottomLeftX, bottomLeftY, rectWidth, rectHeight);
        shapeRenderer.setColor(0, 1, 0, 1);
        shapeRenderer.rect(bottomLeftX + rectWidth, bottomLeftY, rectWidth, rectHeight);
        shapeRenderer.setColor(0, 0, 1, 1);
        shapeRenderer.rect(bottomLeftX + rectWidth, bottomLeftY + rectHeight, rectWidth, rectHeight);
        shapeRenderer.setColor(1, 1, 0, 1);
        shapeRenderer.rect(bottomLeftX, bottomLeftY + rectHeight, rectWidth, rectHeight);
        shapeRenderer.end();
    }

    @Override
    public void dispose() {
        shapeRenderer.dispose();
    }
}
This example allows the user to move the camera using the WASD keys just like before, but now it also allows the user to zoom the camera using the up and down arrow keys, and to rotate the camera using the left and right arrow keys.
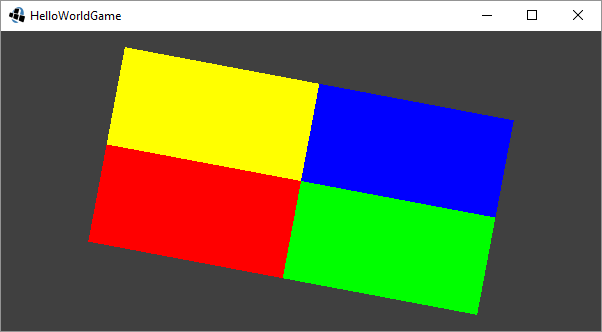
Notice that it’s possible to do weird things with the camera, like zoom in “through” the shapes being drawn, which inverts everything, or to zoom too far out making everything too small to see. In a real scene, we could also move outside our game world. With all of this in mind, in a real game it’s probably a good idea to limit what the camera can do.
World Coordinates
Our above camera examples all use pixel coordinates, which will work for simple games. But more advanced games use the concept of world coordinates (also called model coordinates) instead of pixel coordinates (also called screen coordinates) to separate the game’s logic from its rendering.
The above example creates a camera with a viewport width and height that match the width and height of the device or game window:
camera = new OrthographicCamera(Gdx.graphics.getWidth(), Gdx.graphics.getHeight());
But consider the fact that we could have chosen any size for the viewport, like this:
camera = new OrthographicCamera(200, 100);
This line of code creates a camera with a viewport width of 200 and a viewport height of 100: but keep in mind that those aren’t measuring pixels! How you think about them depends on your game: you might think of them as feet, or meters, or light-years, or beard-seconds. This is what we mean by world or model coordinates. For example let’s say our camera’s viewport is 200x100 feet.
Now that our camera’s viewport is no longer measured in pixels, we don’t have to think about drawing in terms of pixels either. For example, we can think of our rectangle sizes in feet as well. Same with the various movement speeds we’re using in the code.
And since we’re no longer thinking in pixels, we can also use whatever origin we want: 0,0 no longer has to be the bottom-left corner of the screen. It’s pretty common to think of 0,0 as where the player starts in the world, and to draw everything relative to that.
Putting it all together, our program could look something like this:
package io.happycoding.helloworld;

import com.badlogic.gdx.ApplicationAdapter;
import com.badlogic.gdx.Gdx;
import com.badlogic.gdx.Input;
import com.badlogic.gdx.graphics.GL20;
import com.badlogic.gdx.graphics.OrthographicCamera;
import com.badlogic.gdx.graphics.glutils.ShapeRenderer;

public class HelloWorldGame extends ApplicationAdapter {

    OrthographicCamera camera;
    ShapeRenderer shapeRenderer;

    float rectWidth = 100;
    float rectHeight = 50;
    float moveSpeed = 100;
    float rotateSpeed = 20;
    float zoomSpeed = 1;

    @Override
    public void create() {
        camera = new OrthographicCamera(200, 100);
        camera.position.set(0, 0, 0);
        camera.update();

        shapeRenderer = new ShapeRenderer();
    }

    @Override
    public void render() {

        // move camera left and right
        if (Gdx.input.isKeyPressed(Input.Keys.W)) {
            camera.translate(0, moveSpeed * Gdx.graphics.getDeltaTime());
        } else if (Gdx.input.isKeyPressed(Input.Keys.S)) {
            camera.translate(0, -moveSpeed * Gdx.graphics.getDeltaTime());
        }

        // move camera up and down
        if (Gdx.input.isKeyPressed(Input.Keys.A)) {
            camera.translate(-moveSpeed * Gdx.graphics.getDeltaTime(), 0);
        } else if (Gdx.input.isKeyPressed(Input.Keys.D)) {
            camera.translate(moveSpeed * Gdx.graphics.getDeltaTime(), 0);
        }

        // zoom camera
        if(Gdx.input.isKeyPressed((Input.Keys.UP))){
            camera.zoom -= zoomSpeed * Gdx.graphics.getDeltaTime();
        }
        else if(Gdx.input.isKeyPressed((Input.Keys.DOWN))){
            camera.zoom += zoomSpeed * Gdx.graphics.getDeltaTime();
        }

        // rotate camera
        if(Gdx.input.isKeyPressed((Input.Keys.LEFT))){
            camera.rotate(-rotateSpeed * Gdx.graphics.getDeltaTime());
        }
        else if(Gdx.input.isKeyPressed((Input.Keys.RIGHT))){
            camera.rotate(rotateSpeed * Gdx.graphics.getDeltaTime());
        }

        Gdx.gl.glClearColor(.25f, .25f, .25f, 1);
        Gdx.gl.glClear(GL20.GL_COLOR_BUFFER_BIT);

        camera.update();
        shapeRenderer.setProjectionMatrix(camera.combined);

        shapeRenderer.begin(ShapeRenderer.ShapeType.Filled);
        shapeRenderer.setColor(1, 0, 0, 1);
        shapeRenderer.rect(-rectWidth, -rectHeight, rectWidth, rectHeight);
        shapeRenderer.setColor(0, 1, 0, 1);
        shapeRenderer.rect(0, -rectHeight, rectWidth, rectHeight);
        shapeRenderer.setColor(0, 0, 1, 1);
        shapeRenderer.rect(0, 0, rectWidth, rectHeight);
        shapeRenderer.setColor(1, 1, 0, 1);
        shapeRenderer.rect(-rectWidth, 0, rectWidth, rectHeight);
        shapeRenderer.end();
    }

    @Override
    public void dispose() {
        shapeRenderer.dispose();
    }
}
This code creates a camera with a viewport width of 200 and a viewport height of 100. It starts the camera at 0,0 and draws rectangles that are 100 x 50 world units, all relative to the 0,0 origin point.
The important thing to notice is that we’re not using pixels anywhere in this code. All of our rendering and logic uses world coordinates, and the conversion from world coordinates to pixel coordinates is handled by the OrthographicCamera class. For example, in a 600x300 (measured in pixels) window, our 100x50 rectangles (measured in world units) will be rendered in 300x150 pixels.
This allows us to write device-independent game code that doesn’t have to worry about exactly how the scene will show up in terms of on-screen pixels.
Homework
- Convert your previous simple libGDX project to use a camera and world coordinates.
- Draw a scene and let the user move the camera around inside that scene.