Eclipse EE


Eclipse EE
- Enterprise Edition
- Do you already have Eclipse EE?
- Download Eclipse EE
- Importing Maven Projects
- Creating Non-Maven Projects
- Running Tomcat
- Summary
So far you’ve been writing all of your code in a text editor, and compiling your servlet classes via the command prompt. It’s important to understand the fundamentals of how a web app works: stuff like running the server, and writing and compiling servlet classes.
But as your code gets more complicated, using a code editor like Eclipse will make your life much easier.
This tutorial assumes you’re already familiar with Eclipse from the Eclipse tutorial, so I won’t spend a ton of time introducing ideas like workspaces and projects. Instead, this tutorial talks about using Eclipse to develop web apps.
Enterprise Edition
You might have seen stuff referred to as EE, as in Java EE, Jakarta EE, or Eclipse EE. That EE stands for Enterprise Edition, which are versions of Java and Eclipse that include tools for server development.
I think the term “enterprise” is a little outdated, because it comes from a time when the only interactive websites that existed were owned by businesses, like online stores. That’s where the term enterprise (aka business) comes from. Now interactive websites are all over the place, not just owned by businesses. But we’ve kept using the term EE to describe stuff used for developing interactive websites.
Anyway, you’ve already been using Jakarta EE. It’s the tools and .jar files that come with your Jetty or Tomcat server. When you add your server’s lib directory to your classpath, or when you add the jakarta.servlet dependency to your pom.xml file, you’re using Jakarta EE. When you use JSP, you’re using Jakarta EE.
Jakarta EE isn’t an alternative to regular old Java- it’s built on top of it.
Similarly, Eclipse EE is a version of Eclipse that comes with a bunch of tools that make it easier to write server code. Remember how Eclipse let you compile and run a Java file by pressing the play button? Eclipse EE lets you compile and run a server by pressing the play button!
Do you already have Eclipse EE?
If you already have Eclipse, you might already have the EE version. To check, open Eclipse, and then go to Help > About Eclipse. The window that pops up tells you which version you have.
Eclipse IDE for Java Developersmeans you have the standard edition, so you need to download Eclipse EE.Eclipse IDE for Enterprise Java and Web Developersmeans you have the EE version, so you can skip the next step.
Download Eclipse EE
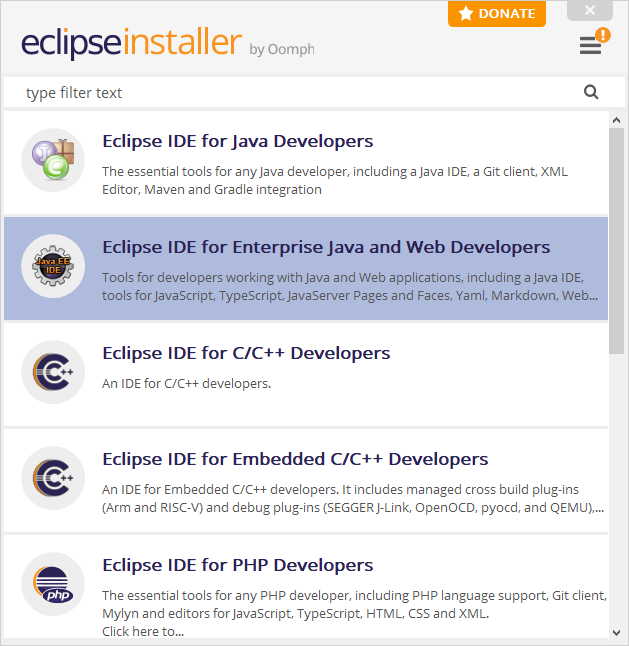
Go to the Eclipse download page and download and run the installer. When the installer launches, a dialog asks you which version to install. Choose Eclipse IDE for Enterprise Java and Web Developers:
Step through the installation process and then launch Eclipse EE.
In the workspace chooser that pops up, I recommend creating a new workspace directory instead of reusing an existing workspace. If you see a welcome tab, you can close it. Finally, you should see something that looks like this:
This means that Eclipse EE is running. Now you can start creating servers and web apps!
Importing Maven Projects
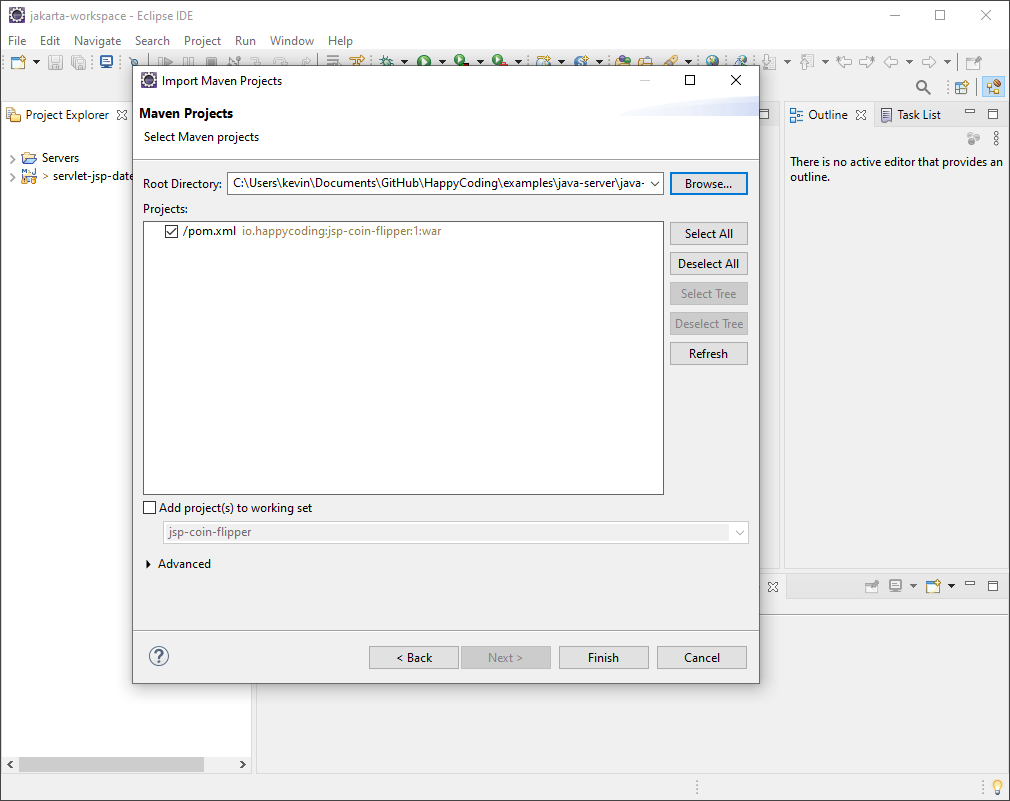
The examples in these tutorials are packaged as Maven projects. You can view all of them on GitHub.
To import one of these projects, go to File > Import... and then in the dialog that pops up, select Maven > Existing Maven Projects. For the root directory, navigate to a directory that contains a pom.xml file. Then click the Finish button.
Creating Non-Maven Projects
I recommend using Maven, but if you don’t want to use Maven for some reason, you can create a project without it.
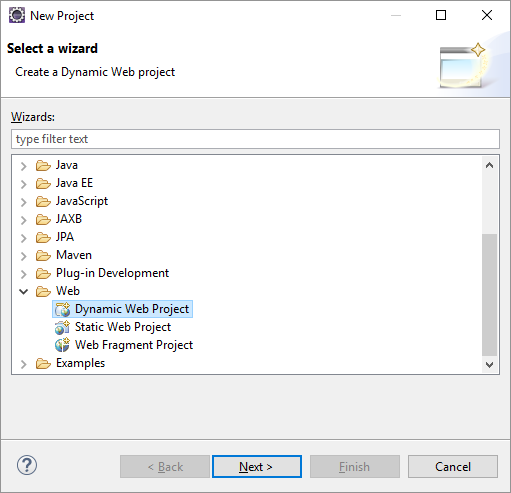
Go to File > New > Project... and in the dialog that pops up, go to Web > Dynamic Web Project and click Next.
On the next screen, give your project a name. The default settings for everything else should be okay.
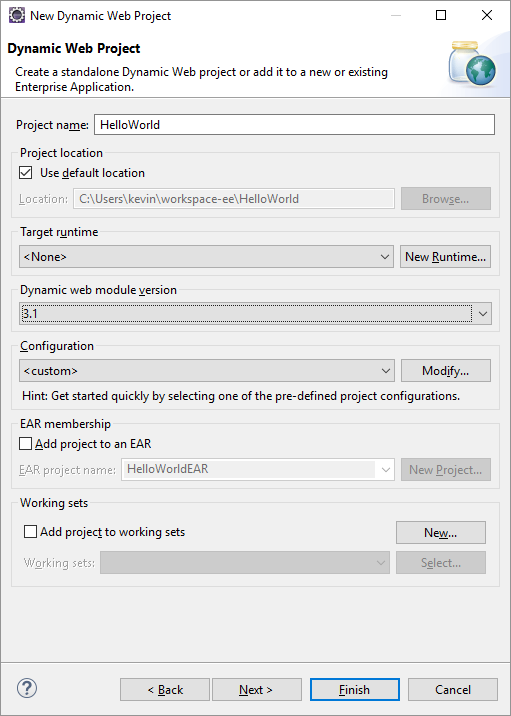
Click the Next button until you get to a screen that contains a Generate web.xml deployment descriptor checkbox. Uncheck that checkbox, because you’re going to use the @WebServlet annotation instead of a web.xml file.
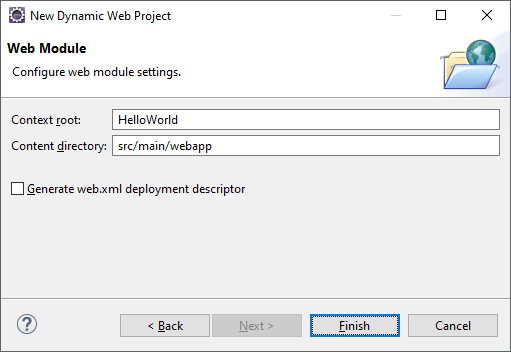
Finally, click the Finish button.
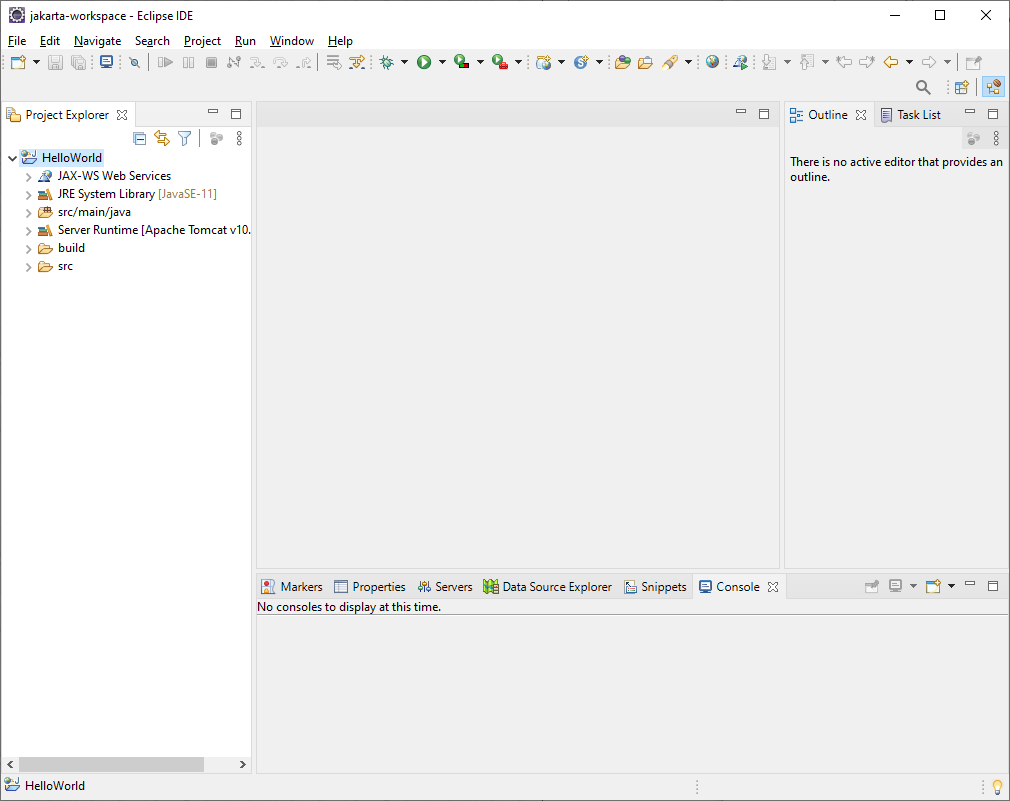
You should now see your project in the Project Explorer tab.
Note: If your project contains a web.xml file, delete it! Apparently unchecking the checkbox might not work.
Writing Code
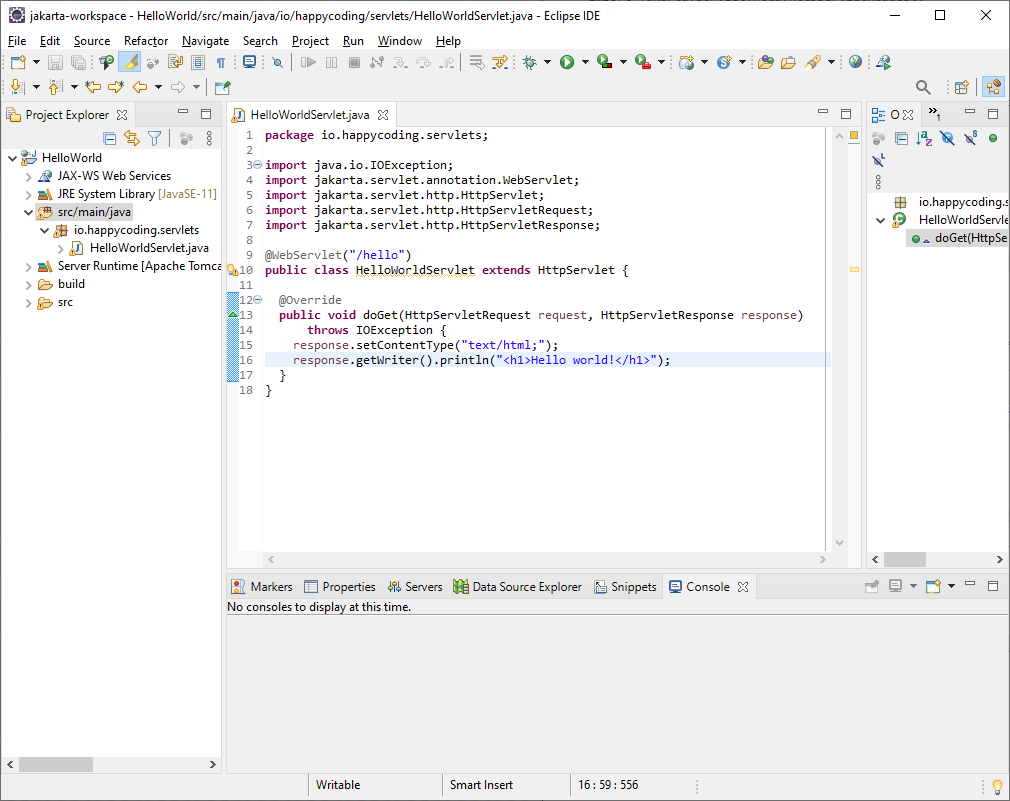
Now that you have a non-Maven project, try creating a servlet. Right-click the src/main/java/ directory, then go to the New menu, and select the Class option. Name your class HelloWorldServlet, and click the Finish button.
That should open up the Java editor. Enter this code into it:
package io.happycoding.servlets;
import java.io.IOException;
import jakarta.servlet.annotation.WebServlet;
import jakarta.servlet.http.HttpServlet;
import jakarta.servlet.http.HttpServletRequest;
import jakarta.servlet.http.HttpServletResponse;
@WebServlet("/hello")
public class HelloWorldServlet extends HttpServlet {
@Override
public void doGet(HttpServletRequest request, HttpServletResponse response)
throws IOException {
response.setContentType("text/html;");
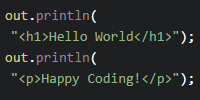
response.getWriter().println("<h1>Hello world!</h1>");
}
}
This example is a servlet file, but you can also create HTML and JSP files from Eclipse, just like you’ve been doing so far!
Enable Annotations
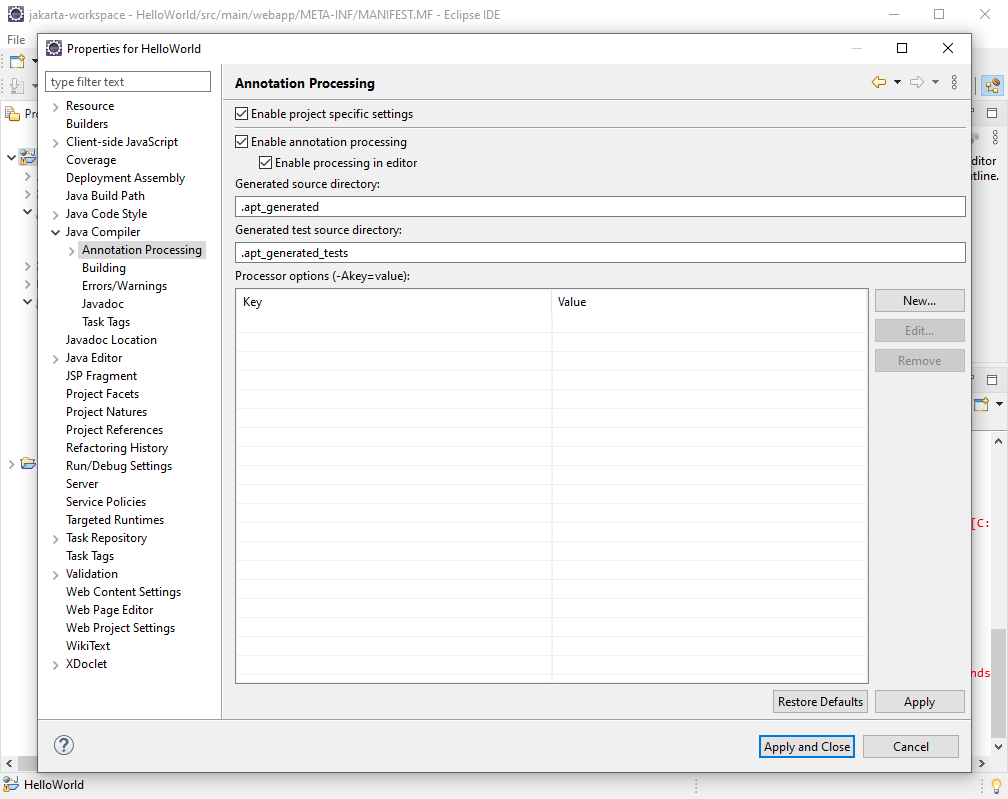
Because the servlets in these tutorials use the @WebServlet annotation instead of a web.xml file, you need to tell Eclipse to enable annotations. You only need to do this if you’re not using Maven.
- Right-click on your project and then select
Properties. - Open
Java Compiler > Annotation Processingand then check theEnable annotation processingcheckbox. - Click the
Apply and Closebutton.
Running Tomcat
Now that you have a Maven or non-Maven project in your Eclipse workspace, you can run your server from Eclipse.
Right-click on your project, and then click Run As > Run on Server.
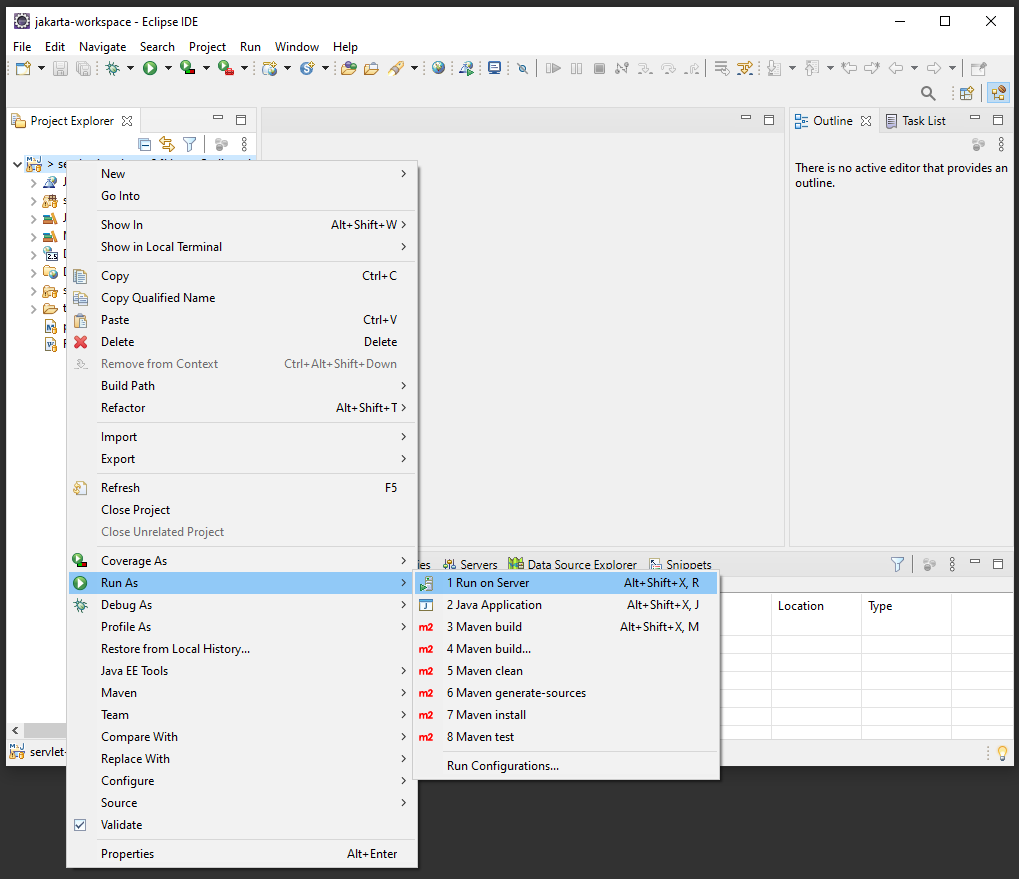
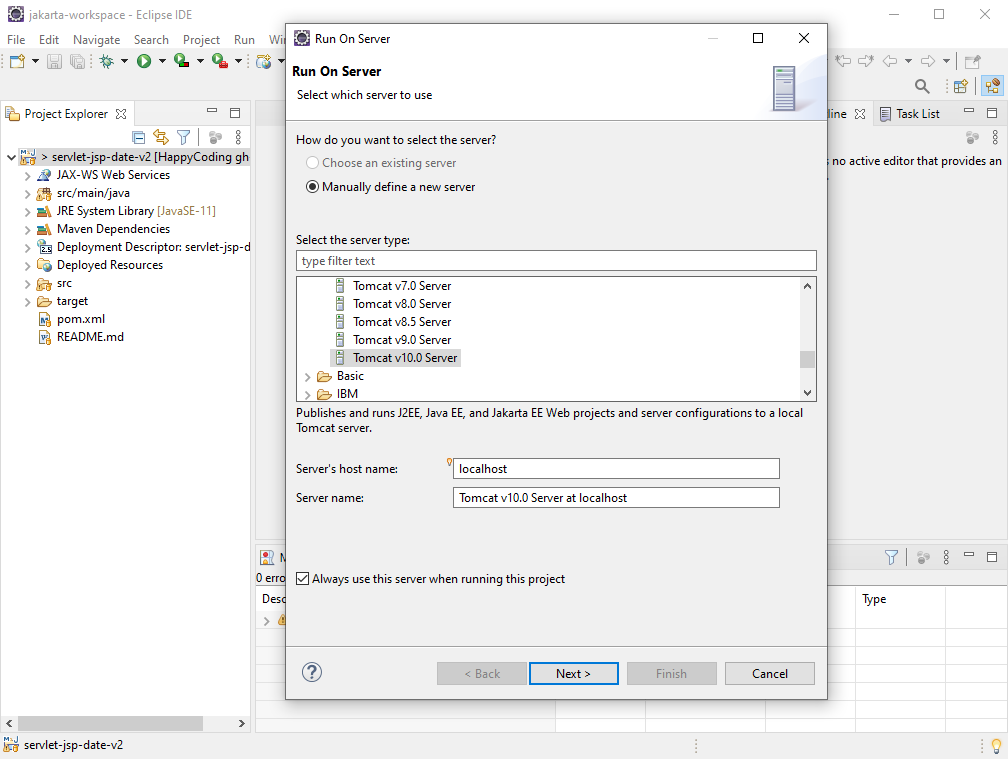
In the dialog that pops up, select the Tomcat version that you downloaded previously, and then click the Next button.
On the next screen, set the Tomcat installation directory to your Tomcat directory.
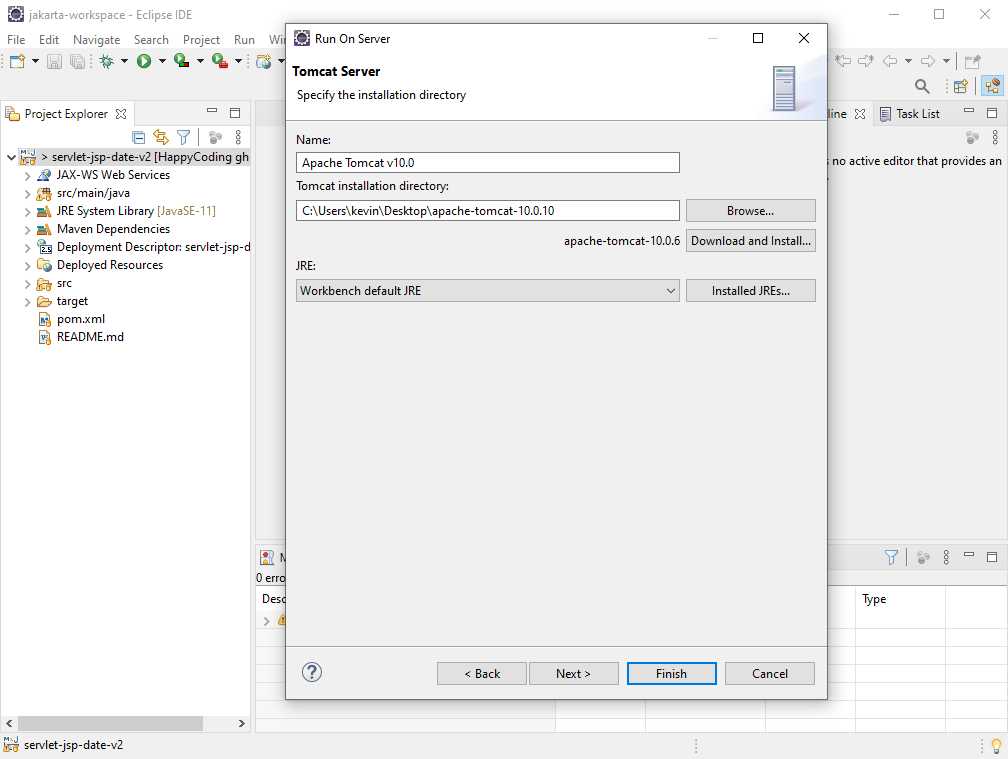
Then click the Finish button!
Eclipse will run your Tomcat server and automatically deploy your project to it. Eclipse might open an internal web browser, but I usually close that and open my normal web browser to localhost:8080, just like you did in the previous tutorials.
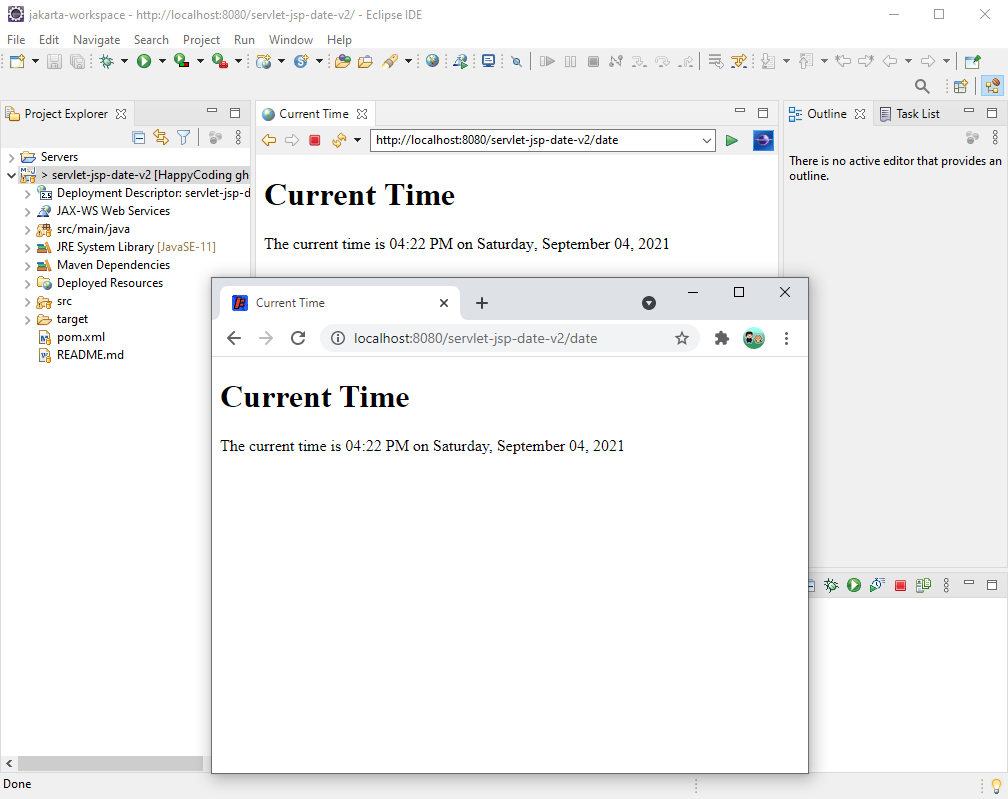
Now you can run, stop, and restart your server directly from Eclipse, using the button in the upper-right corner of the Servers tab.
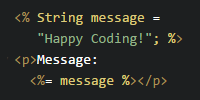
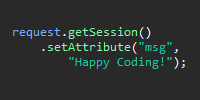
Try changing the value of message in the HelloWorldServlet class. Click the Stop button (it looks like a red square in the Servers tab in Eclipse) to stop the server. Then click the Run button (it looks like a green play button towards the top of Eclipse) to run the server again. Refresh the page, and you should see the new message!
Summary
Eclipse gives you a bunch of cool features: it tells you about compiler errors directly in the editor, and it provides autocomplete and makes it easier to compile your code and run a server.
But you don’t have to use Eclipse. You can stick with a text editor and the command line if you want. And in fact, I think it’s really important to understand the fundamentals of what’s going on behind the scenes. You could also use another IDE, like Intellij.
No matter how you write code, the process is the same: you write your code, and then run the server and visit your web app in a browser. Eclipse makes stuff like compiling and running a little easier, but there’s no magic!