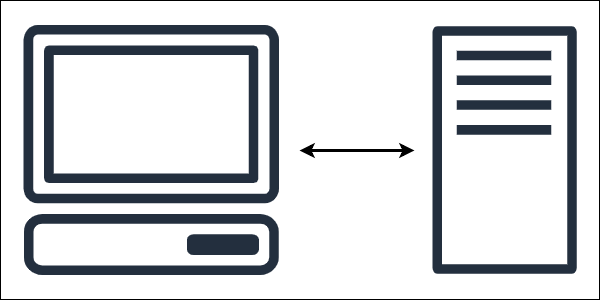
Client / Server Communication


Client / Server Communication
- Clients
- Requests and Responses
- Servers
- Server-Side Rendering
- Client-Side Rendering
- Sending Data to the Server
- Local Servers
- Hybrid Approaches
- Learn More
If you haven’t worked with server code before, some of the concepts might seem confusing: what exactly is a client and a server? How do they communicate? How do you pass data between them?
Understanding these concepts is crucial to understanding the code you’re about to start writing. So before diving into the code, let’s spend some time learning about these concepts.
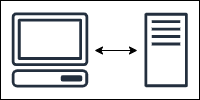
Clients
A client is whatever you’re using to interact with the internet. It’s the web browser you’re using to read this page. The web browser on your computer is one client, the web browser on your phone is another client. There are other types of clients (like the Netflix app on your phone, or the Spotify application on your computer), but we’ll focus on web browsers for now.
One important property of a client is that they run locally on your computer (or phone, or game console). When you hear the term “client-side”, or something that happens “in the client”, that means it happens on your computer. This distinction will become important when you learn about servers.
HTML
One major job of clients is to parse HTML content and display it to the user.
For example, let’s say you have this HTML:
<!DOCTYPE html>
<html>
<head>
<title>My First Webpage</title>
</head>
<body>
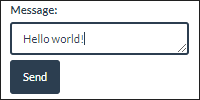
<h1>Happy Coding</h1>
<p>Hello world!</p>
</body>
</html>
A client (aka a web browser) parses this content into a nicely formatted webpage:
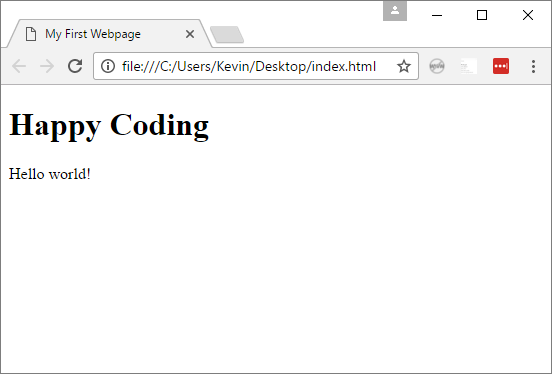
You can try this out by saving this HTML to a .html file and then opening that file in a web browser.
You’ll learn how the client gets the HTML content in a second, but for now you can think of a client as an HTML renderer. That’s pretty much exactly what a web browser is!
JavaScript
Web browsers (aka clients) can also run JavaScript code. This is client-side code that runs on your computer.
(It’s also possible to run JavaScript on a server, but that’s a bit outside the scope of this tutorial.)
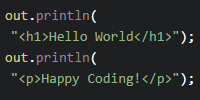
For example, let’s say you have this HTML, which includes some JavaScript code:
<!DOCTYPE html>
<html>
	<head>
		<title>Happy Coding</title>
    <script>
      alert("hello!");
    </script>
	</head>
	<body>
		<p>Happy coding!</p>
	</body>
</html>
Try saving this to a .html file and then opening that file with your web browser. You should see a hello! dialog box pop up when you load the file.
This JavaScript code runs on the client, in your web browser. This is a contrived example, but JavaScript code is what makes webpages interactive. Actions like animation and reacting to user actions like clicking a button are generally done by running JavaScript code.
Requests and Responses
Now you know that a client is a web browser that renders HTML and runs JavaScript locally. Where does that HTML and JavaScript come from?
This content generally comes from a URL like happycoding.io/index.html or google.com. When you type a URL into the address bar of your web browser, your web browser sends a request to that URL, and the server sends back a response that contains the content at that URL.
Servers
A server is a computer that responds to requests by serving responses.
How does a server respond to a request for a URL?
At a high level, there are two types of content:
- Static content that doesn’t change much. The tutorials at HappyCoding.io are an example of this type of content. When you view them, you see the same thing as everybody else, and they don’t change much over time. Other types of files like images are often static as well.
- Dynamic content that changes over time, or based on who’s viewing the page. For example, the content of stackoverflow.com changes every time somebody posts a question. Your Twitter feed is unique to you, based on who you follow and what they’ve posted.
Static Files
Simple webpages that contain static content that doesn’t change based on who’s reading it are often stored in files, just like the files on your computer.
For example, I have a small static webpage at KevinWorkman.com/index.html. Let’s walk through the process of visiting this site:
- You type
kevinworkman.com/index.htmlin the address bar of your web browser and press enter. - Your web browser sends a request for this URL.
- That request goes to my server. (I use GitHub Pages as a server, so the request really goes to a GitHub Pages server.)
- That server looks for a file named
index.html. (You can view this file directly here.) - The server sends back a response that contains the content of the file. (In this case, the content is HTML.)
- The client (your web browser) receives that response, and displays the HTML.
- You see the nicely formatted webpage.
This URL -> request -> file -> response path is generally followed for other static content as well, like images and .css and .js files.
Dynamic Content
Static files work for content that doesn’t change often, but what about more advanced webpages that change over time, or websites that show content posted by other users? It’s not possible for twitter.com to be a single static file, because the content of the page is different depending on who you follow and what they’ve posted.
This type of webpage requires server-side code that handles the request and builds a dynamic response based on who made the request and what data is stored. Let’s walk through the process of visiting Twitter:
- You type
twitter.comin the address bar of your web browser and press enter. - The web browser sends a request for this URL.
- The request goes to Twitter’s server.
- That server runs code that looks at the request, figures out who it came from, fetches the list of people you follow, and a list of their tweets. The server formats these tweets into HTML.
- The server sends back a response that contains that HTML.
- The client (your web browser) receives that response, and displays the HTML.
- Note: From the client’s perspective, it doesn’t care whether this HTML came from a static file or from a dynamic server. Either way it’s “just” HTML to the web browser.
- You see the nicely formatted page of tweets.
Server-Side Rendering
The above example glossed over how the server formatted a list of tweets into HTML. Implementing Twitter’s entire backend is probably out of scope for this tutorial, so let’s start with a smaller example.
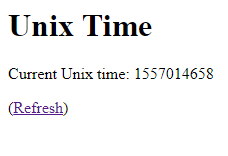
Let’s say you want to build a webpage that show the current Unix time (the number of seconds since midnight on January 1, 1970). When the client requests the URL of the page, you can use the System.currentTimeMillis() function to calculate the current Unix time, which you can format into HTML and send as a response.
The term “server-side rendering” is a bit misleading, because it really means that the HTML is generated on the server. It’s still rendered by the browser on the client.
Here’s what that might look like:
import java.io.IOException;
import javax.servlet.annotation.WebServlet;
import javax.servlet.http.HttpServlet;
import javax.servlet.http.HttpServletRequest;
import javax.servlet.http.HttpServletResponse;

@WebServlet("/time.html")
public class UnixTimeServlet extends HttpServlet {

  @Override
  public void doGet(HttpServletRequest request, HttpServletResponse response) throws IOException {
    long unixTimeSeconds = System.currentTimeMillis() / 1000;

    response.setContentType("text/html;");
    response.getWriter().println("<h1>Unix Time</h1>");
    response.getWriter().println("<p>Current Unix time: " + unixTimeSeconds + "</p>");
    response.getWriter().println("<p>(<a href=\"\">Refresh</a>)</p>");
  }
}
You’ll learn more about exactly how this code works in other tutorials, but for now the important thing to understand is that when the client requests the /time.html URL from our server, the server responds with HTML content that it generated using Java code, rather than HTML that came from a .html file. The client doesn’t care (or even know) how the HTML was generated. It renders the HTML no matter where it came from.
The @WebServlet annotation tells the server which URL this code should handle requests for. This example uses /time.html, but you could have chosen anything. URLs like /time without a file extension or even URLs like /time/* with wildcards work fine!
Note: The above example is meant to demonstrate how you can output HTML from a server, but you probably don’t want to output HTML like this. Check out the JSP tutorial for a more realistic approach.
Client-Side Rendering
Server-side rendering lets you build dynamic webpages, but it also requires that you output the whole page at one time. For a small example this might not be a big deal, but think about a more complicated page like Twitter: what if you wanted to load more tweets when the user scrolled to the bottom of their feed?
If you relied on server-side rendering, you’d have to include a ton of tweets in the HTML your server sends back to the client. This could make your page slower, and most users probably won’t even see most of the tweets anyway!
This is where a technology called AJAX comes in handy. AJAX is a fancy way of saying that you can use JavaScript to request content from a server. With AJAX, the request flow looks like this:
- The user types a URL into the address bar of their web browser.
- The web browser sends a request to a server.
- The server responds with some initial content. This content is usually mostly static, for example the navigation bar at the top. It also includes some JavaScript code responsible for building the dynamic parts of the page.
- That JavaScript code makes another request for more content.
- That request goes to the server exactly like any other request would. The server responds with the requested content. This is usually the dynamic content, and can come in many different formats: HTML, XML, JSON, plain text, etc.
- That response comes back to the JavaScript code, and the JavaScript code parses the content to build out the rest of the UI using JavaScript functions.
- The user sees the initial content first, maybe a loading bar while the dynamic content is requested, and then the dynamic content is populated.
Let’s look at our Unix time example again, this time using the client-side rendering approach.
Server Endpoints
First, create an endpoint (which is a fancy word for a URL that responds with data) on your server. In this example, the endpoint needs to return the current Unix time.
import java.io.IOException;
import javax.servlet.annotation.WebServlet;
import javax.servlet.http.HttpServlet;
import javax.servlet.http.HttpServletRequest;
import javax.servlet.http.HttpServletResponse;

@WebServlet("/time")
public class UnixTimeServlet extends HttpServlet {

  @Override
  public void doGet(HttpServletRequest request, HttpServletResponse response) throws IOException {
    long unixTimeSeconds = System.currentTimeMillis() / 1000;

    response.setContentType("text/html;");
    response.getWriter().println(unixTimeSeconds);
  }
}
This is pretty much exactly the same code you saw above with server-side rendering. The only difference is that instead of outputting HTML content, this code responds with a single value: the current Unix time.
But note that this is still a regular URL. You can even visit it in a web browser, exactly like any other URL:
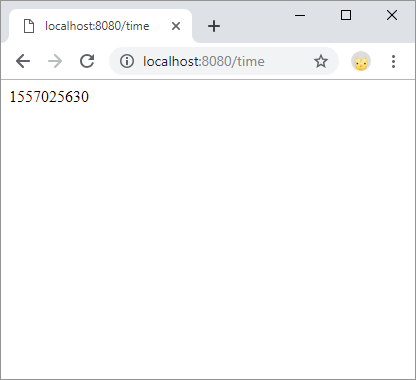
This isn’t a very interesting webpage, but that’s because it’s not meant for humans to see! It exists so JavaScript can request it and then use the response to build the HTML of the page.
This example is a bit contrived, and many “real” endpoints will return more complex data like JSON. You don’t have to worry about that right now, but if you’re curious to see a more realistic example, check out https://happycoding.io/api/site.json which is an endpoint that’s used by https://happycoding.io/about/stats to build out a more complex UI using JavaScript code.
Fetch
Now you know how to create a server-side endpoint that handles a request for a URL, runs some Java code, and returns some data in the response.
The other half of this is the JavaScript code that requests the data from the server and uses it to build the HTML of the page.
client.html
<!DOCTYPE html>
<html>
  <head>
    <meta charset="UTF-8">
    <title>Unix Time</title>
    <script>
      function requestUnixTime() {
        const resultContainer = document.getElementById('result');
        resultContainer.innerText = 'Loading...';

        fetch('/time') // request data from the server
        .then(response => response.text()) // convert the response to raw text
        .then((unixTime) => {
          // build the HTML of the page
          resultContainer.innerText = unixTime;
        });
      }
    </script>
  </head>
  <body onload="requestUnixTime();">
    <h1>Unix Time</h1>
    <p>Current Unix time: <span id="result"></span></p>
    <p>(<a href="">Refresh</a>)</p>
  </body>
</html>
This file contains static HTML and JavaScript. When a user navigates to the user.html URL, the client sends a requests and the server sends this content back as the response. The client then displays the page and calls the requestUnixTime() function.
The requestUnixTime() function uses the Fetch API to send a request to the /time URL. Like the example above, the server handles this URL by returning a response that contains the current Unix time. The JavaScript code uses this response to build the UI, in this case by showing the current Unix time in the page.
Again, this is a contrived example, but imagine doing this with more complex data, like a list of tweets! This is also how features like infinite scrolling work. (In addition to requesting data when the page loads, you can request more data when the user clicks a button or scrolls past a certain point.)
Sending Data to the Server
So far, every example has involved a client requesting content from a server, and the server responding with the requested content.
But it’s also possible for a client to send data to the server. There are a few ways to do this, depending on what kind of data you want to send.
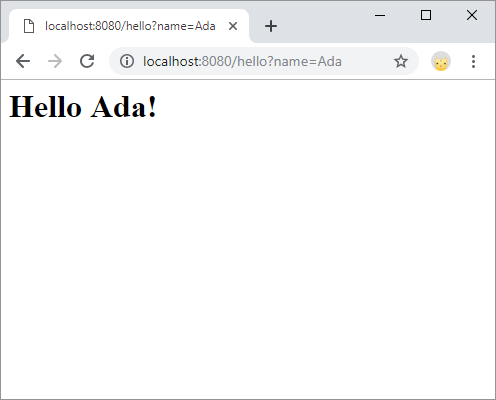
Query Parameters
Query parameters are key=value properties appended at the end of a URL after a ? question mark character. For example, let’s take a look at this URL:
https://www.youtube.com/watch?v=PBsUD40nPkI
This URL points to https://www.youtube.com/watch and includes a v parameter with a value of PBsUD40nPkI. The YouTube server that handles this request can use this parameter to load the correct video and send it back as part of the response.
You can pass in multiple key=value pairs, separated by an & ampersand character.
https://www.youtube.com/watch?v=PBsUD40nPkI&t=42
This URL again points to https://www.youtube.com/watch and includes two parameters: v with a value of PBsUD40nPkI and t with a value of 42. The YouTube server that handles this request uses these parameters to load a video and skips ahead to 42 seconds.
Here’s an example of what that would look like on the server side:
import javax.servlet.annotation.WebServlet;
import javax.servlet.http.HttpServlet;
import javax.servlet.http.HttpServletRequest;
import javax.servlet.http.HttpServletResponse;

@WebServlet("/hello")
public class HelloServlet extends HttpServlet {

  @Override
  public void doGet(HttpServletRequest request, HttpServletResponse response) throws IOException {
    String name = request.getParameter("name");
    response.setContentType("text/html;");
    response.getWriter().println("<h1>Hello " + name + "!</h1>");
  }
}
This server code handles requests to the /hello URL, and gets the value of a name parameter, which it uses to respond with some HTML content. This example outputs HTML directly, but you can also use query parameters with endpoints as well.
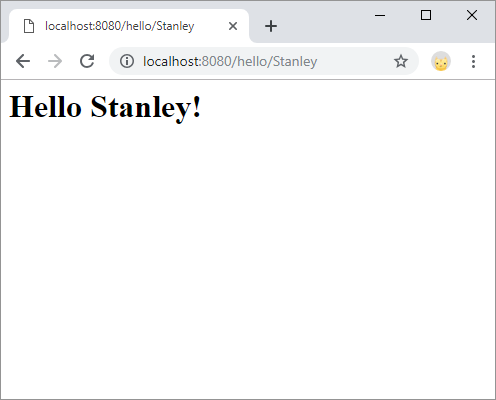
URL Path
Query parameters are not considered part of the URL: they come after the URL. But it’s also possible to pass data in the URL itself.
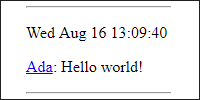
First, you create a handler on the server for any URL that starts with a certain path. For example, you could create a handler for any URL that started with /hello/, so /hello/Ada, /hello/Stanley, and /hello/Grace all triggered the same code. Then that code could parse the URL to figure out what name was being passed in. That would look like this:
import java.io.IOException;
import javax.servlet.annotation.WebServlet;
import javax.servlet.http.HttpServlet;
import javax.servlet.http.HttpServletRequest;
import javax.servlet.http.HttpServletResponse;

@WebServlet("/hello/*")
public class HelloServlet extends HttpServlet {

  @Override
  public void doGet(HttpServletRequest request, HttpServletResponse response) throws IOException {

    // name is whatever comes after /hello/
    String name = request.getRequestURI().substring("/hello/".length());

    response.setContentType("text/html;");
    response.getWriter().println("<h1>Hello " + name + "!</h1>");
  }
}
This code uses a wildcard URL to match any URL starting with /hello/ and then uses the substring() function to get the name of the URL that comes after the /hello/ part.
POST Requests
You can use query parameters or URL paths to pass in small strings to your server, but there are a couple of important considerations with these approaches:
- The URLs show up in your history and in the server logs. That might not be a big deal for URLs like
/hello/Adaor/watch?v=PBsUD40nPkI, but this is not a good way to pass data like passwords or credit card information. - There’s a limit to how long a URL can be. The exact limit depends on which browser you’re using, but it’s generally around 2000 characters. This might seem like enough for single parameters, but what if you want to let users write blog posts?
- A URL is a string of characters. What if you want to send binary data to the server, like uploading an image file?
You can use POST requests to solve these problems.
All of the requests you’ve seen so far are GET requests: a client is requesting to get content from a server. When you visit google.com in your browser, you’re making a GET request to google.com. That’s also why all of the server code has used the doGet() function so far.
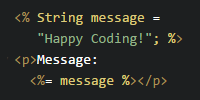
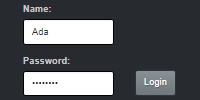
By comparison, a POST request happens when a client requests to send (post) content to a server. One of the most common examples of this is filling out a form. When you fill out a form and press the Submit button, your browser makes a POST request to the server, containing the data from the form.
Here’s an example HTML file that contains a form:
<!DOCTYPE html>
<html>
  <head>
    <meta charset="UTF-8">
    <title>Form Submission</title>
  </head>
  <body>
    <h1>Hello Form Submission</h1>
    <p>Type your name and press Submit:</p>

    <form method="POST" action="/hello">
      <input name="name" />
      <br/>
      <button>Submit</button>
    </form>

  </body>
</html>
Notice the method and action attributes of the form element. This tells the browser to make a POST request to the /hello URL containing the form data when the user presses the Submit button.

The server side would look like this:
import java.io.IOException;
import javax.servlet.annotation.WebServlet;
import javax.servlet.http.HttpServlet;
import javax.servlet.http.HttpServletRequest;
import javax.servlet.http.HttpServletResponse;

@WebServlet("/hello")
public class HelloServlet extends HttpServlet {

  @Override
  public void doPost(HttpServletRequest request, HttpServletResponse response) throws IOException {
    // the name parameter comes from the form
    String name = request.getParameter("name");

    response.setContentType("text/html;");
    response.getWriter().println("<h1>Hello " + name + "!</h1>");
  }
}
The only thing special about this code is that it uses the doPost() function, which handles POST requests. A more realistic project would usually do some processing of the data, like storing it in a database and then redirecting to a different URL, but this example outputs HTML as the response.

Local Servers
While developing locally, you’ll generally deploy to a local server, which means that you’ll run both the server and the client on your computer. After you’re ready to publish your code, you’ll deploy to a remote server so other people can interact with it.
I’m mentioning this now because a common way to talk about code is whether it runs “on the server” or “on the client”. This distinction is more obvious when talking about a remote server, because in that case the client and server are two different computers. When you’re deploying locally, the server and client happen to be the same computer, but you should still think in terms of server-side and client-side.
If it helps, try to imagine the server as a completely separate computer, even if you’re deploying locally.
Hybrid Approaches
This tutorial was meant to introduce client/server communications, specifically in the context of web requests.
A real project will generally use a mix of all of the above, rather than sticking to a single approach for everything.
For example, a webpage might use server-side rendering to create the initial content, like the navigation bar. It might then use client-side rendering to load dynamic content like recent user updates, and it might show a form that makes a POST request to let users enter new updates.
There is no single correct approach, and which approach you choose often involves considering various tradeoffs: how long it takes your page to load, whether you want your logic to happen on the server or client, and code complexity.
The best advice I can offer is to go with whatever makes the most sense to you, and to try not to overthink it too much. Good luck!
Learn More
Comments
Happy Coding is a community of folks just like you learning about coding.
Do you have a comment or question? Post it here!
Comments are powered by the Happy Coding forum. This page has a corresponding forum post, and replies to that post show up as comments here. Click the button above to go to the forum to post a comment!