Hosting on AWS


Hosting on AWS
- War Files
- Eclipse
- Deploying Locally
- Amazon Web Services
- Updating
- Deploying from Eclipse
- Custom URLs
- Summary
So far, we’ve been developing locally by turning our own computers into a server that we access using the localhost:8080 URL. Running locally is a good habit to get into, because you want to test your changes before you unveil them to the entire world. But if you want other people to be able to visit your web app, you have to host your server somewhere.
It’s possible to use your computer as a “real” server that other people can access. You can google something like “turn my computer into a server” if you want to do that, but this tutorial covers using Amazon Web Services to host our web apps.
Note that this is more involved than the basic file hosting we talked about in the HTML tutorials. Simple file hosting will work for static files, but you need server-side hosting if you want to actually run code on a server. You might want to check whether the host you’re already using offers server-side hosting, but usually they’re two separate things.
War Files
Remember that .jar files are just archive files that contain Java code. The extension .jar stands for Java archive. You can package your Java program into a .jar file to send to other people to run or use as a library.
Similarly, a .war file is an archive file that contains web app code. The .war extension stands for web application archive. That might sound complicated, but really it’s just a way to bundle your web app directory up into a single file that a server can deploy.
Console
Let’s create an example web app and then bundle it up as a .war file using the console. Let’s start with a simple servlet:
import java.io.IOException;
import javax.servlet.ServletException;
import javax.servlet.http.HttpServlet;
import javax.servlet.http.HttpServletRequest;
import javax.servlet.http.HttpServletResponse;
public class SimpleServlet extends HttpServlet {
@Override
public void doGet(HttpServletRequest request, HttpServletResponse response) throws IOException, ServletException {
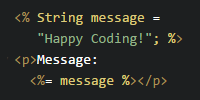
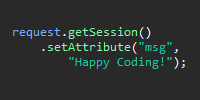
request.setAttribute("message", "Happy coding!");
request.getRequestDispatcher("/WEB-INF/jsp/index.jsp").forward(request,response);
}
}
This basic servlet just adds an attribute to the request and then forwards that request to a JSP file. Remember that you have to add the servlet API library to your classpath when compiling a servlet class, like this:
javac -cp C:/Users/kevin/Desktop/jetty-distribution-9.4.5.v20170502/lib/servlet-api-3.1.jar SimpleServlet.java
That gives us the .class file that we actually want. Then here’s the JSP file:
<!DOCTYPE html>
<html>
	<head>
		<title>War File Example</title>
	</head>
	<body>
		<h1>${message}</h1>
		<img src="images/cat.jpg" />
	</body>
</html>
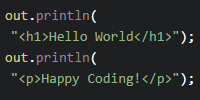
This JSP just shows the message along with a picture of a cat. Meow! ![]()
Now we just need a web.xml file to map a URL to the servlet:
<web-app
	xmlns="http://xmlns.jcp.org/xml/ns/javaee"
	xmlns:xsi="http://www.w3.org/2001/XMLSchema-instance"
	xsi:schemaLocation="http://xmlns.jcp.org/xml/ns/javaee
		http://xmlns.jcp.org/xml/ns/javaee/web-app_3_1.xsd"
	version="3.1">

	<servlet>
		<servlet-name>SimpleServlet</servlet-name>
		<servlet-class>SimpleServlet</servlet-class>
	</servlet>

	<servlet-mapping>
		<servlet-name>SimpleServlet</servlet-name>
		<url-pattern>/home</url-pattern>
	</servlet-mapping>

</web-app>
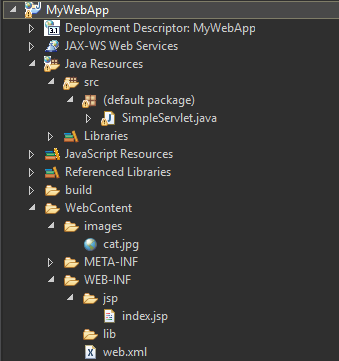
Putting it all together, your web app directory should look like this:
-
MyWebApp/-
images/cat.jpg
-
WEB-INF/web.xml-
jsp/index.jsp
-
classes/SimpleServlet.class
-
Hopefully by now that all seems pretty straightforward to you. This is just a simple example, but it contains a servlet, a JSP file, and a static file, so it should be a reasonable stand-in for more complicated stuff.
Anyway, now that we have our web app, we can create a .war file that contains all of the files needed to run it on a server. Open a console inside your MyWebApp directory, and then type this:
jar cf MyWebApp.war *
This runs the jar command and tells it to create a file named MyWebApp.war, and the * tells it to include all of the files in the current directory in that file.
Now you should have a MyWebApp.war file inside your MyWebApp directory. You can double-check its contents using the jar tf command, or by opening it in an archive manager like 7-Zip. You should see this:
> jar tf MyWebApp.war
META-INF/
META-INF/MANIFEST.MF
images/
images/cat.jpg
WEB-INF/
WEB-INF/classes/
WEB-INF/classes/SimpleServlet.class
WEB-INF/jsp/
WEB-INF/jsp/index.jsp
WEB-INF/web.xml
The point here is that your MyWebApp.war file should not contain the MyWebApp directory. It should contain all of the stuff inside the MyWebApp directory.
Eclipse
If you’re using Eclipse, you can also package your web app into a .war file directly from Eclipse. Here’s the same example project in Eclipse:
To package this project as a .war file, right-click the project, expand the Export menu, and select the WAR File option (or go to File > Export... and then select Web > WAR File). You should see this dialog:
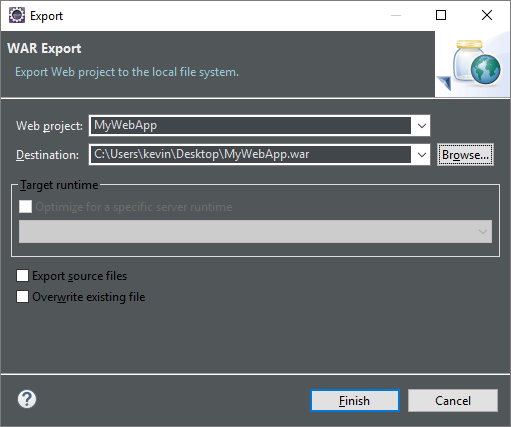
Give this dialog a destination where you want your file to go, and then click the Finish button.
Deploying Locally
Just to show you how a .war file works, let’s deploy it locally.
Now that you have a .war file, you can now take that file and deploy it on your local server by copying it into the webapps directory. So your server directory would look like this:
-
jetty/start.jar(bunch of other files)-
webapps/MyWebApp.war
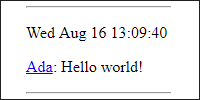
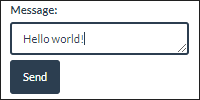
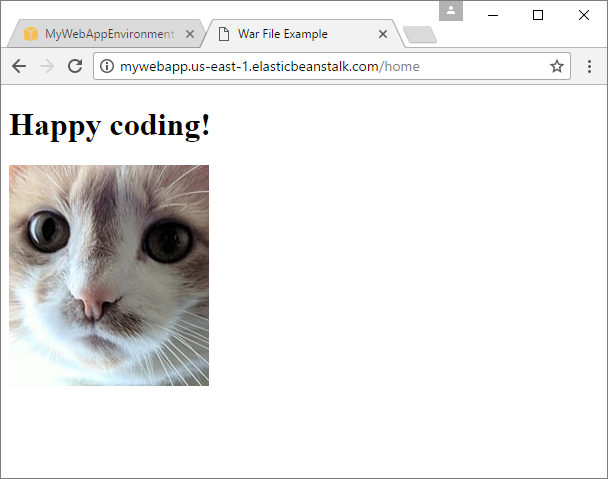
Run your server, and then visit http://localhost:8080/MyWebApp/home in a browser, and you’ll see this:
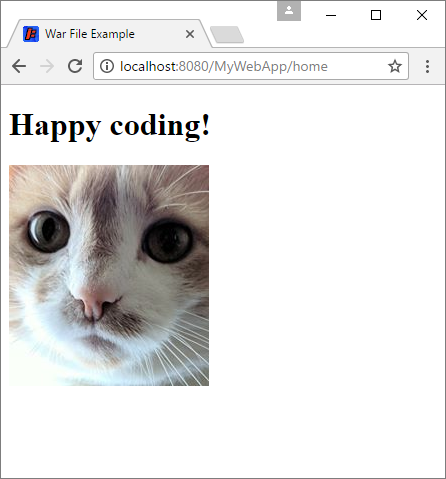
The lesson is that .war files are designed to contain all of the files needed to run a web app on a server, and servers can take a .war file to deploy a web app. Now you just have to find a host that supports deploying .war files!
Amazon Web Services
Amazon Web Services, or AWS is a set of tools and services designed to help you deploy web apps in the Amazon cloud. We can use a couple of AWS tools to host our .war file.
Go to the AWS homepage and sign in to the console. You can use your existing Amazon account, or register if you don’t have one already.
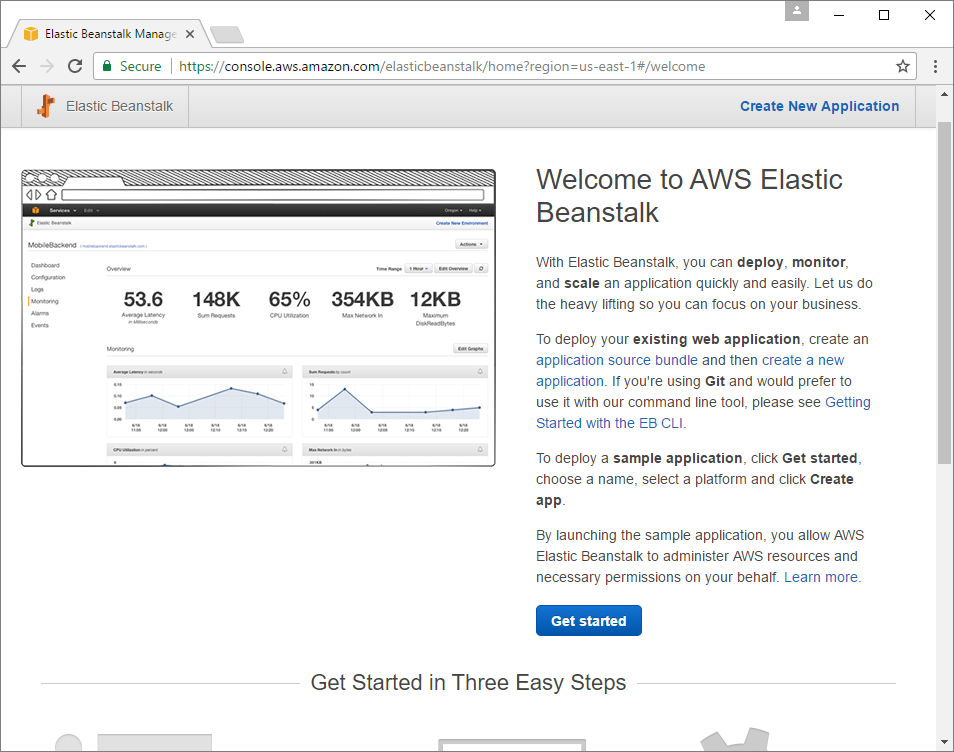
The AWS console is just a list of all of the different services AWS offers. You’re looking for Elastic Beanstalk. Click that. You should see the Elastic Beanstalk homepage:
Click the Get Started button, which brings up a form where you can enter information about your web app:
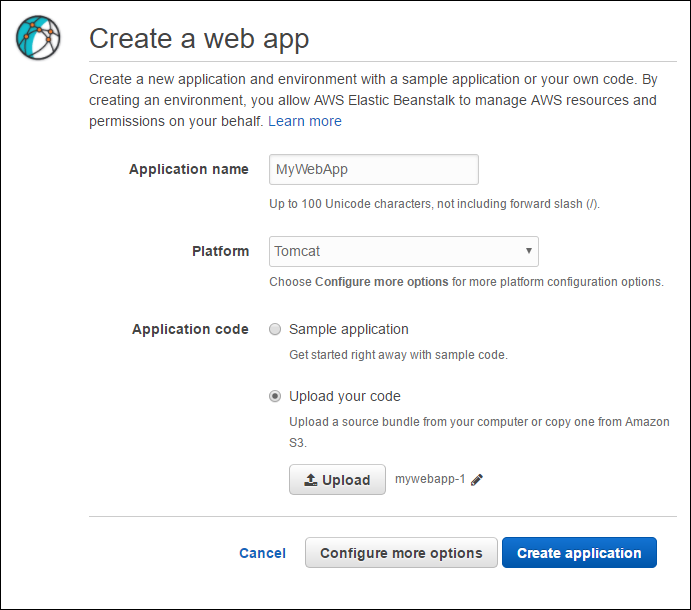
- Application name can be anything you want.
- Platform needs to be Tomcat. Tomcat is a Java server, very similar to Jetty.
-
Application code should be set to Upload your code, and you should upload your
.warfile here.
Then click the Configure more options button. This lets you configure a ton of settings, but for now just choose the Low cost option from the Configuration presets. Then click the Modify link in the Environment settings cell. This lets you choose a name for your environment. Choose anything you want. You can also set a domain here: this isn’t a full custom domain yet, so you aren’t choosing something like example.com, you’re choosing something like MyWebApp.us-east-1.elasticbeanstalk.com. This will be easier to work with than the randomly generated URLs you get by default.
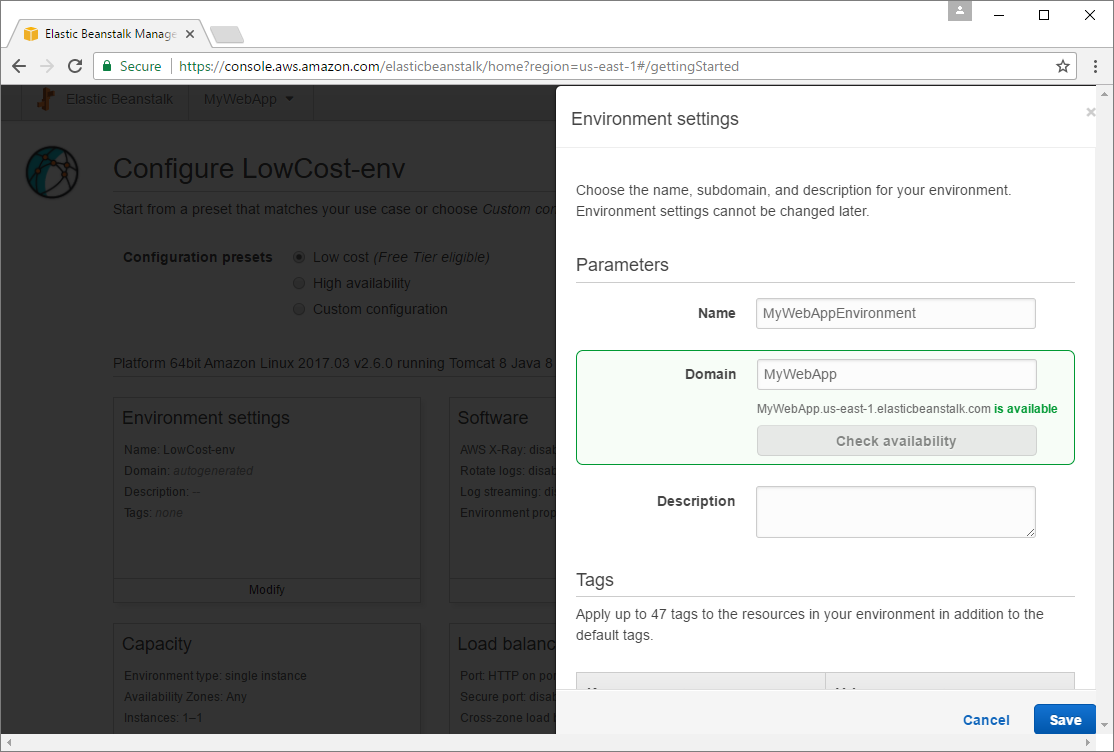
Click the Save button, and then click the Create app button at the bottom of the Configure screen.
It takes a few minutes to get started, but eventually your environment will become active:
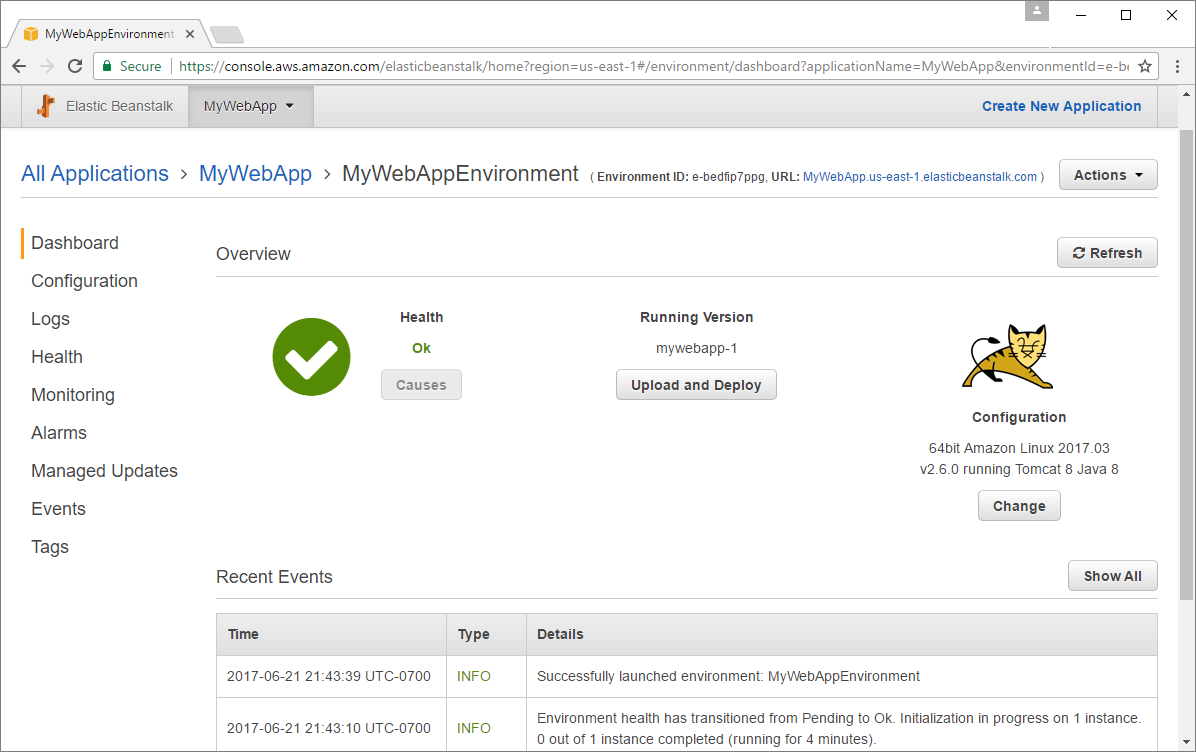
At this point, your server is running, and you can visit your web app using the URL near the top. Remember that our homepage is mapped to the /home URL, so my full URL is http://mywebapp.us-east-1.elasticbeanstalk.com/home (your URL will be depend on the settings you chose in your configuration). Anyway, you can use that URL to view your web app!
You can also send this URL to other people so they can view your web app!
Updating
To make a change, create a new .war file and then click the Upload and Deploy button on your Elastic Beanstalk console. Upload the new .war file, and in a minute or so your change should be live!
Don’t forget to test your changes in a local server before uploading to your live site. This will save you a ton of headaches, make it easier to debug your code, and prevent your users from seeing buggy behavior.
Deploying from Eclipse
It’s also possible to deploy to AWS directly from Eclipse, without creating a .war file first.
Install the AWS Toolkit for Eclipse plugin. This gives you an option to deploy directly to Elastic Beanstalk in Eclipse’s run menu.
Custom URLs
The URL that Elastic Beanstalk gives us isn’t very pretty, so you probably want to create your own custom URL that points to your web app. There are a couple ways to do that.
Amazon Route 53
Amazon Route 53 is another AWS service, and it allows you to register a domain name and point it to whatever you want. You can follow the directions here to register a domain with Route 53, and then follow the directions here to point that domain to your web app on Elastic Beanstalk.
Namecheap
Route 53 is convenient if you want to keep your whole web app inside AWS tools. But if you have a bunch of domain names and different websites, it can be more convenient to use a separate domain registrar like Namecheap.com to handle all of your domains in one place.
If you want to use Namecheap, start by searching for the domain you want here to see if it’s available. Purchase the domain you want (you don’t need any of the extra stuff they offer you).
After your purchase is complete, go to the Namecheap dashboard, and you should see your domain listed. Click the Manage button, and then click the Advanced DNS tab. Which settings you choose depends on exactly how you want your domain to behave, but here’s what I chose:
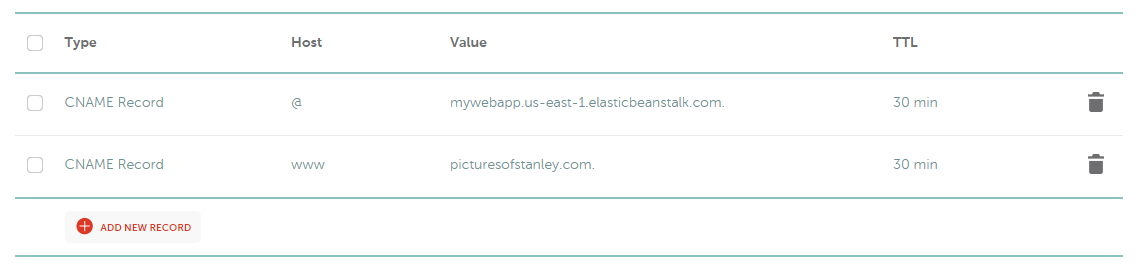
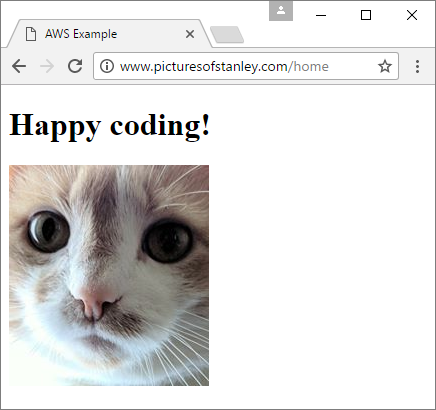
These settings point my domain picturesofstanley.com (Stanley is my cat’s name) to my web app on Elastic Beanstalk, and points the www.picturesofstanley.com subdomain to the main domain, so they both work.
Now I can visit picturesofstanley.com/home to see the web app:
Summary
This tutorial covered the basics of using AWS and Elastic Beanstalk to deploy our web app to a public URL. We’ve just scratched the surface of what AWS can do, so I encourage you to build on the foundation you just learned to research more advanced features. For example, you might want to setup automatic scaling so your web app can handle tons of users, or you might add a database using another AWS service.