Hello World


Hello World
Now that we know how to write P5.js code (using one of the editors we talked about in the editor tutorial) and run it in a browser, we can start diving into the fun stuff.
Let’s start with an example program. Remember that P5.js requires a .html file for the browser to render, so let’s start with that:
(You only have to create your own .html file if you’re using a basic text editor. The other P5.js editors create this for you. I’d still recommend reading this section so you understand what’s going on behind the scenes though.)
<!DOCTYPE html>
<html>
	<head>
		<title>P5.js Hello World</title>
	</head>
	<body>
	</body>
</html>
This is a plain HTML file that doesn’t do anything yet. Save it to index.html wherever you want. I’ll save mine to my desktop for now. You can open this up in your browser, but all you’ll see is a blank screen:
P5.js JavaScript Library
At its core, P5.js is a JavaScript library. Like we talked about in the JavaScript libraries tutorial, a JavaScript library is just a bunch of JavaScript code that was written by somebody else, that you can use from your own JavaScript code. For example, you can load the JQuery library to gain access to functions that make it easier to add interactive elements to your webpage. But keep in mind that it’s all just JavaScript code! In fact, you can look at the JQuery code to see for yourself.
So when we say that P5.js is a JavaScript library, what we mean is that P5.js is a bunch of JavaScript code written by other people (these P5.js contributors to be more specific). We can load that library to give ourselves access to the functions that are defined in the library.
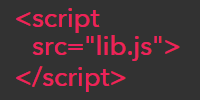
To load the P5.js JavaScript library, we add this line to the <head> section of our index.html file:
<script src="https://cdnjs.cloudflare.com/ajax/libs/p5.js/0.5.14/p5.js"></script>
This line points to a copy of the p5.js file, which contains all of the JavaScript code in the library. You can load that URL in your browser to see the contents, but again, it’s all just regular JavaScript code!
We could also download the p5.js file and put it next to our index.html file, in which case we’d add this line instead:
<script src="p5.js"></script>
(You should only do this if you need to work with P5.js offline or if you really want a self-contained project.)
Our .html file now looks like this:
<!DOCTYPE html>
<html>
	<head>
		<title>P5.js Hello World</title>
		<script src="https://cdnjs.cloudflare.com/ajax/libs/p5.js/0.5.14/p5.js"></script>
	</head>
	<body>
	</body>
</html>
This file still doesn’t do anything, but now we have access to the functions that P5.js gives us. That means we can write JavaScript code that calls P5.js functions, like this:
function setup() {
  createCanvas(400, 400);
  background(64);
}

function draw() {
  fill(255);
  ellipse(mouseX, mouseY, 20, 20);
}
We can put this code in its own sketch.js file, and then add a <script src="sketch.js"></script> line to the <head> section of our index.html file, or we can include the code directly in its own <script> tag, like this:
<!DOCTYPE html>
<html>
	<head>
		<title>P5.js Example</title>
		<script src="https://cdnjs.cloudflare.com/ajax/libs/p5.js/0.5.14/p5.js"></script>
		<script>
			function setup(){
				createCanvas(500, 500);
				background(64);
			}

			function draw(){
				fill(255);
				ellipse(mouseX, mouseY, 20, 20);
			}
		</script>
	</head>
	<body>
	</body>
</html>
Let’s take a second to talk about what this is really doing.
- The browser loads the
index.htmlfile and starts reading the HTML tags in it. - The browser reads the
<title>tag, which sets the label displayed in the browser tab. - The browser reads the first
<script>tag, which loads the P5.js library. - When the P5.js library is loaded, it defines a bunch of functions and sets up an
onloadcallback. (More on that in a second.) - Then the browser reads the second
<script>tag, which defines asetup()and adraw()function. - The browser finishes reading the HTML tags, which is just an empty
<body>element. - The browser then fires the
onloadevent, which triggers the callback that P5.js set up. - In that callback, P5.js creates an instance of the
p5object and calls thesetup()function that we created. - The
createCanvas()function (which is a function that P5.js gave us) creates a canvas element and adds it to the<body>tag. - The
background()function (another function from P5.js) colors the whole canvas. In this case it’s gray. - P5.js automatically starts calling the
draw()function 60 times per second. - Each frame, our code calls the
fill()function, which changes the fill color to white. - Then our code draws a circle wherever the mouse is.
In other words, since the draw() function is called 60 times per second, and each frame draws a circle wherever the mouse is, this program shows a trail of circles that follow the mouse.
Here’s a CodePen that shows the full HTML file we just saw:
See the Pen by Happy Coding (@KevinWorkman) on CodePen.
And here’s a CodePen that just shows our JavaScript code:
See the Pen by Happy Coding (@KevinWorkman) on CodePen.
From now on, I’m just going to show code like this without the surrounding HTML. But if you’re creating your own files, remember to include the HTML!
The P5.js Reference
Now we understand the basics of what P5.js is, what it’s doing behind the scenes, and how to write and run code that uses P5.js. We also know how we can use P5.js to create sketches:
- P5.js automatically calls the
setup()function when the page loads. - We can call the
createCanvas()function that P5.js gives us to create a<canvas>element to draw on. - P5.js then automatically starts calling the
draw()function 60 times per second. - We can call P5.js functions like
ellipse()to draw stuff, and we can use P5.js variables likemouseXandmouseYto get input.
From here, it’s “just” a matter of knowing about other functions we can call and other variables we can use. Let me introduce you to your new best friend: **the P5.js reference!
The P5.js reference is a list of everything that P5.js gives you, and it should be your first stop when you have a question about how to do something in P5.js.
For example, let’s say we wanted to change our program to draw blue rectangles instead of white circles. How do we know what to do?
First off, we’d want to break our problem down into smaller pieces and take those pieces on one at a time. Step one might be: how do we change the color to blue?
We’d look in the reference, and we’d eventually find the fill() function in the Setting subdivision of the Color section. We’d click the fill() function link to view its reference page. That page tells us that one form of the fill() function takes three arguments: red, blue, green, each between 0 and 255. So to change the color to blue, we’d call fill(0, 0, 255)! We might test that out by changing the circle’s color before we continue to the next step.
Then step two might be: how do we draw a rectangle? We’d go back to the P5.js reference, and after some searching, we’d find the rect() function. We’d check out its reference page to learn that the rect() function takes 4 parameters: an x position, a y position, a width, and a height. This is actually exactly what the ellipse() function takes, so to draw a rectangle we’d just change the ellipse(mouseX, mouseY, 20, 20) line to rect(mouseX, mouseY, 20, 20). Try changing the values of the parameters to see what happens!
Here’s what our code looks like now:
See the Pen by Happy Coding (@KevinWorkman) on CodePen.
We could also do Google searches for stuff like “P5.js draw rectangle” for a ton of results. Remember: the best thing you can do is work in small steps!
Homework
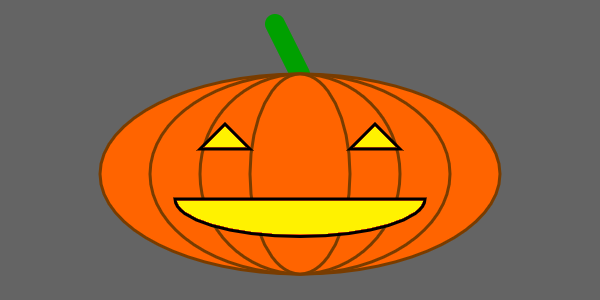
- Modify the above program to draw a yellow triangle.
- Read through the P5.js reference and write small example programs to test different things out. If you have a question, don’t be afraid to post in the forum!
Next: Review
Comments
Happy Coding is a community of folks just like you learning about coding.
Do you have a comment or question? Post it here!
Comments are powered by the Happy Coding forum. This page has a corresponding forum post, and replies to that post show up as comments here. Click the button above to go to the forum to post a comment!